This tutorial explains how to prevent or allow various users and groups from taking ownership of files/folders of your Windows 8 PC.
I have already covered a tutorial that explains how to take ownership in Windows 8. Taking ownership allows particular user to make changes/modify the files/folders without any restriction. It may make your PC’s data less secure.
Although, by default, the ownership can be taken by all the users of administrator group. But sometimes you might want to prevent a specific Windows 8 user from taking ownership. Let’s see how.
Prevent and Add Users From Taking Ownership In Windows 8:
Note: You can alter the changes only if you login as an Administrator in your Windows 8 PC.
Preventing Users From Taking Ownership:
Step 1: The first thing that you need to do is access Security Policy Editor. To open, use secpol.msc in the Run box.
Step 2: In the Security Policy Editor, navigate to User Rights Assignment, by using below path:
Security Settings -> Local Policies -> User Rights Assignment
Click on User Rights Assignment.
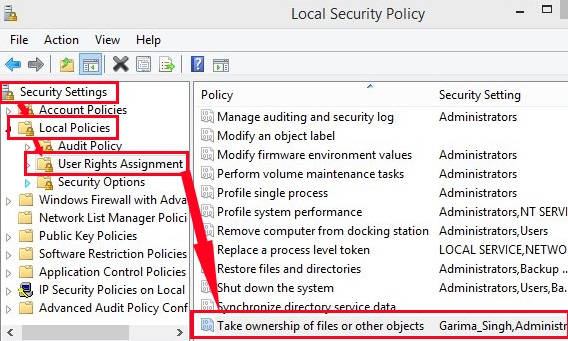
Step 3: On the right side of the editor, you will find a setting that says “Take ownership of files or other objects”. Double click on it.
Step 4: In the next window, you will find list of users and groups, who can take ownership. In the list you will find Administrator group as well. It allows all the users of Administrator group to take ownership.
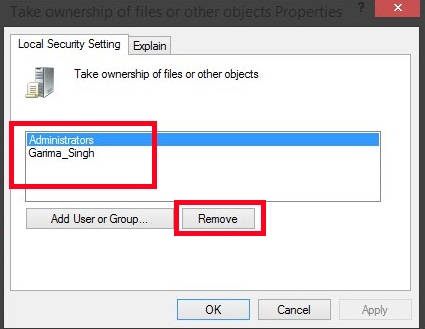
To prevent all users of this group to take ownership, click on the Administrator or the user/group whom you want to prevent. After that click on “Remove” button.
Adding Users To Allow For Taking Ownership:
Step 5: Now, to add various users, click on “Add user or group” button.
In the next window, click on “Advanced” option.
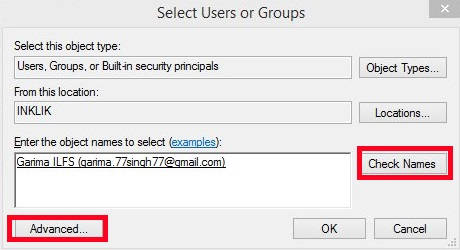
Step 6: It will pop-up a new window from where you can choose various users and groups for taking ownership. Then click on a button that says “Find Now”. It will give you a list of users/groups that are available in your PC. Click on the username or group to add, and then click on OK.

You will find that the user/group has been successfully added to the list.
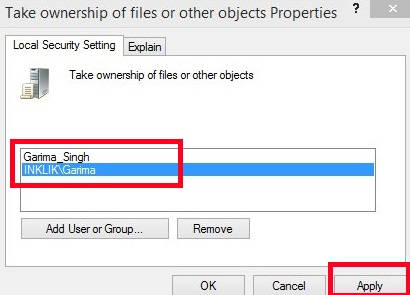
Similarly, you can add more users or groups.
Also learn, how to prevent Windows 8 from automatically logging to the last user.