Do you have an old slow PC or Laptop at home that you plan to dispose? Think again! You could make it quite useful by installing a Chrome Operating System and modernizing it. Google is now allowing the general public to freely download Chrome OS Flex, which is a new leaner adaptation of its popular Chrome OS. So instead of discarding your old system, this could be a better alternative for you to give it a new lease of life and make it feel like a Chromebook.
It won’t do everything a Chrome OS does. Certain features are dependent on system hardware. Google Play and Android apps aren’t supported at all. Click here for a list of the differences between Chrome and Chrome OS Flex as published by Google.
Chrome OS Flex is still in the ‘early access mode‘ and not suitable for production use. Hence, you could encounter some bugs / instability depending on the model of your system and the hardware.
Google has published a list of Certified Models here. Non-Certified devices will also be able to run Chrome OS Flex, but Google doesn’t guarantee their performance and stability.
Lets see the brief steps involved in this installation. I tried the installation with my Lenovo ThinkCentre M73 and it worked absolutely well with minor issues that could easily be resolved. In a couple of hours I had my ChromeBook up and running.
The target device must be running Windows, MAC or Linux with 4 GB RAM, 16 GB free Internal Storage space and bootable from a USB flash drive.
Steps to Create the Recovery Media:
Here are the steps to create the Recovery Media for Chrome OS Flex. These can be executed on another system that is different from the target system.
- Install the Chrome Extension – Chromebook Recovery utility from this link.
- Insert a USB drive with 8 GB free space.
- Launch the extension and click on ‘Get Started’
- Click on ‘Enter a Model Number directly, Select the Manufacturer as ‘Google Chrome OS flex and Product as ‘Chrome OS Flex (Developer Unstable)’
- Select your USB Flash Drive and Continue.
- Next, click on ‘Create Now’ to start creating the Recovery Media.
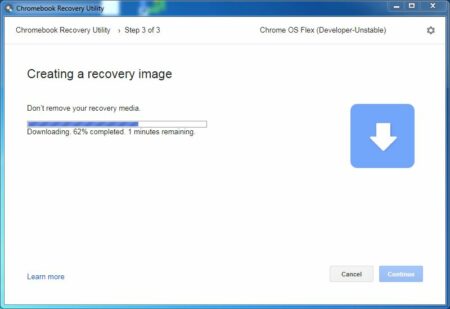
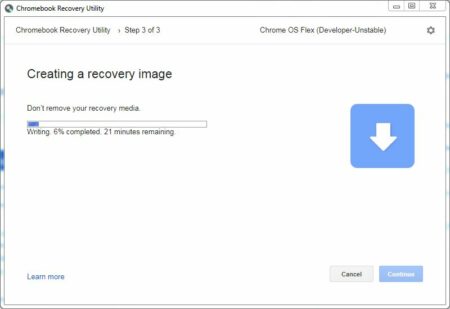
The above procedure takes a pretty long time as the Utility Downloads, Verifies and writes the Recovery image to the USB Flash drive. In my case took an hour and forty-five minutes to finish.
Steps for Target System:
Go to the BIOS setting of your old system where you want to install Chrome OS flex and change the Boot Sequence to boot from the USB drive.
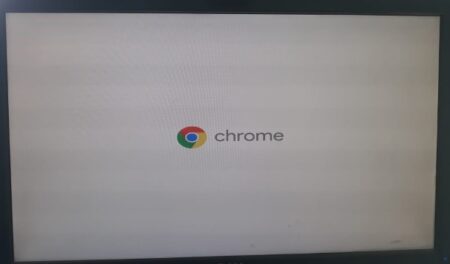
Insert the Recovery Media prepared above and boot the system
Follow the simple onscreen instructions and very quickly, your Chrome OS Flex device will be up and running.
Remember, that your target system is running Chrome OS Flex from the prepared USB Flash Drive without harming the existing OS on its hard drive. Once you have tested the system and are ready, you can use it to erase the current OS and permanently replace it with Chrome OS Flex.
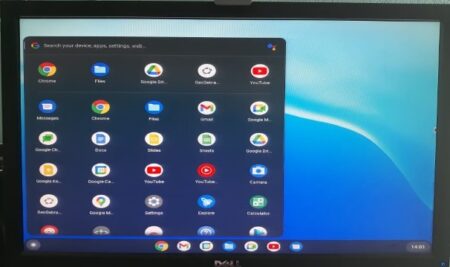
Once the system boots up after the installation, configure your Google Account and access the entire range of Google Apps, Google Docs, and much more through the launcher.
Spend some time with your new OS and you will never regret its features.