Gisto is an awesome freeware desktop application that lets you manage, edit and share your GitHub hosted code snippets, better known as Gists. It works with your existing GitHub account, and also uses the same Gist management infrastructure as GitHub. Any changes you make to your Gists through Gisto are instantly synced to your GitHub account. You can add tags to your Gists in order to manage them better, and search them using a variety of parameters like tags, names, description etc., by making use of the built-in search functionality. Gisto also features revision history that lets you see any changes made to your Gist(s). To top it all off, Gisto features ACE – a powerful code editor that lets you edit your Gists from within the application and save the changes to your GitHub account. Getting intrigued? Let’s find out more.

Gisto: Installation and Primary User Interface
Gisto is a multi-platform application, and is available for all three major families of Desktop Operating Systems (Windows, Linux and OSX). To get the Gisto variant for your OS, simply head over to the application’s download page, and download the one that you want. Installation is also a typically standard next .. next .. finish affair. Once Gisto is installed, the first screen requires you to login to your GitHub account.

Once you’re successfully logged in through your GitHub account, Gisto takes a while to sync all of your Gists, and displays them in Gisto’s intuitive two pane UI. Here’s a screenshot of Gisto’s primary User Interface:

As mentioned before, Gisto features a simple but easy to navigate two pane User Interface. The left pane consists of a list of all your Gists, while wider right pane acts as a preview/edit area for the Gists. The left section of the header consists of a search box that lets you search your Gists using a variety of parameters, whereas the right header section consists of options to create a new Gist, Settings, and Log Out.
In addition to that, there’s also an options bar that lists all of the options available for the Gists. The Gist preview section itself also has a few options, represented by icons as well (Most of them are the same as the options on the primary options bar). All these options are briefly mentioned below (Also check the screenshot):

General Options:
- Add File: You can directly add another file to the existing Gist through this option.
- Edit: This option opens the currently selected Gist in the editing mode.
- Plunker: This options launches your default browser and opens up the Gist in Plunker, an online community that lets you collaborate on your web development ideas.
- Share: You can share your Gist with other GitHub users using this option (You need to know the GitHub username of the person you want to share the Gist with, for this).
- Download: This option lets you download your Gist as a Tarball archive.
- Gist ID: Copies your Gist ID hash to the clipboard.
- Embed: This options copies the Gist embed code to the clipboard.
- Open in Browser: Opens the Gist in browser, via GitHub.
- Remove: This option deletes the Gist from your GitHub account.
Other Options:
- The Paper Clip icon copies your entire Gist to the clipboard.
- The Chain Link icon copies the Gist’s direct web link to the clipboard.
- For opening your Gist on the GitHub website, click the OctoCat (GitHub’s official mascot) icon.
- Download your Gist using the Download icon.
- To edit your Gist, click the Pencil icon.
- Click the Cross icon to delete your Gist.
Also see: Find Code Easily Online With Absolute Code Finder.
How to create a new Gist, and add Tags using Gisto?
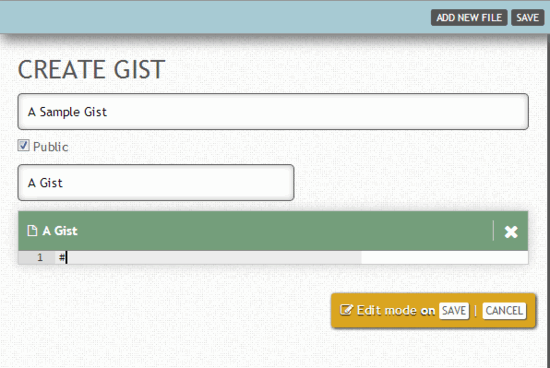
Creating a new Gist through Gisto is extremely simple. All you have to do is click the Create New Gist (Blank Paper icon) option on the top right corner, enter a title for your Gist, and type your code snippet away. When you’re done, click Save on the options bar to save your Gist, and Gisto will sync it to your GitHub account. Here’s a little animated graphic:
Gisto lets you add tags to your Gists in order to help you manage them better, as well as speed up things like searching. Adding tags to Gists is quite simple. To do so, all you have to do is simply append the tag after the Gist’s title with the # sign. For example, if you want to add a tag CSS to a Gist named My First Gist, simply write My First Gist #CSS in the Gist Title field. You can add as many tags as you want to a Gist, using this method. That ain’t hard, right?
Also see: 5 Free Snippet Managers To Manage Code Snippets.
How to see revisions made to your Gists?
Gisto lets you see the revisions made to your Gists, as well as the time and date of the last revision. To see the version of the Gist just before the last revision, simply click on the revision info pop-up box and it displays the Gist as it was, before the last revision. As simple as that.

Conclusion
Gisto is an amazing application that makes creating a managing your Gists really easy. The program has a simple but intuitive and functional interface. On top of that, you also get nice features like revision history, sharing and tagging capabilities, themes and more, all for the low price of free. Overall, Gisto takes all the hassle out of the entire process of creating code snippets and sharing them with others. Do give it a try, you’ll love it.