This tutorial explains how to track time spent on GitHub Issues automatically. By default, you won’t find any option in GitHub to track the time you spent on issues. But today, I have found a simple and effective method which can help you do that pretty easily. There is actually a free service called “Toggl” that lets you track time on issues directly from GitHub. But, there is a catch, you would actually need to use its Chrome extension for the job. The extension integrates with GitHub and lets you start time tracking inside the issues.
All the tracked time are logged to the online Toggl dashboard and you can access them to see the breakdown of your work time on the GitHub issues. You can track time on unlimited GitHub issues for free and also there is no limit on the time tracking sessions for each issue.
If you also use Jira for creating and managing issues, then you can also track time spent on Jira issues with ease. For that, simply go through our post on how to track time on Jira issues automatically.
How to Track Time Spent on GitHub Issues Automatically:
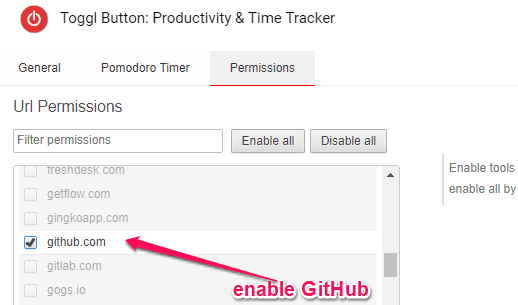
To get started, open Toggl online and sign up for a free account. After that, simply install the Toggl extension on Google Chrome. Then a popup window will open up where you would need to select GitHub from the list of domains.
As soon as you do that, Toggl will integrate with GitHub on Chrome. Now, you can proceed to start tracking the time spent on GitHub issues automatically. For that, the first thing you need to do is open GitHub and select the repository in which you want to track time on issues. Then create a new issue or open any of the existing ones. When you do that, you can see a “Start Timer” button added by Toggl on the right.
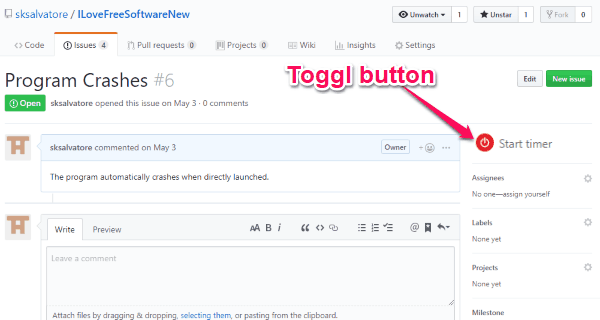
Now, to track the time spent on that particular issue, all you gotta do is click on the “Start Timer” button. Then a small popup window will appear where you can set the name issue, add a project from Toggl, and tags. After that, click on “Done”, and it will start tracking the time automatically.
![]()
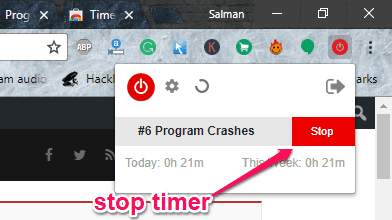
Do note that it will keep tracking the time even if you close the issue or switch tabs. So, once you’re done working on the issue, you should manually stop the timer. You can do that either by clicking the “Stop Timer” button inside the issue, use the Chrome extension icon at the top, or directly from the Toggl dashboard.
As soon as you stop the timer, the tracked time will be logged to your Toggl dashboard. You can see the total time spent on that issue and also the breakdown of time per session. This way you can track time spent on as many GitHub issues as you want automatically and record for later reference.

Closing Words:
This is how you can effectively track time spent on GitHub issues automatically. The Toggl extension for Chrome makes it very easy for you to track the time which you spend working on different issues. The best thing about Toggl is that it keeps a record of all your tracked time and lets you view them on an intuitive dashboard. One thing which might concern you is the fact that it limits this advantage only for the Google Chrome users.
I hope you like this tutorial.