This tutorial details how to increase the size of UI elements in Windows 10. Computers (and the technology associated with them) have grown by leaps and bounds over the course of their development in the recent years. Both hardware and software are much powerful and capable than they used to be. Taking a look at primary (system) software, also known as Operating Systems, it’s hard to ignore the strides they have made. Modern Operating Systems are incredibly powerful and can handle a plethora of varied tasks all at a time, without breaking a sweat.
However, with their advancements, Operating Systems have also become a lot more user-friendly, and include a ton of enhancements that make using a computer extremely easy. This is true for the latest Windows 10 as well, which includes quite a bunch of accessibility improving features.
Thanks to one such feature, you can increase the size of user interface elements (menus, windows etc.) in order to make them more visible. Sounds interesting? Let’s see how you can increase the size of UI elements in Windows 10.

How To Increase The Size Of UI Elements In Windows 10?
Increasing the size of user interface elements in Windows 10 is a pretty simple affair. It can come in really handy in making the UI elements more visible, especially for the users who might be visually challenged. Here’s how to do it:
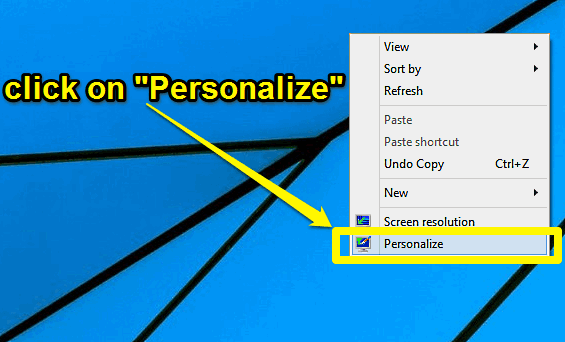
Step 1: Right-click anywhere on the desktop. From the context menu that comes up, click on Personalize.

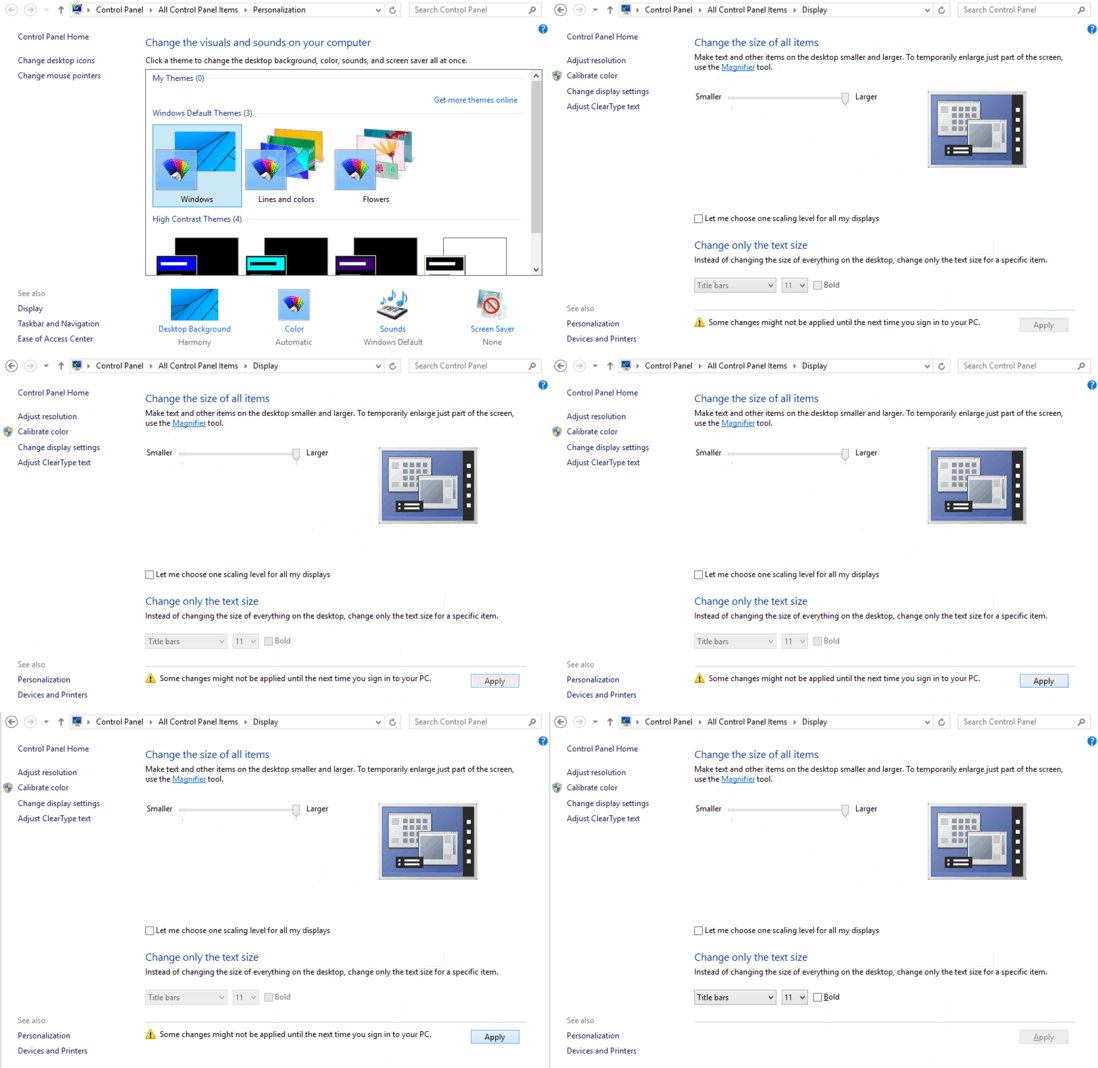
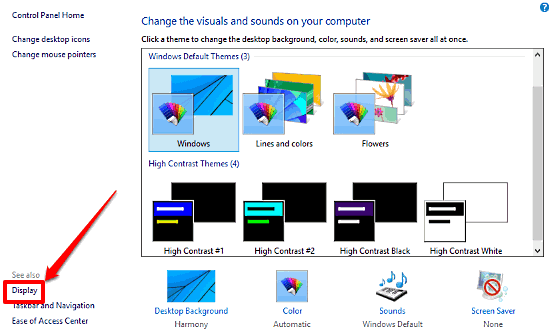
Step 2: The Personalization pane will come up, where you can change things like themes, screensavers, sound schemes, and a lot more. Click on Display, under the See also section.

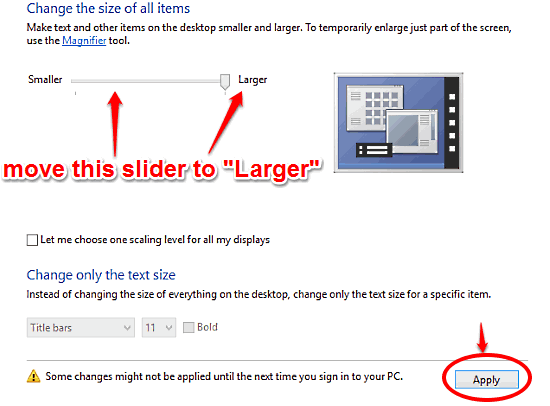
Step 3: Almost there. On the next screen, you’ll see a sub-section called Change the size of all items. With that, there will also be a slider, preset to the Smaller setting. All you have to do is move this slider to the Larger setting, and hit Apply. Check out the screenshot below:

That’s all there’s to it, fellas. As soon as you hit the Apply button, Windows 10 will automatically increase the size of pretty much every UI element (e.g. menus, windows, taskbar) that you see on the screen. Not really that hard, right?
See Also: How To Use High Contrast Themes In Windows 10?
Conclusion
The ability to increase the size of UI elements is a simple but hugely useful accessibility feature of Windows 10. Easy to use, it lets you magnify the size of screen elements in a matter of few seconds. Give it a shot and let me know what you think of it in the comments section.