This tutorial details how to clear live tile notifications history on logoff in Windows 10. As probably the most massively reworked Windows version ever, Windows 10 includes a laundry list of new and unique features. But in addition to that, it also carries forward a large number of enhancements introduced by its predecessors, notably the most recent one, Windows 8, improving them further. Out of the features it retains, modern UI apps are the most evident one. These apps follow a clean and cohesive design language, can run in the background, and of course, support Live Tiles, which provide you a ton of constantly updating useful information, ranging from breaking news to weather alerts.
You already know that you can clear your personal information from live tiles. But doing so every once in a while can be a little tedious, don’t you think? Besides, there can be occasions when the live tiles don’t update as frequently as they should, and hence end up displaying stale information.
Not a problem, as a simple trick automatically clears any and all cached live tile notifications when you log off, so that you can start afresh every time you log on. Intrigued? Let’s find out how you can clear live tile notifications history on logoff in Windows 10.

How To Clear Live Tile Notifications History On Logoff In Windows 10?
It’s easy to configure Windows 10 to automatically get rid of live tile notifications history, every time you logoff. To do so, all you have to do is a little tinkering with the Group Policy. So without further ado, let’s see how you can do it, courtesy of a detailed illustrative walkthrough:
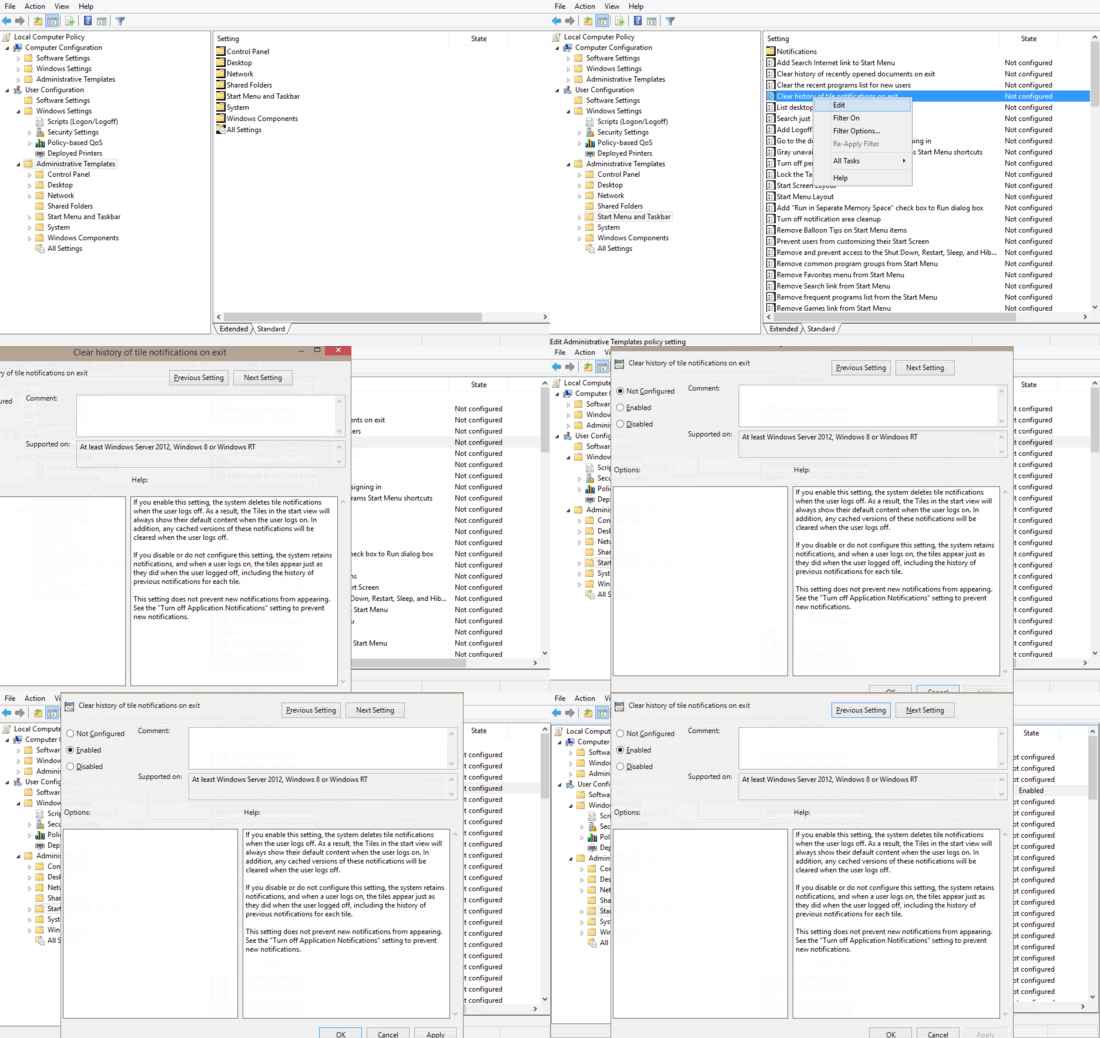
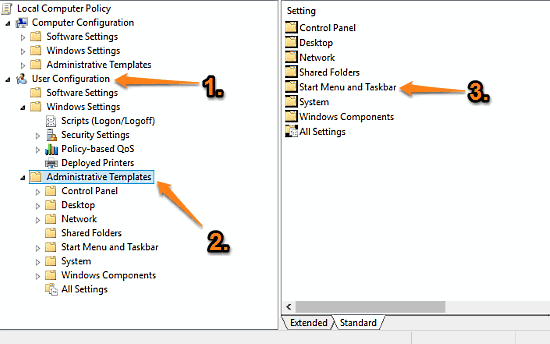
Step 1: At the Run prompt, key in gpedit.msc and hit OK to launch the Windows Group Policy Editor. Once there, use the left pane to navigate to User Configuration > Administrative Templates > Start Menu and Taskbar.

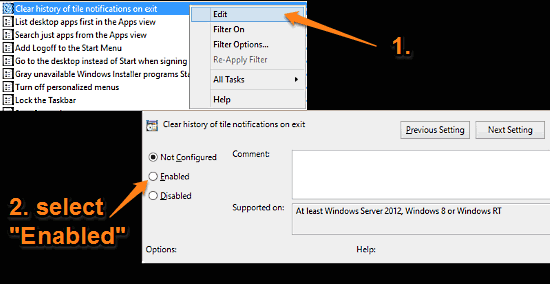
Step 2: Once you double click Start Menu and Taskbar, you should see a number of sub-options related to it show up in the right pane. Scroll down to the one that says Clear history of live tile notifications on exit, right click on it, and hit Edit. Once the edit pane pops up, change the setting to Enabled via its corresponding radio button. Click Apply, followed by OK. Here’s a screenshot:

That’s it. From now on, whenever you log out, the OS will automatically clear the history of currently displayed live tile notifications, so that you can start off with a clean slate, every time you log back in. Pretty cool, right?
See Also: How To Selectively Remove Installed Updates In Windows 10?
Conclusion
Live Tiles (and in general, modern UI apps) are one of the most impressive features ever added to Windows. They are easy on system resources, provide a slew of information at a glance, and of course, look gorgeous. However, there can be cases when these live tiles show old cached information instead of the most recent updates. But thanks to the steps mentioned above, you can easily prevent that from happening. So try it out, and let me know your thoughts in the comments below.