This tutorial explains how to add write protection to USB in Windows 10.
If you have stored some important data on your USB flash drive, then it is good to enable write protection on that USB before giving it to someone for use. There are chances that other person can edit your important files by mistake or overwrite them. Therefore, those who are running Windows 10 PCs and need to add write protection to USB, this is a handy tutorial.
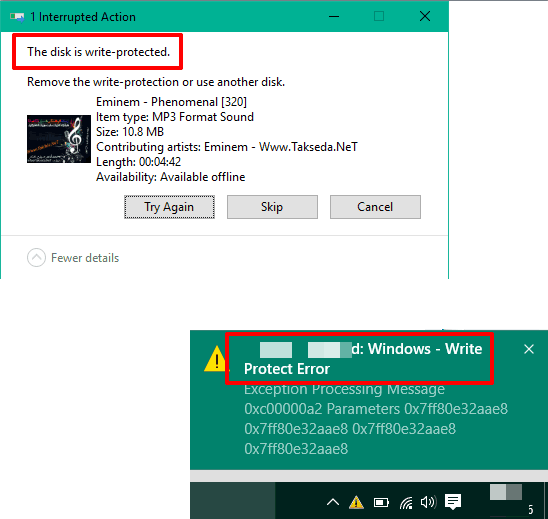
You need to access Command Prompt on your Windows 10 PC and execute some very simple commands to make your USB write protected. After this, when someone will try to edit or replace a particular file stored on your USB or paste some file, he/she will see some write protect error, like visible in the screenshot below.
Let’s us see how we can activate write protection on USB in Windows 10.
Note: This feature can only protect editing and pasting of files in USB. Your files can be deleted easily even if you have enabled write protection.
How To Add Write Protection To USB In Windows 10?
Before going further, you must plug-in your USB flash drive
Step 1: You need to open Command Prompt window with Administrative privilege.
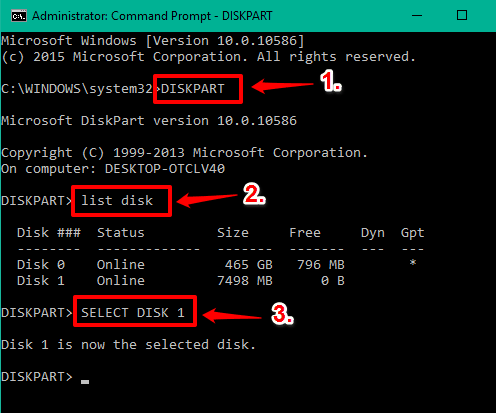
Step 2: Type 'DISKPART' and press enter.
Step 3: Now you need to enter LIST DISK command and execute it. It will help you to find your USB flash drive. It would be DISK 1. You won’t be able to see the name of your USB drive, but you can easily find it by its size.
Step 4: In this step, you need to select your USB by executing the command “SELECT DISK 1“. See the above screenshot.
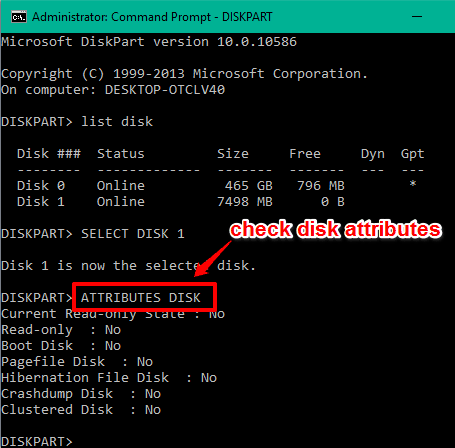
Step 5: Now the disk is selected, it’s time to check its attributes. For this, enter ATTRIBUTES DISK command and execute it. After this, you will be able to see Read-only, Current Read-only state, and other attributes of your USB flash drive.
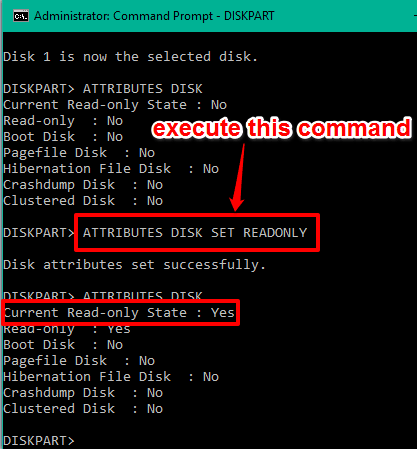
Step 6: It’s time to enable write protection to USB flash drive. Enter ATTRIBUTES DISK SET READONLY and execute this command. It will immediately add write protection to USB and you can also see the new attributes.
Try to edit or overwrite some file or paste some file on your USB flash drive, you will receive an error.
Disable Write Protection In USB Flash Drive In Windows 10:
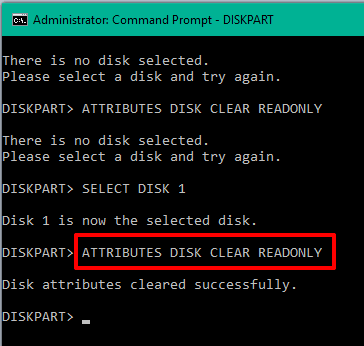
When you want to disable write protection in USB flash drive in Windows 10, repeat step 1 to 5. After this, you need to enter command ATTRIBUTES DISK CLEAR READONLY and press enter.
It will remove write protection from USB.
Conclusion:
Adding write protection to your USB flash drive is not the foolproof option to protect your files and USB, especially when the second person knows how to disable write protection. Still, it is better than keeping the USB flash drive in open mode. You should try it.
