Focusky is a free presentation maker for Windows to create stunning animated videos, presentations, or explainer videos. It offers dozens of predefined content layouts, backgrounds, charts, images, animated figures, symbols, smart arts, flash files, and more which you can add to your presentations. You can even import your own videos from the web or PC, add text, and insert audio files to make your presentations more interesting.
Similar to other services like Showbox, Animaker, RawShorts, and Moovly, this one also allows you to add animated backgrounds and slide or frame transitions. It comes with a vast editing canvas where you can add multiple slides or frames and customize them individually. Focusky supports the drag-and-drop function using which you can insert all the predefined objects into the canvas in no time. Additionally, it also lets you publish your presentations as .ZIP, EXE, PDF, Video, HTML, etc.
Note: The free plan of Focusky is limited to 10 GB storage, 50 uploads per month, embed watermark, no premium templates, etc. Simply purchase any of the paid plans to overcome these limitations.
Now, let me explain the steps to create astonishing presentations using Focusky.
How to Choose a Video Template:
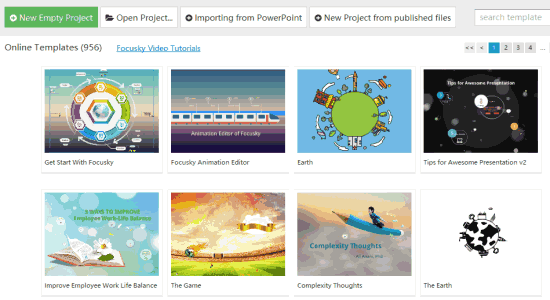
Step 1: After you launch this tool, you will see various pre-designed templates which you can use for your presentations. If you want to start from scratch, then select the option “New Empty Project” at the top. It even has the option to import your PowerPoint presentations for editing.
Step 2: When you select a predefined template or import your own, the editor will open up with a vast canvas along with all the editing tools at the top and right of the window. If you select a predefined template, then all the frames or slides will be visible on the left. You can select the frames individually for editing as you normally do with Powerpoint.
How to Add a Background to the Canvas:
Step 1: Before getting started with editing and creating your presentations, the first thing you need to do is add a background to the canvas. Click the “Background” button at the top and a popup will appear with all the available backgrounds listed in categories like 3D BG, Image BG, Video BG, and BG color.
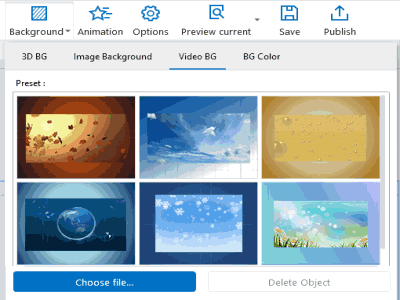
Step 2: Most of the 3D and Video backgrounds are paid, but you can use some of the backgrounds for free. Select any one of the backgrounds and it will get automatically applied to the canvas. Remember, all the image and color backgrounds are free to use.
How to Add Frames or Slides to the Canvas:
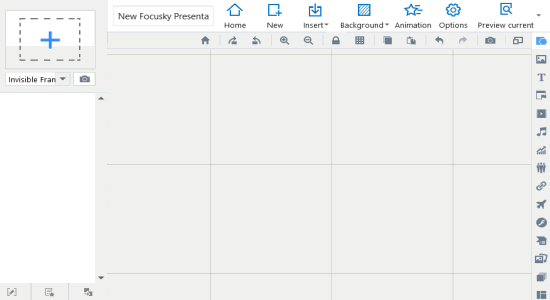
Step 1: Once, you’re done with selecting a background, you can start adding frames to the canvas. To do this, click the big “+” button at the top-left corner of the editor. It also lets you choose between circular, rectangular, invisible, and bracket frames. You can add as many frames as you want which works exactly like the slides in Powerpoint.
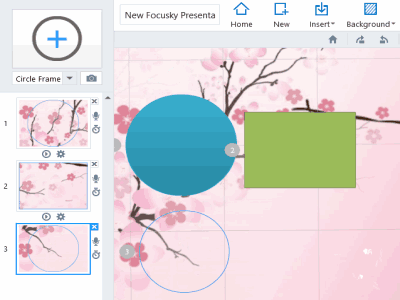
Step 2: You can simply expand any frame by selecting it on the left and start adding objects, media files, text, and more to each frame. You can also add voice narration, delay frame play time, auto-play the slide after the previous slide, and set animated transition time using the small icons associated with each frame on the left. Unlike Powerpoint, you can zoom out the canvas to see all the frames added to the canvas.
How to Add Multimedia Files to the Presentations:
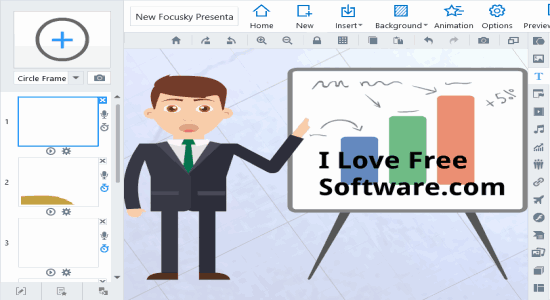
Step 1: The best part of Focusky is that it offers dozens of multimedia contents which you can add to your frames. The available media contents are animated figures, charts, symbols, shapes, explainer images, flash or SWF files, and smart arts. You can find all the contents on the right toolbar and you can simply drag-and-drop any object to the canvas. It also has an option to import SWF files from your PC.
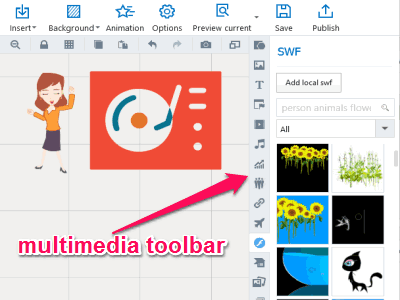
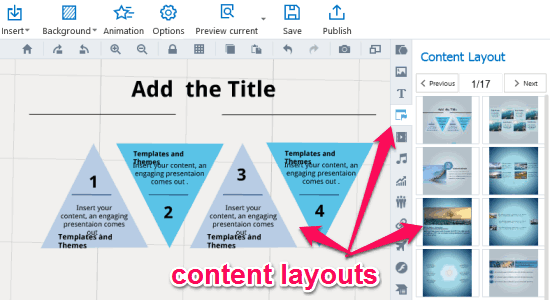
Step 2: From the multimedia toolbar, you can also add various predefined content layouts to the canvas. You can customize the predefined layouts as you want and also add each one of them as an individual frame.
Step 3: Another great feature of this tool is that it lets you add images, links, music files, and even videos from your PC. If you want then you can also add videos by entering URLs of different websites like YouTube, Vimeo, etc.

How to Add Animated Transitions to the Frames:
Step 1: To make your presentations look stunning and interesting, you can add various animated transitions to the frames. To do this, click the “Animation” option at the top of the window. As soon as you do that, the animation window will appear with an “Add Effect” button on the right.
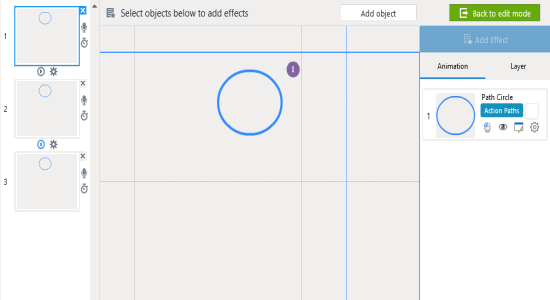
Step 2: You can add animations to each frame as well as to all the objects added to that particular frame. If the frame already has some objects added, then you can add animation to them or you can click the “Add Object” button to insert new object or multimedia files. Each object is added in a frame with a separate layer, which means you can select layers (objects) to add different animations to each one of them.
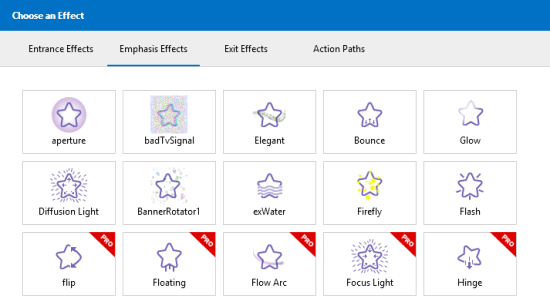
Step 3: To add animation, simply select a frame or any object on that frame and hit the “Add Effect” button on the right. The “Choose an Effect” window will pop up with all the available animations listed in categories like Entrance, Emphasis, Exit, and Action Paths. Each category includes free animations along with some of the paid animations as shown below.
Step 4: Click on any animation to add it to the frame or object. Once you’re done adding animations you can click the “Preview” button to get a quick glance at your presentation.
How to Save and Publish Presentations:
Step 1: When you’ve created your presentation, click the “Save” button at the top to save it as a Focusky presentation file, which you can later import and customize.
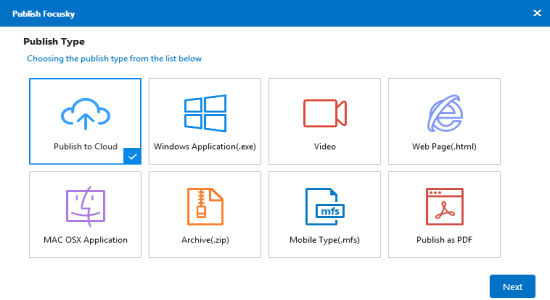
Step 2: Focusky also lets you publish and export your presentations as .ZIP, EXE, MFS, HTML, PDF, Video, Mac OSX Application, and to the Cloud server of Focusky. For this, click the “Publish” button and select the publish type, as simple as that.
My Final Verdict:
Focusky is an amazing tool to create outstanding presentations and animated explainer videos. It offers dozens of predefined multimedia contents like SWF files, shapes, charts, images, content layouts, and more. If you’re looking for a perfect solution for creating animated presentations, then Focusky is probably the best option for you.