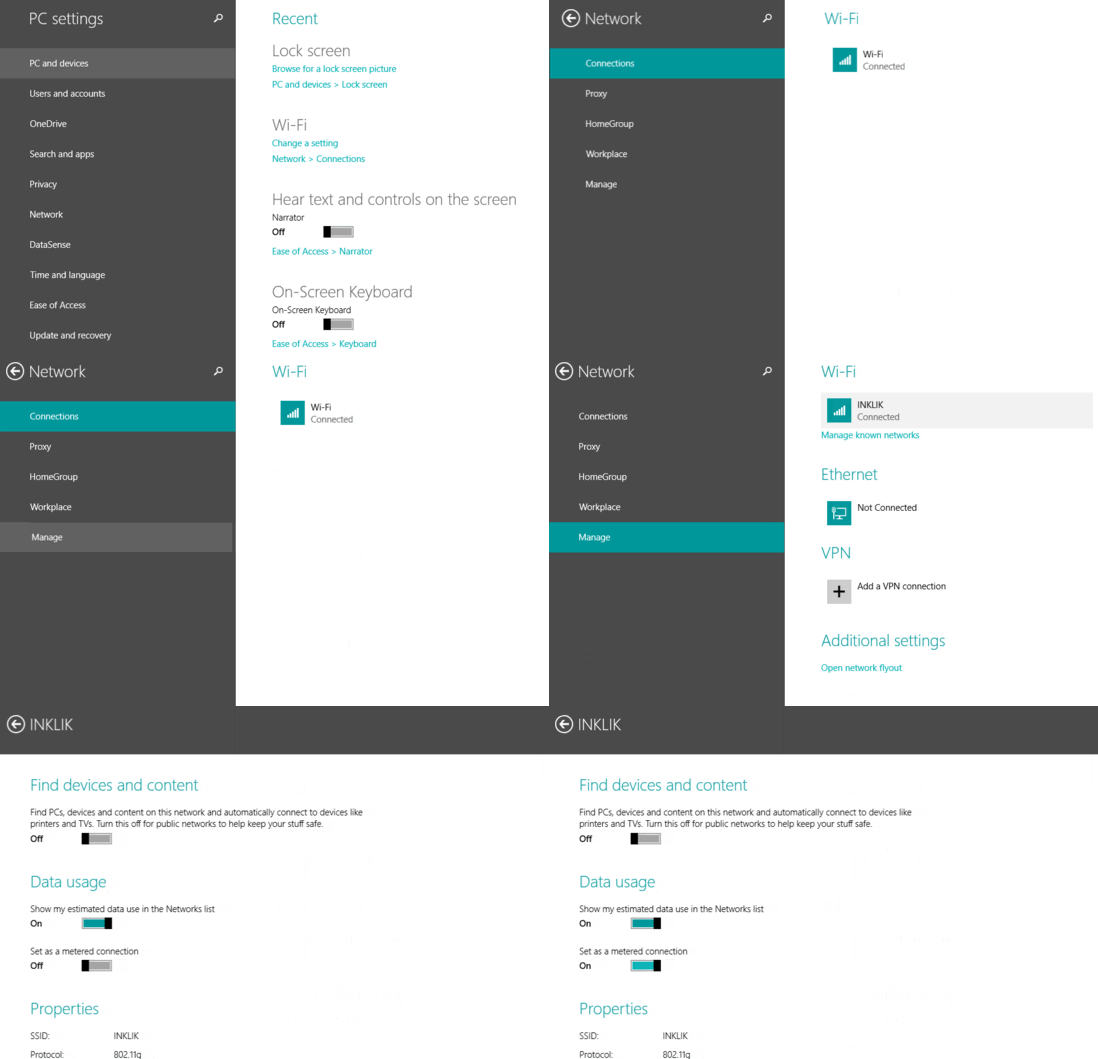
This tutorial details how to set a network connection as metered in Windows 10. As a powerful and modern OS focused towards productivity, Windows 10 supports all kinds of standard network connectivity options. This means that while using Windows 10, you can connect to the Internet via Wi-Fi, Ethernet or Mobile Broadband (for Windows 10 running devices having cellular capabilities). There’s also a lot of network activity going on in the background (automatic file synchronization, Live Tile updates etc.) when you’re using Windows 10.
While near constant network connectivity is required for optimum user experience, it can also cause you to incur massive overage charges from your Internet Service Provider. So, what can you do about it?
The answer is simple, you set your connection to metered, so that Windows 10 automatically takes care of the network activity for you. Wanna know more? Let’s find out how you can set a network connection as metered in Windows 10.

What Exactly Happens When You Set A Network Connection As Metered?
In the simplest of words, setting a network connection as metered tells Windows that you don’t have an unlimited data usage allowance. When this is done, the Operating System takes control over the way network is utilized for activities such as Windows updates, Live Tile updates, App downloads, and Automatic file synchronization. It can smartly pause/resume updates, limit file synchronization etc. to makes sure you don’t go over the network usage limit. Pretty cool, don’t you think?
How To Set A Network Connection As Metered In Windows 10?
Setting a network connection as metered in Windows 10 is pretty simple (Note: It’s important to know that Ethernet networks cannot be set as metered. This works only for Wi-Fi and mobile broadband connections). Here’s how to get started:
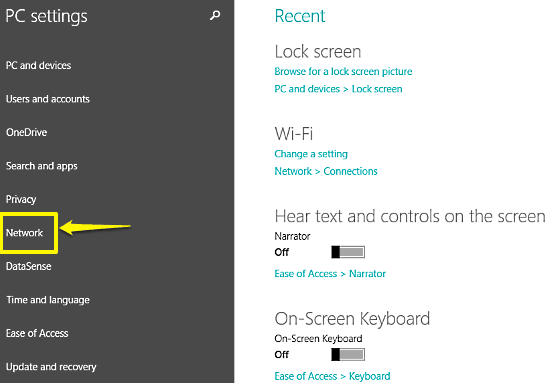
Step 1: Launch the modern style PC Settings app. From the left column, indicating major system tweaks, click on Network.

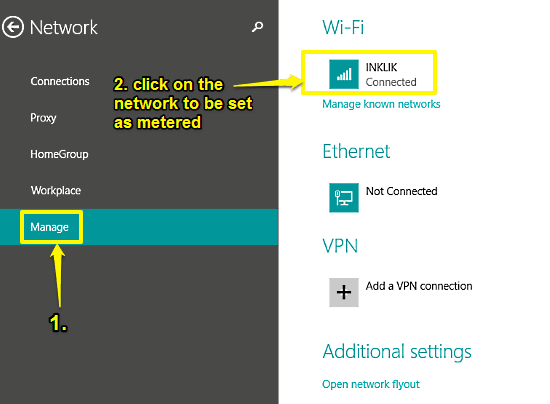
Step 2: From the network specific settings now displayed on the left pane, click on Manage. This will show up some more settings in the wider right column. Under the Wi-Fi section, click on the name of the Wireless network you want to set as metered.

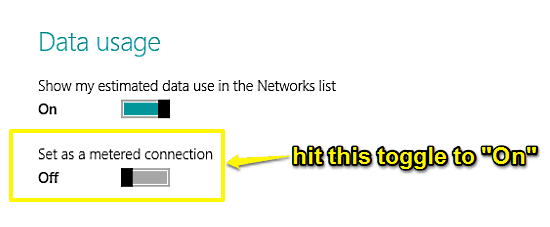
Step 3: Once you do that, the selected Wi-Fi network’s properties, settings etc. will be displayed. Simply move to the Data usage section, and hit the toggle labeled Set as a metered connection to On. Check out the screenie below:

And that’s it! Going forward, all of the system updates, live tile notifications etc. will be intelligently controlled by Windows 10, ensuring that you never go over your data usage allowance. Really handy if you ask me!
You Might Want To See: How To Set Custom Image As Lock Screen Background In Windows 10?
Conclusion
Being a modern OS, Windows 10 includes a whole lot of features and connectivity options. While it can perfectly function sans network connectivity, having a network connection makes it even better. However, constant network connectivity can also lead to overage charges. But as you know now, this can be easily prevented by setting a network connection as a metered one. So give it a shot, and let me know your thoughts in the comments section.