In this article, you will learn how to remove image background using paint 3D in Windows 10. In this technical era, you will find numerous people who are well familiar with the skill of editing image programs and modifying them. We use many free software and image-enhancing tools to adjust and crop images and give them a modernized look. But, when we talk about removing the background of an image, it becomes a little bit complicated. To make this tricky job simple and straightforward, you can use a inbuilt Paint 3D application.
Windows 10 comes with an amazing application known as Paint 3D. Using this tool, you can easily remove the image background. The user interface of the app is quite easy to use that provides you quick access to the available tools. Inside the app, there are a lot of effects and useful tools. Doesn’t it sound interesting? So let’s give it a try.
How to Remove Image Background using Paint 3D in Windows 10?
Paint 3D is the next level of MS paint and it is made for those who require more. Most of the photographers prefer to use this pre-installed application for editing purposes. In addition to the impressive features, you can create a transparent background using this application. Here is how to do this:
Step 1: Click on the Start button, search for the “Paint 3D” tool and then open it.
Step 2: Once you are in the app, click on New to select a new project. In the top of the window panel, click on the Menu option.
Step 3: In the right pane of the next page, select Browse files and choose the image from which you want to remove the background. To pick an image from the file manager, you can also click on the Insert option, available in the left panel.
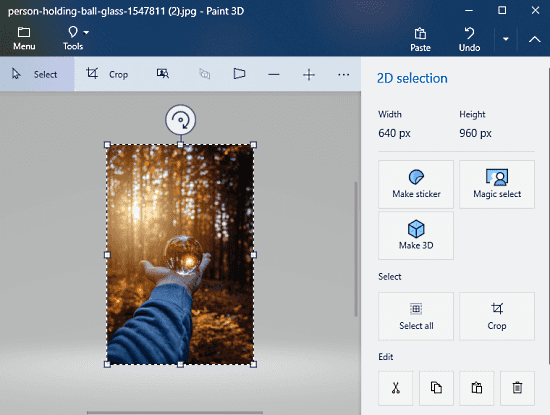
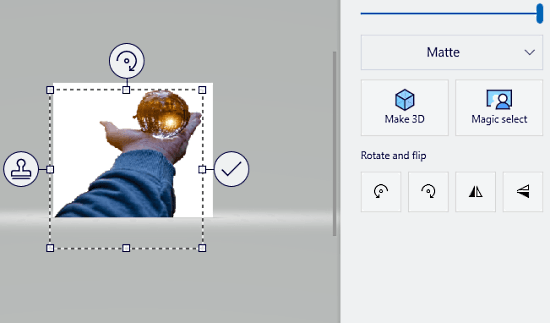
Step 4: When the image prompts in the app area, move your pointer to the right pane and click on the “Magic select” option.
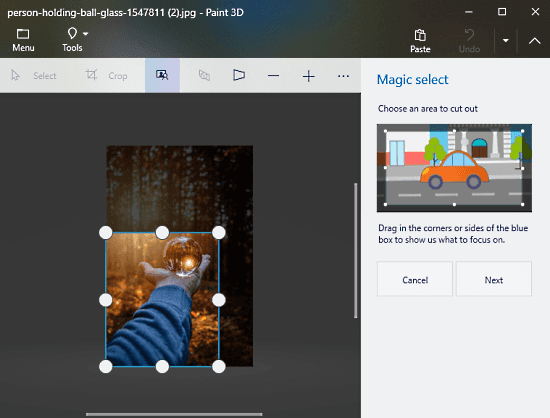
Step 5: Now, select the field you want to keep and cut out the remaining portion. Hold the edges of the image and drag it as shown in the above snapshot.
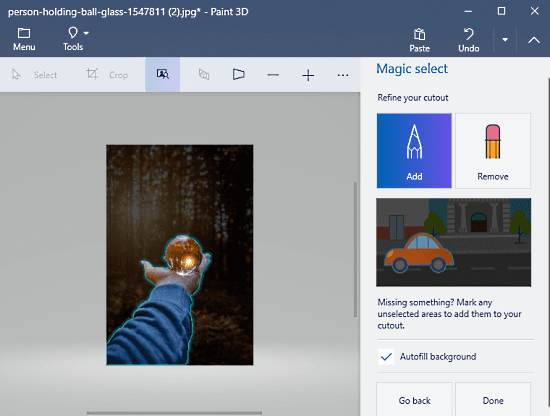
Step 6: Once you did, click on the Next button. A green borderline automatically highlights the edges of the image. If it misses something, click on the Add option, available in the right pane. To add the missing part to the cutout, you need to draw a line on any unselected field.
Step 7: To eliminate some objects from the cutout, click on the Remove button and mark on the unwanted area. Now, move to the right sidebar and click the Done button.
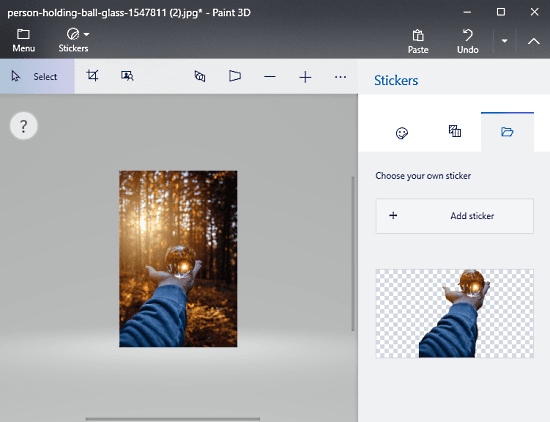
Step 8: On the following page, select Make Sticker option from the right sidebar. After that, move to the top pane and select Stickers. The image prompts on the right pane without a background image as shown in the above snapshot. It makes a sticker of the image that you can use on another image.
If you want to use the cutout image, open Menu and select “New” option. Click twice on the sticker and then adjust its sides and corners as shown in the image. In order to save the new image, go to Menu and select the Save option.
Apart from that, if you need to use the cutout in another image then insert your image first, and then you can add & adjust the cutout, the way you like.

In the above snapshot, there are two hands holding the ball in which the right one is the cutout sticker which I used here. As there is no background in the sticker, it gets merged properly with the original photo.
You can also take your own photo and use the same method explained above to remove the background from images. And then use the sticker and put it in your original photo.
Closing word:
Using Paint 3D program, you can easily remove the image background and give them a unique look without using a high-priced software. Most of the time, this application properly detects the edges and highlights them as well. But sometimes, you might be experienced with a small layer of errors near the corner in the image that can be fixed easily by including or excluding the things.