This tutorial explains how to enable or disable Windows Firewall rules in Windows 10. As a modern day Operating System designed to meet the most demanding of productivity requirements, Windows 10 includes a whole lot of features. From eye-candy visual goodness to rock solid security, Windows 10 has everything covered. If we talk about security, Microsoft’s latest OS ships with a bevy of system tools that make sure your data remains safe, whether you’re offline, or connected to the Internet.
One such very important native feature is the Windows Firewall, which monitors and regulates the network traffic between Internet and your computer. It also acts as a security barrier between your computer and the Internet, filtering out potentially harmful packets and allowing the ones that are safe.
You already know that you can selectively allow services and apps through Windows Firewall. But do you know that you can enable/disable inbound and outbound Firewall rules as well? Interesting, right? Let’s take a look at how you can enable or disable Windows Firewall rules in Windows 10.

How To Enable Or Disable Windows Firewall Rules In Windows 10?
Windows Firewall (or pretty much any network firewall) basically uses a bunch of inbound and outbound rules. Essentially, these rules are directives that Windows Firewall follows in order to regulate the network traffic between the Internet and your computer. These rules also define which applications can send/receive via the Internet, and which can’t. The following stepwise tutorial explains how you can enable or disable inbound and outbound firewall rules in Windows 10:
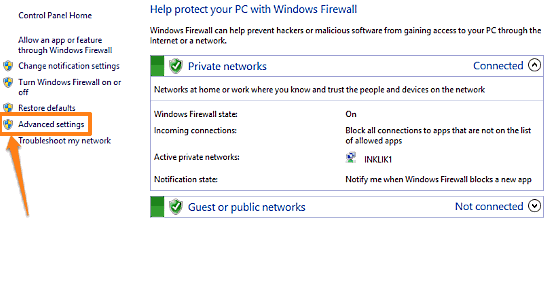
Step 1: Navigate to Control Panel > Windows Firewall. When the firewall settings window comes up, click on the Advanced settings option in the left pane.

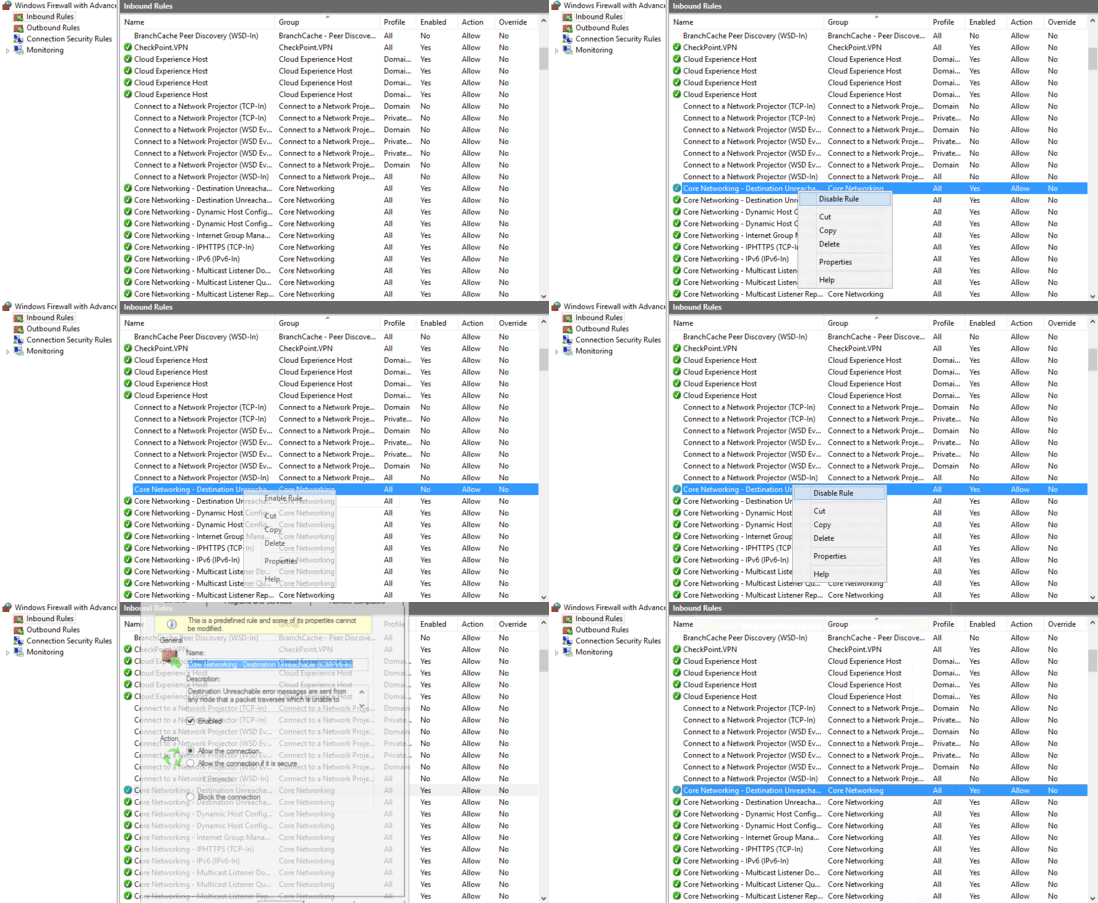
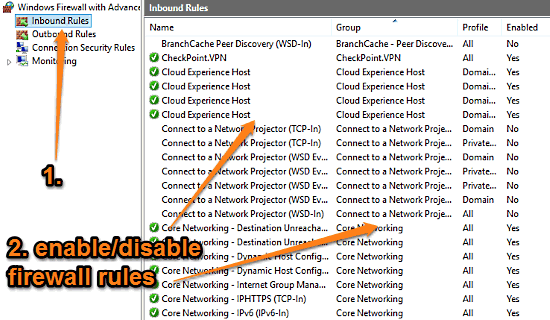
Step 2: The Windows Firewall with Advanced Security window will now pop-up, having a dual-column interface. In the left column, there are two self-explanatory options: Inbound Rules (which regulate network traffic from Internet to Your Computer), and Outbound Rules (which regulate network traffic from Your Computer to Internet). Click on the category whose rules you want to see. As you do that, the right pane will display an extensive list of firewall rules. The enabled rules are indicated with a Green checkmark icon against them, whereas the disabled ones don’t have any icon. To enable a disabled rule, simply right click on it, and select Enable Rule. The process to disable an enabled rule is similar, only this time, you have to select the Disable Rule option. Check out the screenshot below:

That’s all there’s to it. You can use the above method to enable or disable both inbound and outbound Windows Firewall rules. How cool is that?
Also See: Specify Automatic Search Locations For Device Drivers In Windows 10
Conclusion
Windows Firewall is an essential system security feature, and it ensures that information exchange between your computer and the Internet is secure and free from any malware and things like that. And the fact that you can selectively enable/disable (as well as configure) both inbound and outbound firewall rules makes it even better. Give it a shot, and let me know what you think of it in the comments section.