This tutorial explains how to host product changelog page free forever. You can host single page website to post details about the your product changelog using GitHub and Netlify. You can serve website files from a GitHub repository and update its contents from there very easily. The changelog page you create with this has a very nice responsive UI and that is customizable too. There are options to enable Google Analytics and Disqus and you just have to configure them. By default, it will host changelog page on a random domain but if you can use a custom domain too if have it.
Netlify is probably the most popular platform these days for hosting serverless (static) sites. I used it in one of my previous posts to create a static site from WordPress. Also, I used it to host an app landing page, and in this post, I will tell you to use it to host changelog page for free. You have to add the new entry in the product changelog by creating simple file in markdown. And the Netlify will automatically update the site.
How to Host Product Changelog Page for Free?
To use this method, you need the a Netlify and GitHub account. After creating the Netlify account, make sure that your GitHub account is linked. Or, I will suggest you to use your GitHub account to sign up. Now, for the easiness, I have divided the whole process in two parts. In one part, we will configure GitHub to save the change log site data. And in second part we will configure the hosting on Netlify. So, let’s get started.
Part 1: Configure GitHub to Save Site Data
There is a Jekyll template on GitHub that you will have to use for the site creation. So, you simply go to this GitHub repository and fork it in your account. After forking it, you will have to configure the main homepage based on your needs. The first thing you will have to do is edit the “_config.yaml file“. Here you have to change a few site parameters such as website logo, URL, title, description, etc. You can see the screenshot below.
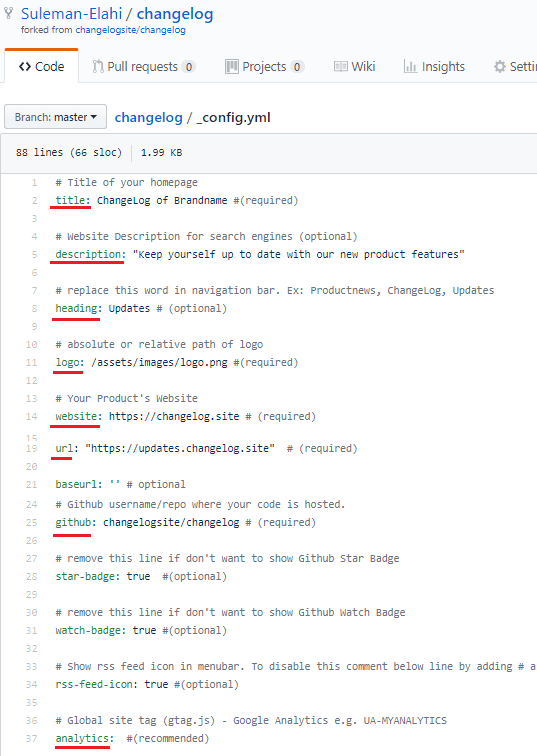
You can replace the “logo.png” in “changelog/assets/images/” folder. And then commit the changes. Make sure that you commit all the changes to the master branch. If you want Google Analytics for the product changelog site you are creating then you will have to add your tracking code in the Analytics section in the configuration file. Also, if you have knowledge of website development then you can tweak “index.html” as well.
Part 2: Configure Hosting on Netlify
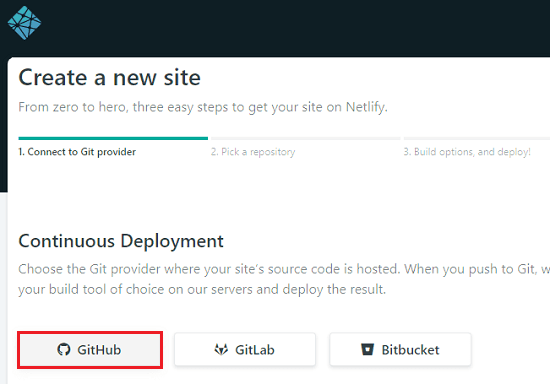
Now, when the GitHub part is done, you have to configure the hosting part. Go to the Netlify’s homepage and then choose the option to create a site with Git. Next, it will ask you to choose a repository. You have to go with the GitHub option and then choose the forked repo that you created in Part 1. Do note that, if your GitHub account wasn’t authorized before then you will have to authorize that here to allow access to all or just the Changelog repository.
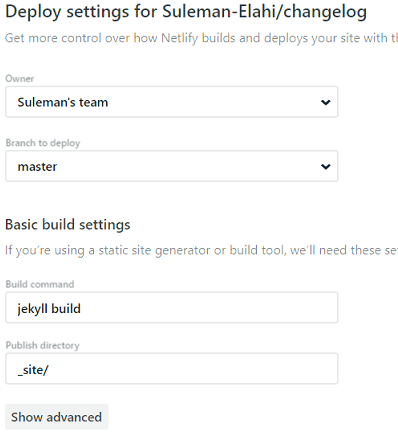
Proceed and the configure the build command. It will automatically detect Jekyll so just lets the thigh as it is and then save the changes. It will now fetch files from GitHub and and will build them. And if you want then you can see the progress of the build process.
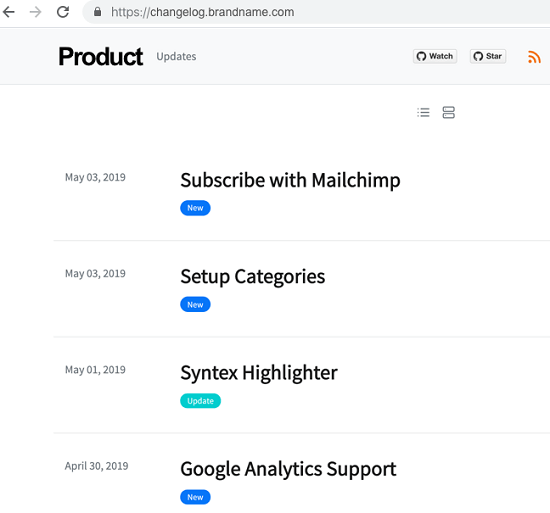
Now, when the build process is done, you can access your changelog site at the URL it gives you. The blank site will then be published. And you will see the fist welcome changelog entry there.
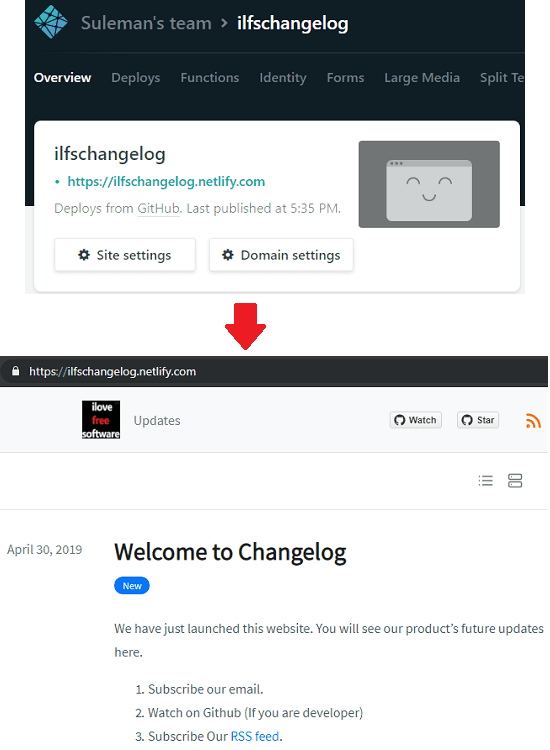
In this way, you can configure Netlify part. At this point, your site is up and running. The only thing you have to do is add content in it. Apart from this, it hosts the site on a random name domain by default. But you can change that to a new name if you want from the site settings, Or, if you have custom registered domain then you can use that there to host the changelog site.
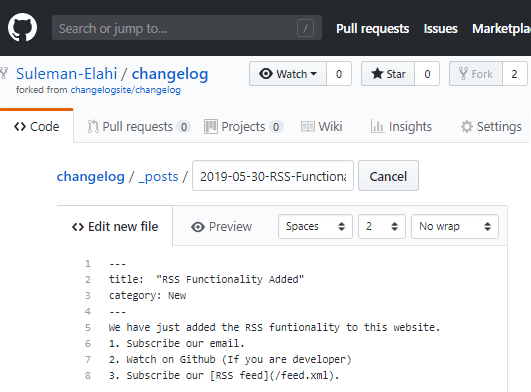
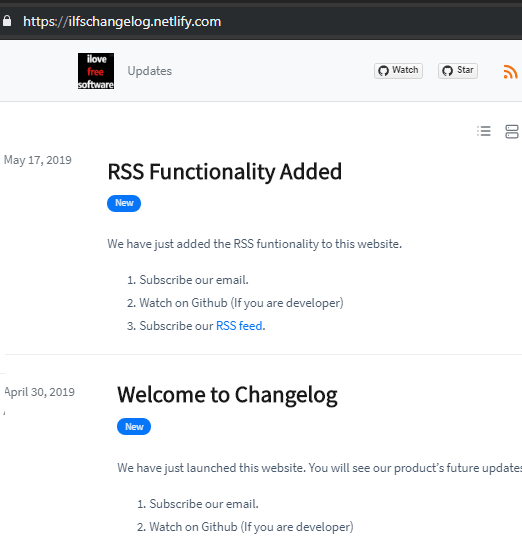
To add new changelog entry in site, you have to create a post in markdown in “changelog/_posts/” folder. Simply navigate to this folder in your GitHub repository and then create new file. Do note that the name of the new file should be in “yyyy-mm-dd-feature-name.md” format. You can see this in the screenshot below. After that, just commit the change a few seconds it will be automatically updated on the site.
That is how you can create a changelog page for your product for free. And you can also host it for free. There is not much technical knowledge you need to use this method. If you follow this post carefully then you will be easily able to deploy the changelog website on your own and post new updates on it. For more details, you can head over to the GitHub repository or this Medium post.
Final thoughts
Changelog is kinda important for your users to easily spot and try new features. And from changelog, your users actually get know about the new fixes and updates and you should have it. But if you can’t afford hosting then you can follow this post and host that for free. The developer of Changelog is creative and the final page is amazing. You just have to do a little hard work in beginning. And then you just keep updating the site by writing some markdown.