This post aims to explain how to create a free URL shortener using Google Apps script and GitHub pages. Here I will show you how you can create a free URL shortener using Google Sheets, Google Apps Script, and GitHub. The only thing which will cost you some money is the domain for the URL shortener. But you can even get a free domain from Freenom if you just need the URL shortener for limited period of time. The URL shortener that we will create in this post will use Google Sheets as the database to store the long URLs and slug to their corresponding short URL. The link shortener will even have the ability to discard some banned keywords to be used as slug.
We have covered some self hosted URL shorteners before, and they are good, but they require a web server to run. To install and setup those, you will have to buy a VPS. But the URL shortener that we will create here will be server less and will run on static website. The website will be hosted using GitHub pages with a custom domain that I assume you already have. If you don’t have a domain then you can register a free one from Freenom. Or, you can buy a cheap domain from Plesk or NameCheap like domain providers.
How to Create a Free URL Shortener using Google Apps Script and GitHub Pages?
The whole process of running a server-less URL shortener that we will create here is divided in three parts. In the first part, we will create the Google Sheet that will be used for storing the URL. In the next part, we will configure the Apps Script to write the logic, save it, and publish that. Finally, we will configure the static website on GitHub to host front-end of the URL shortener and configure the domain to access it.
So, let’s just get started.
Part 1: Creating a New Google Sheet to Store the URLs
Log in to the Google account that you want to use for storing all the data of the URL shortener. So, create a new Google Sheet, give it some name and copy its ID. The ID is a weird string between the “d/” and “/edit” in the Google Sheet URL you can see below.
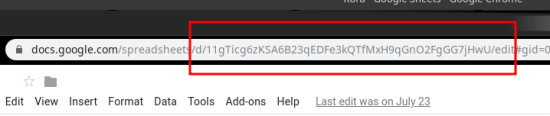
You have to note it down as we will need it in the next part.
Part 2: Setting up The Google Apps Script
Without wasting so much time, you simply copy this Google Apps Script project. Just open this project and use the “File > Make a copy” option. After the project copies in t your account, you can give it some name if you want to but do not deploy it or run any function just yet.
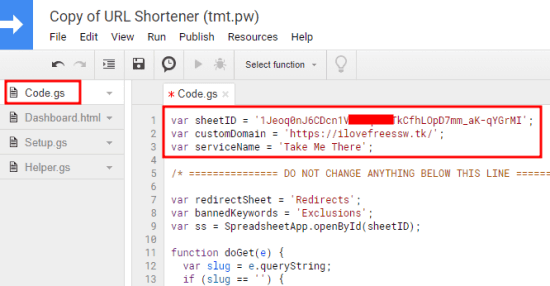
In the first file that you see on Google Apps which is “code.gs” here you have to enter the sheet ID that you have already copied in part 1. Also, here you will have to specify the domain that you want to use for the URL shortener. After specifying these 2, just save the changes in the file.
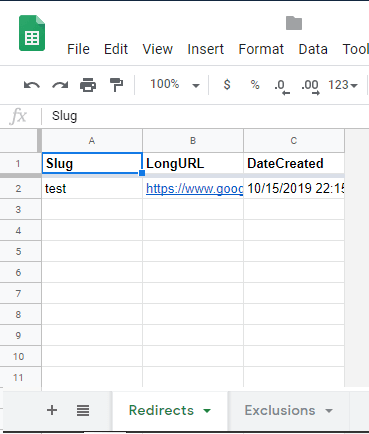
Now, you simply click on the “setup.gs” file and then run the setup function. To do that, just click on this file and hit the play button. The function will run and will prompt you to authorize the script. So do that and after authorizing the script, you will see the structure of the sheet will be changed.

In the Google Sheet, you will see that the first sheet will be used to store the long URLs and slug. The other sheet will be used to store the banned keywords.
Finally, it is time to publish the script as the web app. Use “Publish > Deploy as web app…“. Do remember to select “Execute the app as: to Me (your-email-id)” and importantly, have the “Who has access to the app: setup to Anyone, even anonymous” and finally click “Deploy”.
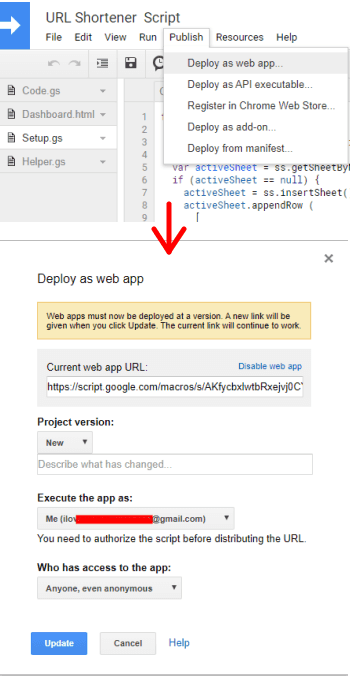
You need to copy the URL of the app that it will reveal as we will need that in the next part. At this point, the Apps Script part is done and you are
Part 3: Using GitHub Pages to Host the Front End of the URL Shortener
Now, we only have to configure a static site to host the front-end of the website. And for that, we will use GitHub pages. So, simply log in to your GitHub account and then clone this repository from here. Extract its contents and keep the “index.html” and “404.html” files somewhere safe as we will need them later.
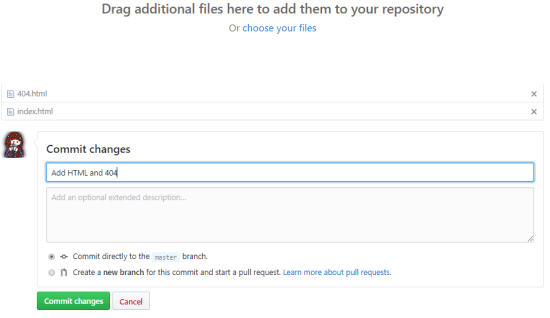
Now, create a new public GitHub repository and initialize it with a Readme file. Now, you just have to upload the “index.html” and “404.html” files that we just extracted from the above repository. So, just upload the files and commit the changes to the master branch.
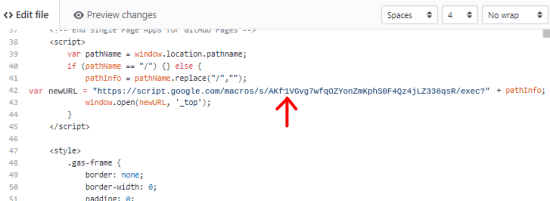
After uploading the files, just edit the “index.html” file and edit the line number 42 and 71. Here you have to paste the link of the Google Apps script that you have already copied at the end of part 2. Save the changes by committing to the master branch. Do not forget to leave a “?” at the end of the URL.
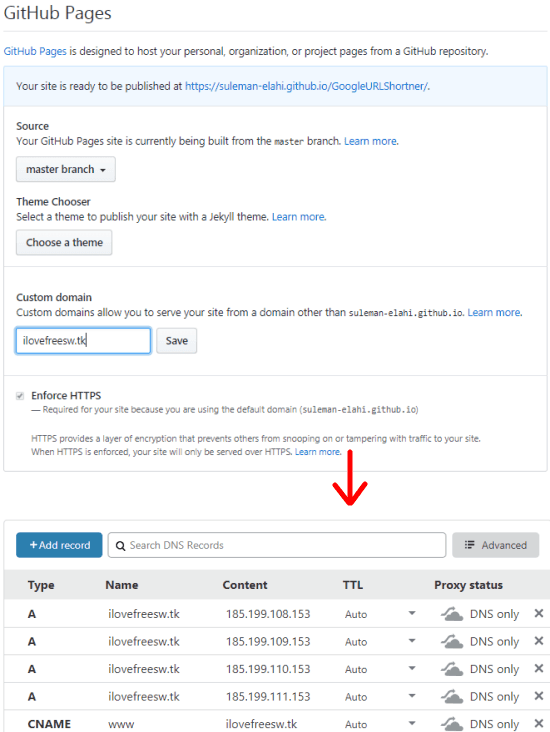
From the repository settings of this newly created repo, enable GitHub pages. Serve pages from the master branch and specify your custom domain there. In addition to this, you have to add create 4 A records in your DNS with following IPs as the value and wait for the changes to appear. The DNS propagation can take up to 5 minutes to 24 hours. If you were using Freenom then the records will be active within 30 minutes.
185.199.108.153
185.199.109.153
185.199.110.153
185.199.111.153
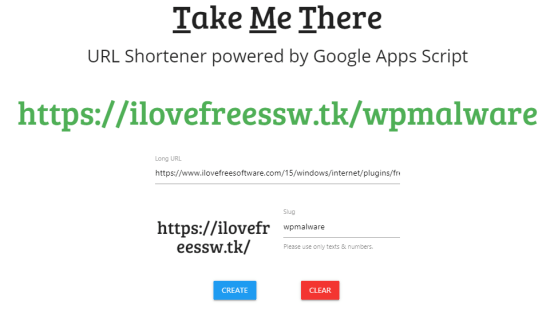
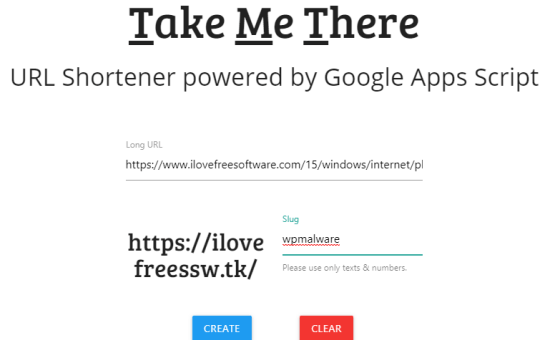
The part 4 ends here and the URL shortener is all ready to use. If all things work fine then after typing your domain in the address bar, you will land on the main interface of the tool. Here you just have to specify a long URL and a slug to shorten it. After submitting the URL and slug, you will get the shortened URL that you are free to use anywhere you like.
In this way, you can create your own, free, and serverless URL shortener in a few minutes. However, it may take hours for the DNS records to propagate. In my case, it took around an hour for the URL shortener to become functional. It works fine and you can use it for any purpose that you want. The only limitations which it has are the absence of analytics or clicks and while redirecting to the long URL, the link to the Google Apps Script is visible in the address bar of the browser. But the developer has stated that there will be some more features in the coming updates such as clicks tracking.
Wrap up…
If you want to run your own URL shortener without spending a single penny then this is the best solution that you’ve got. You just follow the mentioned guide carefully and you will end up with a functional URL shortener that you can own. All the data will stay with you and setting this up and running is very easy as well. Even if you don’t have technical knowledge, I believe you will be able to setup this.