This article covers a method to add Google Drive to Windows 10 File Explorer. The Windows 10 File Explorer comes with One Drive integrated right into the navigation panel. This makes it easy to access files from the cloud easily along with the local files. Previously, the same happened with any other cloud storage that you installed on the machine. For example, if users install the Google Drive desktop app to Windows 10, it automatically got added to the navigation panel in the File Explorer. But this is not the case anymore. Now, if you install Google Drive on your computer, it does not appear in the File Explorer and you have to use the Google Drive app to access the file.
Here I’m covering simple to follow method to get Google Drive in the navigation panel of Windows 10 File Explorer. This is possible by making some changes to the Windows registry. You don’t have to mess around in the Register Editor. Instead, you have to download a register file and run it. With that said, let’s dive in and see how it’s done.
Also read: How to Add Same Columns to All Folders in Windows 10 File Explorer?
Add Google Drive to Windows 10 File Explorer
Before getting right into it, I want to clarify that you have to install Google Drive on your computer to make this work. This method only creates an entry for Google Drive in the File Explorer but if you don’t have Google Drive installed, it just won’t work. You’ll still get the entry but it will lead to an error message.
To get the Google Drive entry in the Windows 10 File Explorer, visit this link and download the respective repository from the GitHub. Extract the downloaded ZIP file to obtain the “GDriveWin10.reg” file.
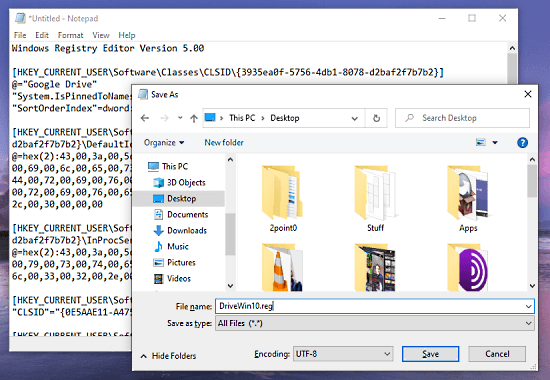
Alternatively, you can access the content of the same file from here. Simply copy the entire text to your clipboard then open Notepad and paste it there. After that, go to the File option and select the ‘Save as…’ option. On the ‘Save as’ window, change the ‘Save as type‘ to “All Files (*.*)” and enter a name for the file with “.reg” at the end.
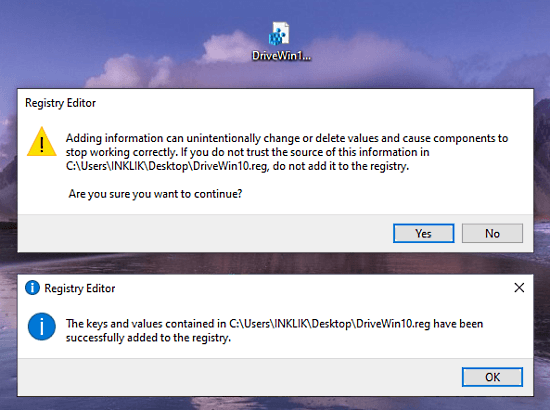
After extracting or creating the register file, double click on it to run. It prompts for Administrative privileges, allows that permission. After that, it shows you a warning message that you are about to make changes to the registry, click ‘Yes’ to continue. Once done, you get a success message on the scene. At this point, your work is done, all you have to do now is restart the File Explorer.
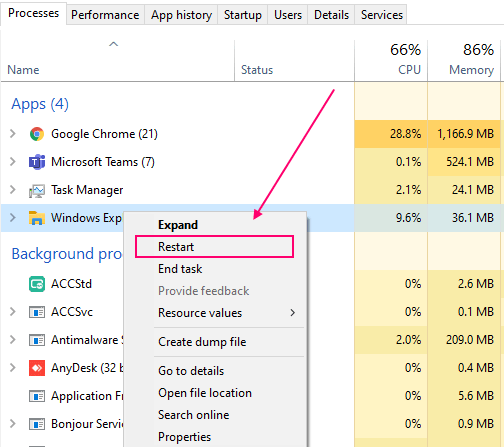
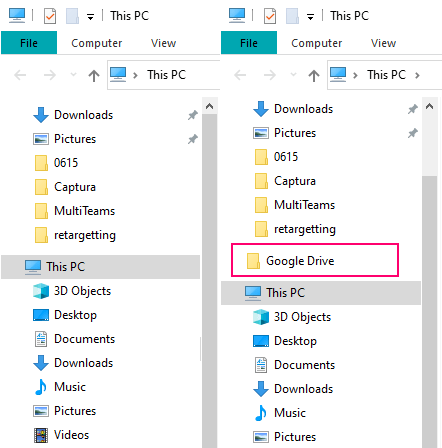
Open a File Explorer window and then open the Task Manager on your computer. In the Task Manager, go to the active tasks and locate the Windows File Explorer (Windows Explorer). Right-click on it and choose ‘Restart’ from the context menu. This takes a minute to restart the explorer. Once done, you’ll get a Google Drive option in the Windows Explorer navigation pane.
Closing Words
By following this method, you can easily add Google Drive back to the navigation panel to Windows 10 File Explorer. This makes it easy to access files from Google Drive by eliminating the friction of moving back and forth between the Google Drive desktop app and File Explorer.