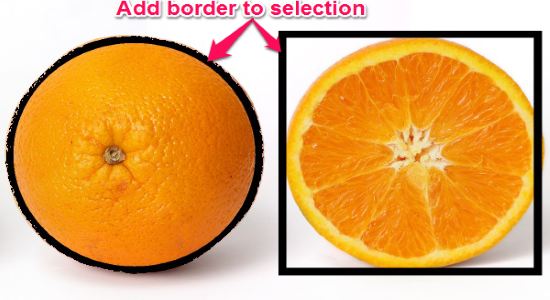
This tutorial explains how to add a border to selection in Paint.Net. After going through this post, you will be able to easily add a stroke or border to any selected part of an image in Paint.Net. In this tutorial, I will explain two different methods to add a border to selection in Paint.Net. Among these methods, one of them requires a plugin called “Pyrochild – Border“, whereas, the other method is a simple trick which you can perform in Paint.Net to add borders without using any third-party plugins.
Paint.Net is no doubt one of the best photo editing software, but it doesn’t have any direct built-in option using which you can add a border to your selection. But, you don’t have to worry about that anymore, as you can perform any of these two different methods and add a border to your selection in Paint.Net with ease.
How to Add Border to Selection in Paint.Net:
Now, let me walk you through both the methods using which you will be able to add a border to any selected area of an image in Paint.Net.
Plugin to Add Border to Selection in Paint.Net:
The plugin which I will use to add a border to selection is “Pyrochild – Border”. So, let’s get started with the required steps.
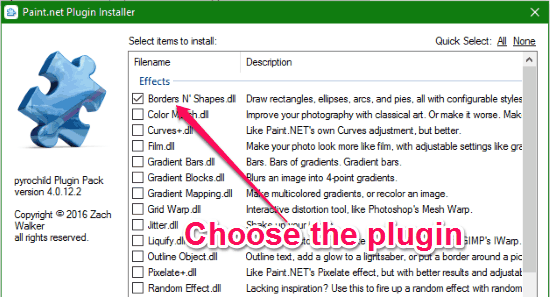
Step 1: First, you need to download the plugin and then extract the ZIP file. After that, run the EXE file and choose “Borders N’ Shapes.dll” plugin from the entire plugin pack. Then hit the “Install” button and the plugin will be installed and integrated with Paint.Net on your PC.
Step 2: Now, simply open up Paint.Net and import the image in which you want to add a border. After that, make any selection on the image and then go to “Effects → Render → Borders N’ Shapes” from the menu bar at the top.

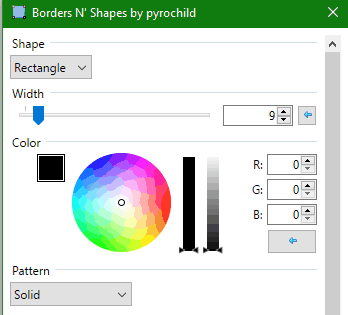
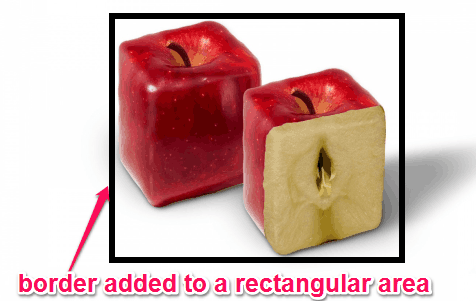
Step 3: As soon as you click on “Borders N’ Shapes”, a popup window will appear where you will be able to choose the following border options: Shape, Width, Color, and Pattern. Now, let’s say you have selected a rectangular area on the image, then choose the shape as “Rectangle”, custom width, choose a color for the border, and the line pattern (either as Solid, Dotted, or Dashed). In the same manner, you can also make a selection on any image and then select the border shape as Ellipse, Arc, and Pie.
Step 4: When you’re done with selecting all the border options, click “OK” and the border will be added to the selection instantly. Remember, while configuring the options, it will also display the changes in real-time such that you can get a perfect border as you desire.
Here is a small video I created to walk you through the above process:
How to Add Border to Selection in Paint.Net Without Any Plugin:
If you’re not fond of third-party Paint.Net plugins, then this method will be the best option for you to add a border to selection in Paint.Net. Simply, follow the steps below to add a border without using any plugin.
Step 1: To get started, simply open up an image in Paint.Net for adding a border. After that, you need to remove the entire background of the image except for the object to which you would like to add a border. For this, you can use the “Magic Wand” tool and click on the background and then press “Delete”, or just use the normal eraser.
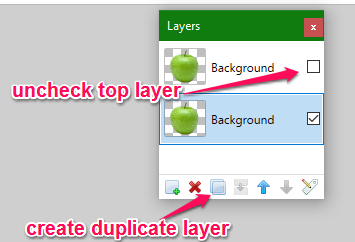
Step 2: When you’re done removing the background, you need to create a duplicate layer on the “Layers” box, as shown below. After creating a duplicate layer, simply uncheck the top layer and select the new duplicate layer for editing.
Step 3: Now, click on “Adjustments” at the top menu bar and select the option “Brightness/Contrast”. Then you need to drag the brightness slider to “-100” and the contrast slider to “100“. As soon as you do that, the entire object will turn black, as shown below.

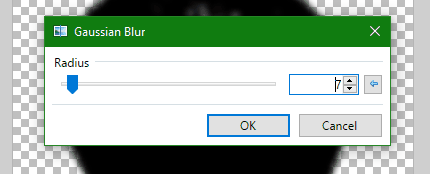
Step 4: After that, you need to go to “Effects → Blur → Gaussian Blur” from the menu bar. Now, drag the “Radius” slider until it reaches “7” or a little more and then click “OK” to apply the blur.
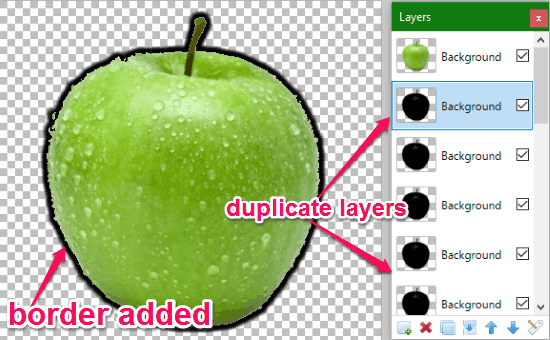
Step 5: Once you’re done applying the blur, simply re-check the top layer on the “Layers” box and you will notice a border around the selected object or area. Now, if you would like to darken the weight of the border, then keep creating duplicate layers of the same duplicate layer which you have created in Step 2.
You can see the steps mentioned above in the video below:
My Final Verdict:
If you’re looking for a way to add a border to selection in Paint.Net, then you can go ahead and use any of the methods explained in this post. Personally, I think the plugin method is very easy and effective. However, if you don’t like plugins, then you can go through the second method to add a border to any selection in Paint.Net.
I hope you find this post useful for adding border to selection in Paint.net.