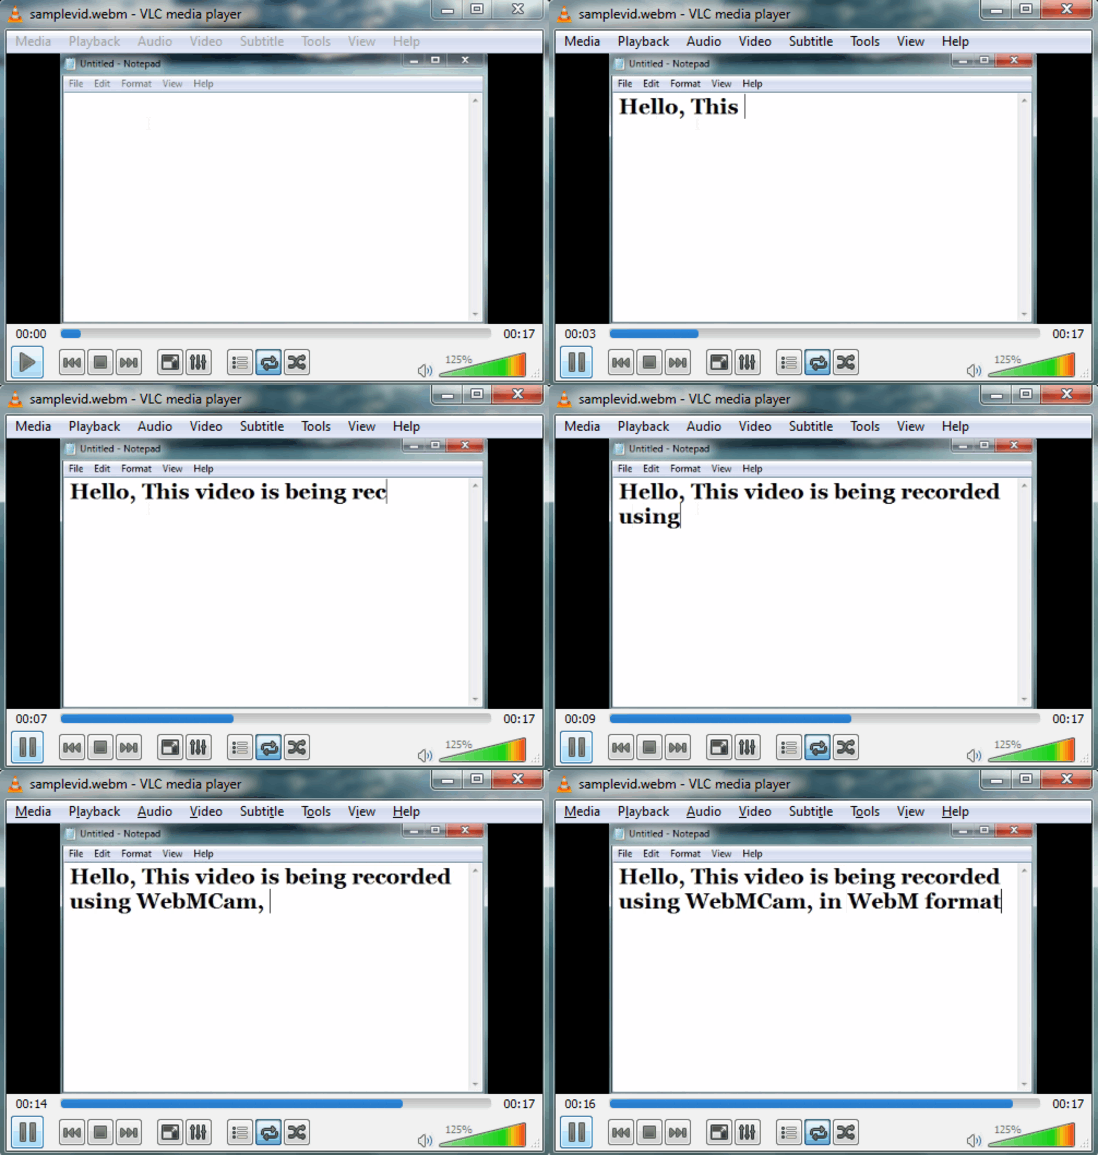
WebMCam is a pretty useful free software to record desktop screen in WebM format. Simple and easy to use, WebMCam captures your desktop’s state as frames and then saves them in the WebM video file format. To do so, WebMCam uses the FFMpeg multimedia framework. While this little application works great as such, it has a few configuration options as well. You can change the number of frames captured per second (FPS), as well as resize the capture area to any dimensions (before starting the capture). You can also change the default image format in which the static frames are saved. In addition, you can also delete selected frames before saving the video file. To top it all off, WebMCam is available as a standalone portable application that requires no installations or anything. Sounds interesting? Let’s find out more.
WebMCam: User Interface
As mentioned before in the article, WebMCam is available as a standalone portable application. This means that there are no installations or setups required. All you have to do is download the lightweight (just about 600 KB) application from its homepage, and run it. Here’s how WebMCam’s user interface looks like:
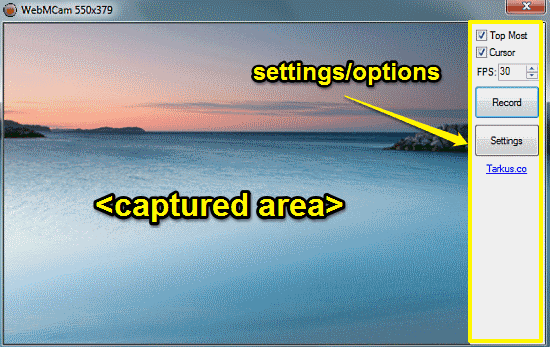
Pretty simple, right? As illustrated by the above screenshot, WebMCam features a really barebones user interface, comprised of just a singular window. Primarily, this window is a frame that shows some part of your desktop screen. The part shown inside WebMCam’s frame is the area that can be captured as a WebM video. Obviously, you can resize this frame to your liking using the standard window resizing handles at any corner of it (The title bar shows the dimensions in real-time as you resize the window). Apart from that, there are just a few buttons and options to the right. These let you start/stop recording, change the application’s settings, alter the frame rate (number of frames captured per second) etc.
How To Use WebMCam To Record Desktop Screen In WebM Format?
Important Note: Before you can get started with WebMCam to record your screen, you need to have the latest build of FFMpeg, as that’s required by WebMCam to record the screen. Here’s a little step by step process on how to get FFMpeg up and running on your computer.
Step 1.1: Download the latest Static build of FFMpeg (32 bit or 64 bit according to the system that you have) from this page. It’s available as a 7z archive. Once downloaded, extract the files in the archive.

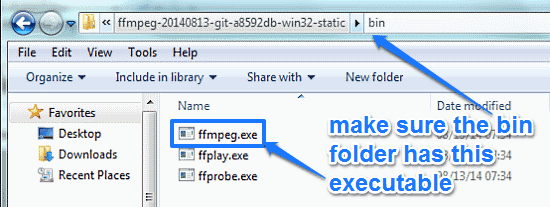
Step 1.2: Once the files have been extracted, head over to the “bin” folder. You’ll see that there are three executable files in there. However, the one we’re interested in is “ffmpeg.exe”. Make sure it’s in there, as it will be required to configure, and hence, run WebMCam, as detailed in the next subsection.
Now that we have FFMpeg, we are all set to configure WebMCam and use it to capture desktop screens.
The following steps illustrate how it’s done:
Step 2.1. Run the downloaded standalone WebMCam executable, and click the Settings button on the right. This will give you a window as shown below. This window lets you configure all the general options related to WebMCam.
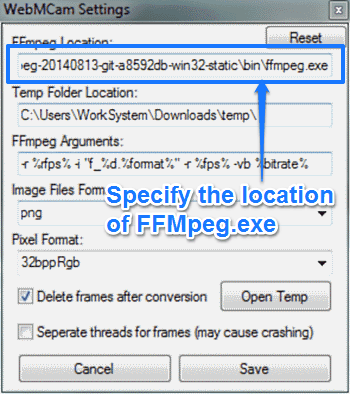
As illustrated in the screenshot above, you have to specify the location of ffmpeg.exe here. To do so, simply copy the location of ffmpeg.exe in the bin folder (As extracted in the previous steps) and paste it in the FFmpeg location text field. This will tell WebMCam to use ffmpeg executable stored in the specified location for the encoding of the WebM file.
Apart from that, you can also configure few other options here, such as the location of temporary files, default frame save format etc. However, it’s best to leave these options as such. Once done, click Save.
Step 2.2. That’s it. We’re now ready to record the screen as a WebM video file. First, drag and resize WebMCam’s frame to specify the screen area that you want to record. The dimensions are shown in real time in the title bar as you do so. You can also change the frame rate from the FPS option on the right, to make the video fast or slow.

Step 2.3. Once you’ve done that, press the record button. WebMCam will now start recording your screen and the Record button will change to Stop. You can freely move WebMCam’s frame around on the desktop during recording, if you want.
Step 2.4. When you’ve recorded all you want, click the Stop button. You will now be presented with an option to save your video. Give it a name and save location, and click Save. Next up, WebMCam fires up the frame editor, which gives you the ability to delete the unwanted frames from your WebM video, with the preview of each frame on the right. Check out the screenshot below:
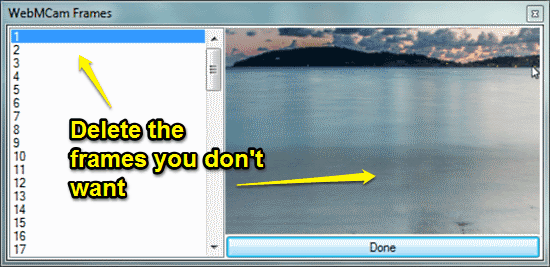
To delete the frames you don’t want, simply select them via mouse, and select Delete from the right click menu. When finished, click Done.
That’s it! Your desktop’s recording as a WebM video file will be instantly saved to the location specified by you. You can use a media player like VLC to view this video. Wasn’t that hard now, was it?
Also See: Free Screen Recorder To Record Screen As Animated GIF
Conclusion
WebMCam is a really nifty freeware application to record desktop screen in WebM format. It’s lightweight, simple, and works the way it’s supposed to. It can come in really handy in situations when you want to create some desktop tutorial videos and share them with others. Add to the fact that it’s portable, and WebMCam becomes even better. Do give it a try, you’ll love it.