This tutorial talks about how to extract frames of animated GIFs in Paint.Net. At the end of this post, you will be able to learn how to extract all the frames from an animated GIF file in Paint.Net. If you’re a Paint.Net user, then you might have noticed that when you open up a GIF file in Paint.Net, it only displays the first frame as a still image. It actually loads the file with its built-in GIF codec which only supports the first frame and doesn’t offer any native option to view or extract other frames. But, I have found a way using which it is possible to view all frames of an animated gif in Paint.Net, and then you can save any frame of your choice.
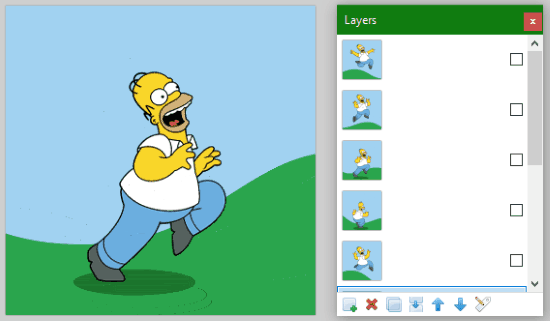
Actually, there is a free plugin for Paint.Net called “Animated Image” which allows you to extract all the frames from a GIF file. All the extracted frames by this plugin will be visible as new layers on the “Layers” box of Paint.Net.
So, let us get started and see how to install and use this plugin to extract GIF frames in Paint.Net.
How to Extract Frames of Animated GIFs in Paint.Net:
Step 1: To get started, the first thing you need to do is download the plugin “Animated Image” on your PC. After that, you need to extract the ZIP file to proceed with installation of this plugin. Before that, please make sure that you’ve closed Paint.Net if it’s open.
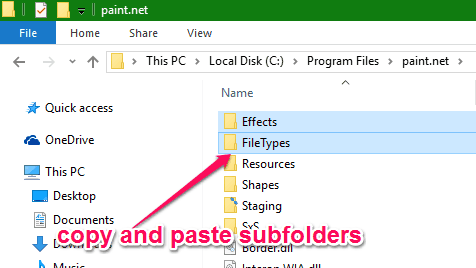
Step 2: Now, open up the folder extracted from the ZIP file and then copy the subfolders “Effects” and “File Types”. Then you need to navigate to the folder in which you have installed Paint.Net. After opening the folder, paste the copied subfolders (Effects and File Types) and then click “Yes” if it asks for merging the folders. Do note that you need to merge folders, and not replace the existing ones.
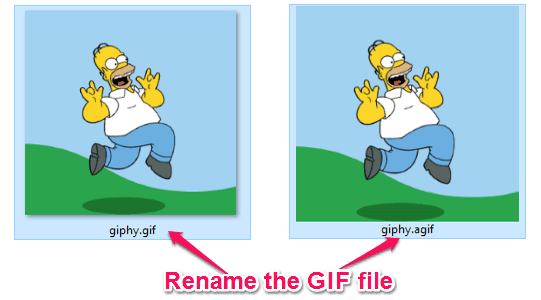
Step 3: As soon as you paste the subfolders, the plugin will automatically integrate with Paint.Net. Now, before you go ahead and open a GIF file you need to rename the file by replacing the suffix “.gif” to “.agif”. For example, if you have a GIF file named, “ABC.gif” then you have to rename it as “ABC.agif”. This is necessary because Paint.Net loads GIF files with its built-in GIF codec and to make it use the plugin for opening GIF files requires renaming the file.
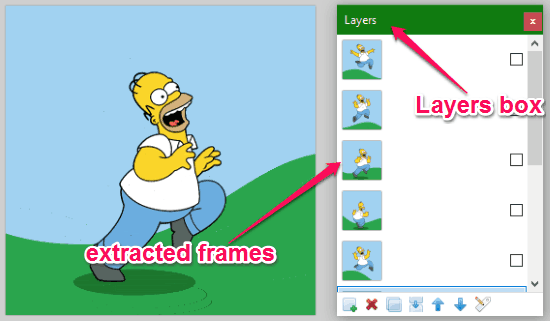
Step 4: After renaming the GIF file, simply open it up with Paint.Net and then it will automatically extract all the frames from the GIF file. You will be able to see the extracted frames as layers on the “Layers” box. There will be 1 layer for each frame.
Now, if you would like to save the frames individually then all you got to do is select a layer (frame) and then save it as JPG, PNG, etc. Otherwise, you can also copy the frame and then paste it on a blank canvas to save.
My Final Verdict:
If you’re looking for a way to extract all the frames of a GIF file using Paint.Net, then this tutorial can help you do that with ease. You can simply integrate the “Animated Image” plugin with Paint.Net and get all the frames of any GIF file and save them individually as normal images.
I hope you find this tutorial interesting and useful.