Screen recording in Windows 11 Snipping Tool is probably the best feature of this year that is added to Windows 11. Apart from taking screenshots, you can now record any area on your desktop using Snipping Tool in a few clicks. You can record screen for as long as you want and save the recorded video as MP4 file. For now, the screenshot annotations are not available for recordings as you can just record a screen area and save it.
There are many free screen recorders out there. Even though Windows includes one screen recorder aka Game Recorder in Xbox, most people don’t use it. But a lot of people do use Snipping Tool. Maybe that’s why they are now working on adding a screen recording option in it. After redesigning the Snipping Tool, in the developer build of Windows 11, you can now record screen and save the video recording. Here in this post. I will show you how.
How to Record Screen using Snipping Tool in Windows 11?
The very first thing that you have to make sure that you are in Windows Insider dev channel. I am on build 25252 and it works on my PC. But you might not have it here and thus you will have to wait for a few more days.
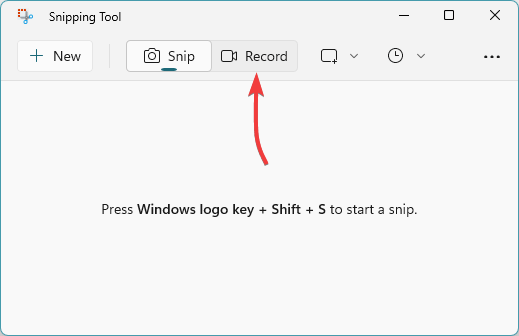
So, just first launch the Snipping Tool by finding it in Start. On the main UI, you will see the Record option if it is enabled for you.
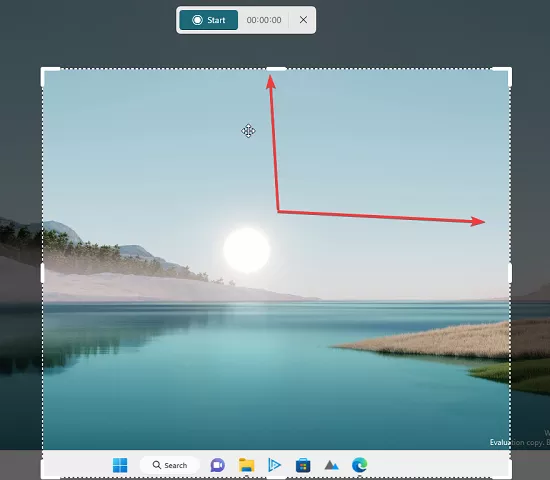
Use the record button and then select an area on the screen that you’d like to record. After that, you just start the recording and record for as long as you want. When done, you just need to click on the stop button on the small popup at the top side.
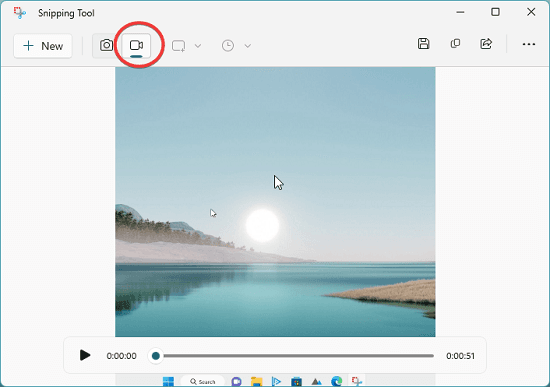
It will process your recording now and will show it to you in the Snipping Tool interface. You can see this in the screenshot below. Now, you can save it as an MP4 file or start a new recording.
As much as I am happy to see them include a recording option in Snipping Tool, it does come with a few caveats.
- No Sound: In my opinion, this is the biggest disadvantage of this Snipping Tool recorder as of now. It cannot record system audio or the microphone input. Maybe they will add the audio recording option in the later updates, for now, it just doesn’t work.
- Only Area Recording: You can only record a selected area on the screen. No default options for full screen recording or window recording are available as of now. You have to manually select the entire screen every time whenever you want to record your desktop.
- No Annotation and Delay Capture: Just like screenshots, you can use delay and annotation features for the screen recording.
Closing thoughts:
I am really excited to see the new screen recording option in my Windows Insider Dev build but its limitation is keeping me away to use it as my go to screen recorder. There is a lot of improvement to be done. And I hope when they release it in the stable Windows 11 build, there will be more features.