This tutorial explains how to password protect websites on Cloudflare. To do this, here I will talk about 2 simple and free methods that you can use to password protect your website or specific pages or routes. If you want to add pin or password-based protection to your websites without any flimsy methods or JavaScript tricks then this tutorial is for you. The methods used in this post here are very strong and cannot be bypassed.
Sometimes, you may want to allow only specific users to access your website. Even though there are tricks and tools if you are using WordPress but you can avoid all that if you are using Cloudflare to host the domain of your websites and the apps. Cloudflare has a built-in tool to add access control to your websites with ease. And you can use both the methods for free by allowing access to up to 50 users.
How to Password Protect Websites on Cloudflare?
Method 1: Use Octauthent to Password Protect your Websites Hosted on Cloudfalre
This is a very simple and straightforward method to add password protection to your websites. Octauthent is basically a third party Cloudflare app that allows you to protect all or certain pages of your websites. It has a free as well as premium version. The free plan allows you to add up to 50 users to the authorized list who can access the website. There are no limits on how many times a user can log in.
The login session can persist for 24 hours or more and you can set a custom duration for it as well. All it asks you is your website URL, path, and API token from your Cloudflare account.
You can use these steps to use Octauthent and configure it to add passwords to your websites.
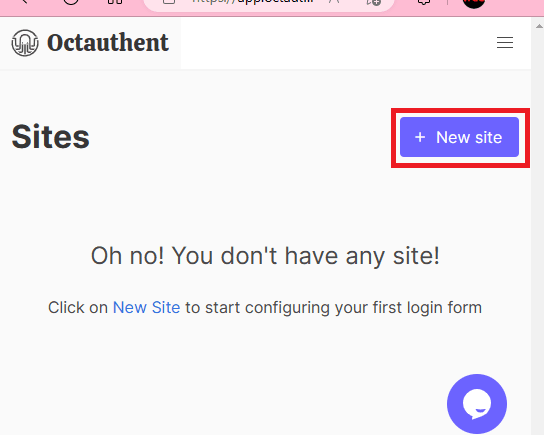
Step 1: Create a free account. From the main dashboard, click on New Site button.
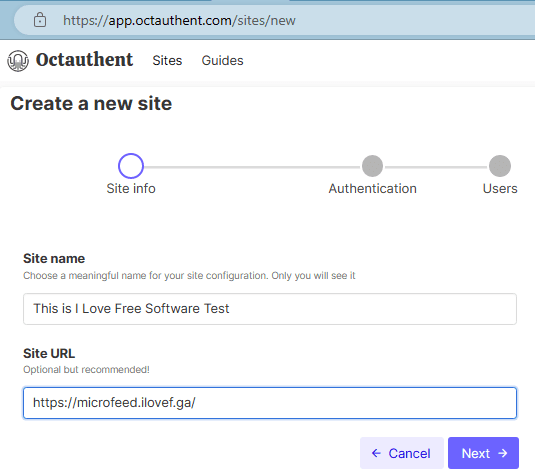
Step 2: Start by adding your site name and site URL.
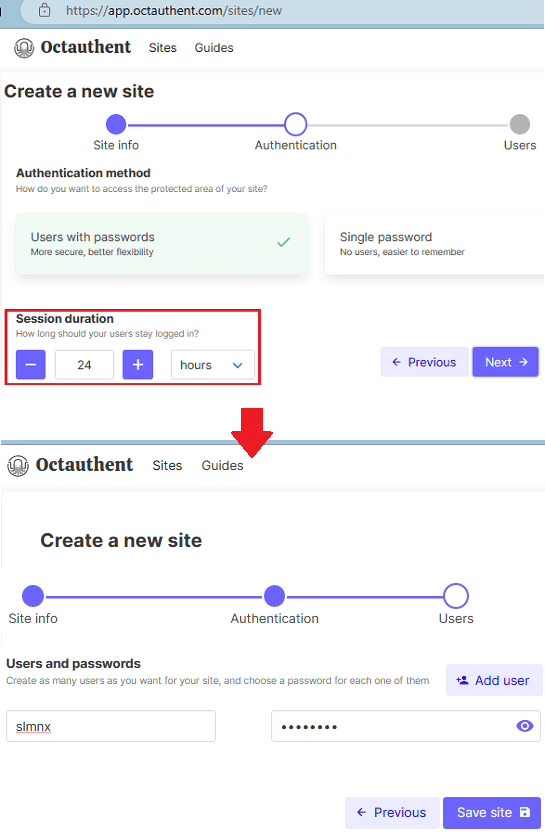
Step 3: Specify the login session retention duration and then proceed further to add list of users who you want to give access. You can add pairs of username-passwords or email-password.
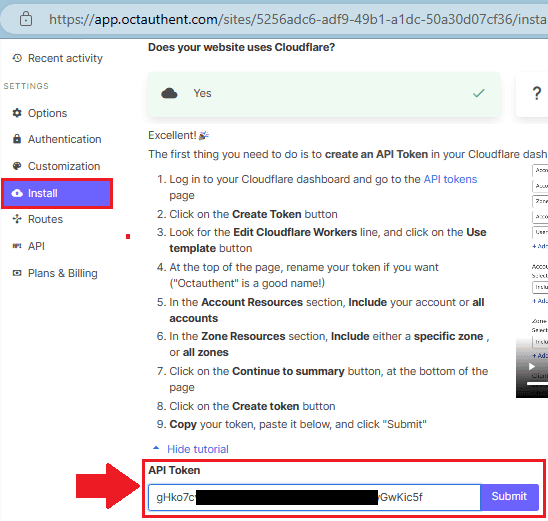
Step 4: Finally, you save the changes and the last thing you have to do is specify the API token for your Cloudflare account. Just paste it at the bottom and then save the changes. If you don’t know how to obtain the API token, then there is a very good demonstration on the same page that you can watch.
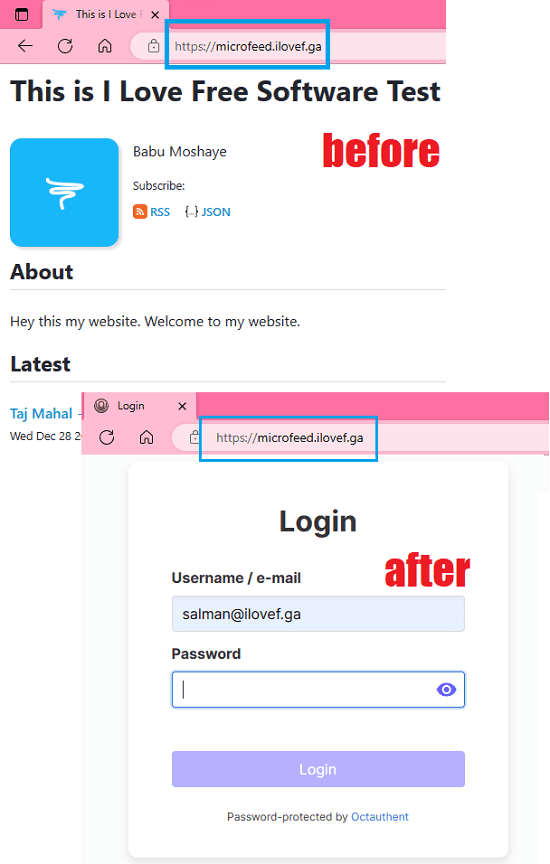
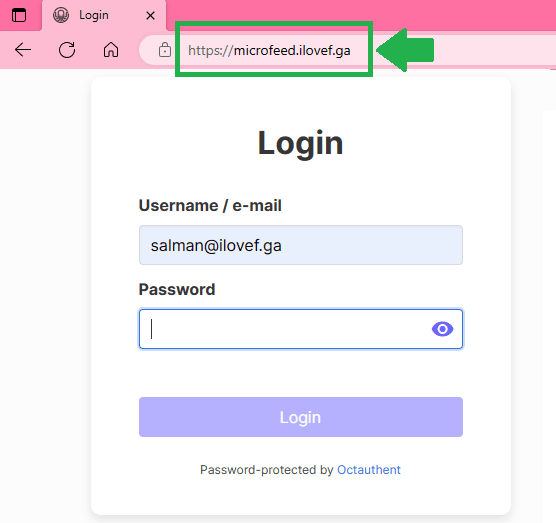
Now, you try visiting the website now. You will see it will ask for username and password. And unless, you enter the correct username-password or email-password combination, you will not be able to use it. This is as simple as that.
This is one simple and quick way to add password to your Cloudflare websites for free. Setting up Octauthent takes only a few seconds. Just keep in mind that while specifying URL of your website, you can also specify URL path patterns to block those routes effectively.
Method 2: CloudFlare Zero Trust
CloudFlare Zero Trust is part of Cloudflare OneDash now. This is a collection of industry standard tools that you can incorporate in your businesses. One of these tools is Cloudflare Access to manage access controls on your apps and website by the public. It works pretty much in the same way as the tool above. Here it has a free plan in which you can add up to 50 users and it uses pin-based authentication. The verified users will be asked to enter a pin that it will send to their email addresses.
The authentication pin will only be sent to the email that exists in the user groups that you will also create.
Here are the steps to use Cloudflare Zero Trust to password protect your websites.
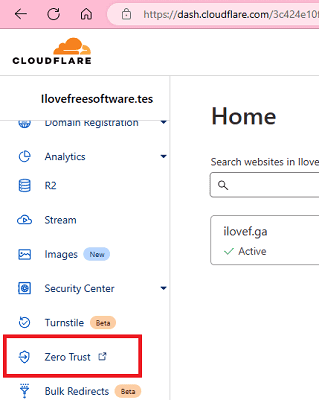
Step 1: Log in to Cloudflare dashboard and then launch Zero Trust from there.
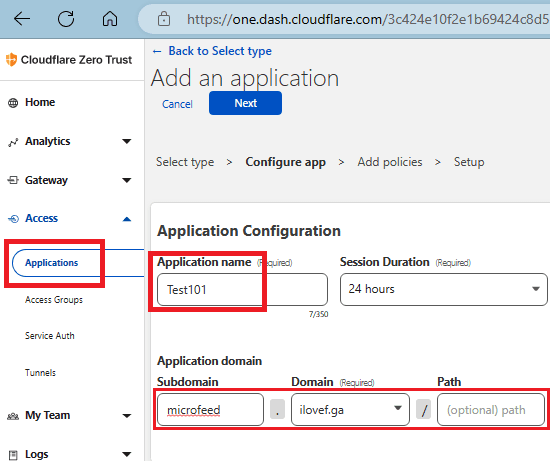
Step 2: Go to Access section and then add create the app here. It will ask you to enter name and URL of the website. Add the subdomain here as well as the URL route patterns that will be protected now.
Before this, you will have to subscribe to the free plan of Zero Trust. And to activate it, you will need to add credit card or PayPal as payment method.
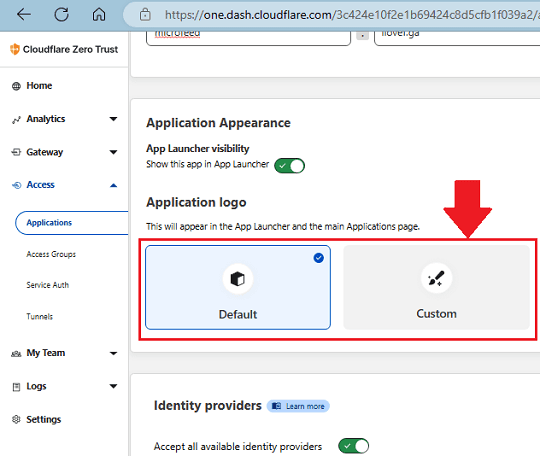
Step 3: Now, you can customize the login page a bit by adding the logo of your company or let it stay as default.
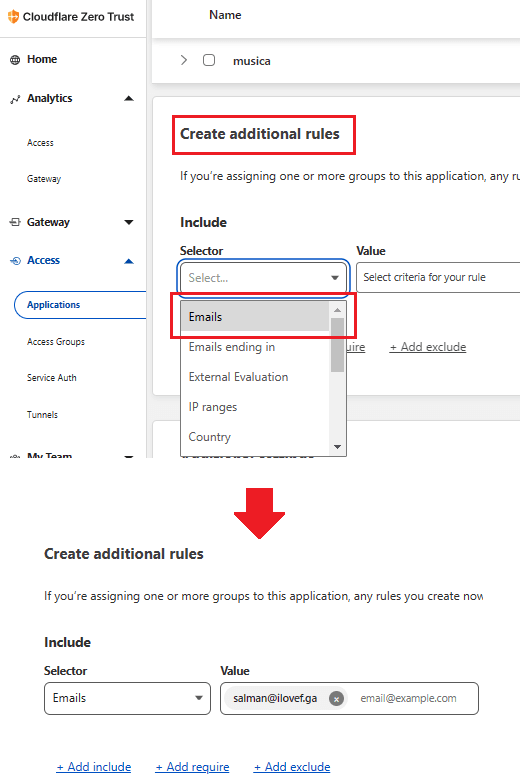
Step 4: This is the final step, here you have to create a policy. This section will basically specify which user group will be allowed to access the website. So, you just give whatever name you want for the policy. In the “Create additional rules” section, you need to select Email option and specify emails of the users that will be allowed to use the protected web application.
Step 5: Done. Now just save the changes and exit.
From now whenever you try to access the website that you have protected, the following screen will show.
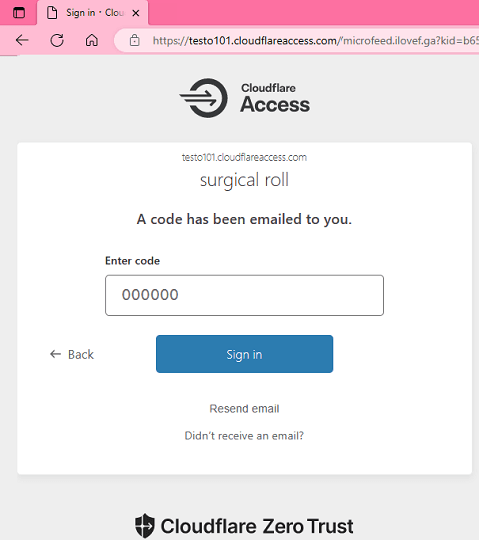
If you are one of the users who is allowed to access the website, then enter your email here. It will send you a code that you have to enter to gain access to the website.
The session will last as specified in the Access settings on OneDash of Zero Trust. You can change those settings if you want and activate more filters as well.
Closing thoughts;
If you are using Cloudflare to host DNS for your website then you can use the access control tools as well. I have added two such tools which take help of Cloudflare to add password authentication to your websites for free. Personally, I will recommend you to Zero Trust as it is production level website and web apps security suite. But if you want something quick and easy and then Octauthent is a good option as well.