This tutorial explains how to view diagnostic data in Windows 10. We all know that Microsoft collects various data on Windows 10 (which includes browsing history, device configuration and connectivity, installed apps, and more) to improve its product and fix bugs using diagnostic data. We already have the feature to set diagnostic data to full or basic but there was no such option to view diagnostic data on Windows 10. Fortunately, Windows 10 now brings Diagnostic Data Viewer feature to see the events and other information collected by diagnostic data.
To view diagnostic data in Windows 10, you will need Settings and Diagnostic Data Viewer app (by Microsoft) in your Windows 10 PC. Settings app helps to activate Diagnostic Data Viewer and the app lets you view the information collected by diagnostic data.
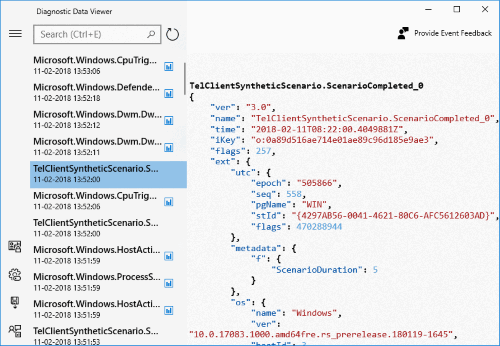
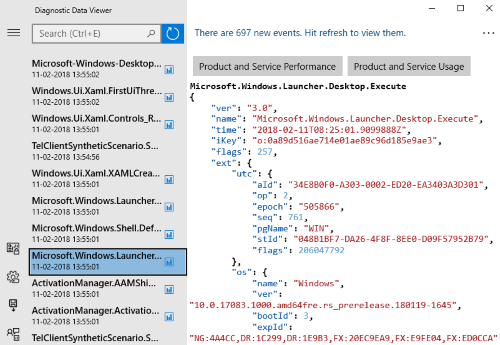
In the screenshot above, you can see diagnostic data viewer page.
Do note currently the option to view diagnostic data using Settings is available in 17083 or higher preview build of Windows 10. You won’t find this feature in Fall Creators Update or earlier builds of Windows 10. If you don’t want to use preview build, then you can wait for this feature to come in the next stable version of Windows 10.
How To View Diagnostic Data In Windows 10?
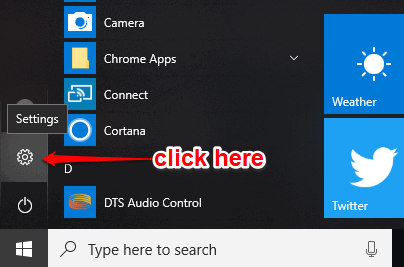
Step 1: In this simple step, you need to click the Start button and then select the “Settings icon“.
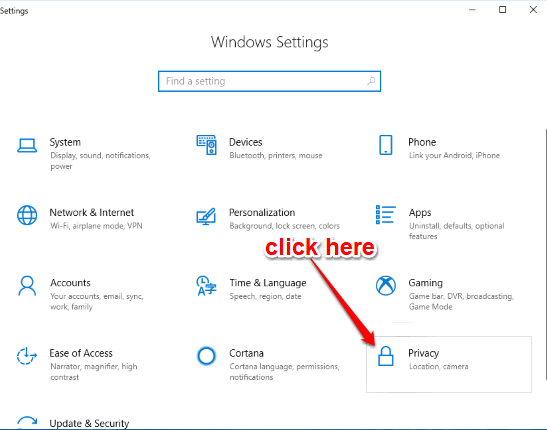
Step 2: Settings app is launched. Under that app, press “Privacy” menu.
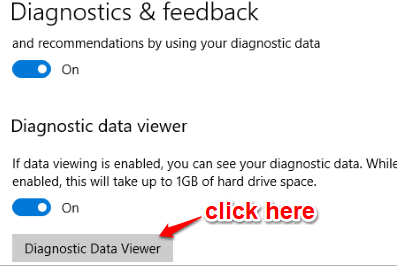
Step 3: Privacy menu has some options that you can see on the left section. Among those options, select the “Diagnostics & feedback” option. When you have done this, you can see “Diagnostic data viewer” option at the right side. There is a button for that option which is turned off by default. Turn on that button.
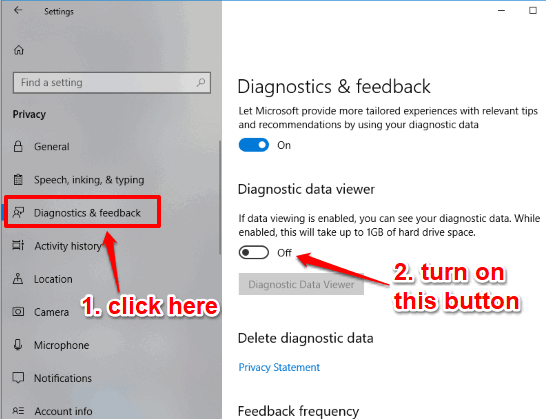
Step 4: “Diagnostic Data Viewer” button will activate after turning on Diagnostic data viewer option. Click on that option.
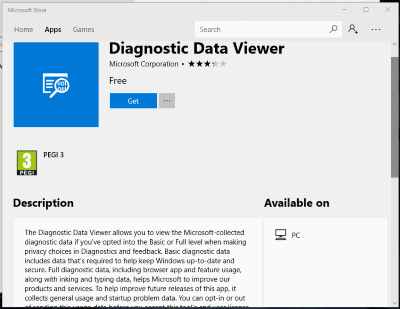
Step 5: Microsoft Store app will open prompting you to install Diagnostic Data Viewer app. Since you are using this feature for the first time, so it is mandatory to install this app.
Step 6: After installing that app, use Settings app and press “Diagnostic Data Viewer” button again. This time Settings app will launch diagnostic data viewer page. It will show the list of events (like high CPU usage, desktop text input session start, Search indexer, Windows launcher desktop execute, and a lot more) and information related to those events.
You may also like to check how to restrict background data for WiFi and disable timeline in Windows 10.
The Conclusion:
The feature to view diagnostic data in Windows 10 is good. It can help you for some technical assistance and you can also check by yourself which type of items are being used for diagnostic data. I didn’t find it very useful for me but those who want to use this feature, then this tutorial is gonna help you activate and view diagnostic data in Windows 10.