This tutorial describes how to turn on Remote Assistance feature in Windows 10. During the early days of the development of personal computing, setting up a new computer used to be a tough task. There were a thousand settings that needed to be checked and re-checked, and even more options that had to be configured while installing an Operating System, or even a program.
However, that ain’t the case anymore. As Operating Systems and programs have advanced, setting them up has gotten easier. And it couldn’t be truer for the latest and greatest Windows 10, which, despite being super advanced, is ridiculously easy to set up. But there might be times when you find yourself stuck with a new installation/setup.
For times like these, Windows 10 includes a super cool Remote Assistance feature, that allows you to seek the help of a friend/technician in setting up your computer over the Internet. Using the Remote Desktop Protocol, your friend can temporarily control your computer and view your desktop to help in setting it up. Conversely, you can help your pal in setting up his/her computer as well. Exciting, isn’t it? Let’s see how to turn on Remote Assistance feature in Windows 10.

How To Turn On Remote Assistance Feature In Windows 10?
Enabling the Remote Assistance feature in Windows 10 is a straightforward affair, and requires nothing more than a minute of effort. Here’s a detailed step by step illustrative tutorial, to get you going:
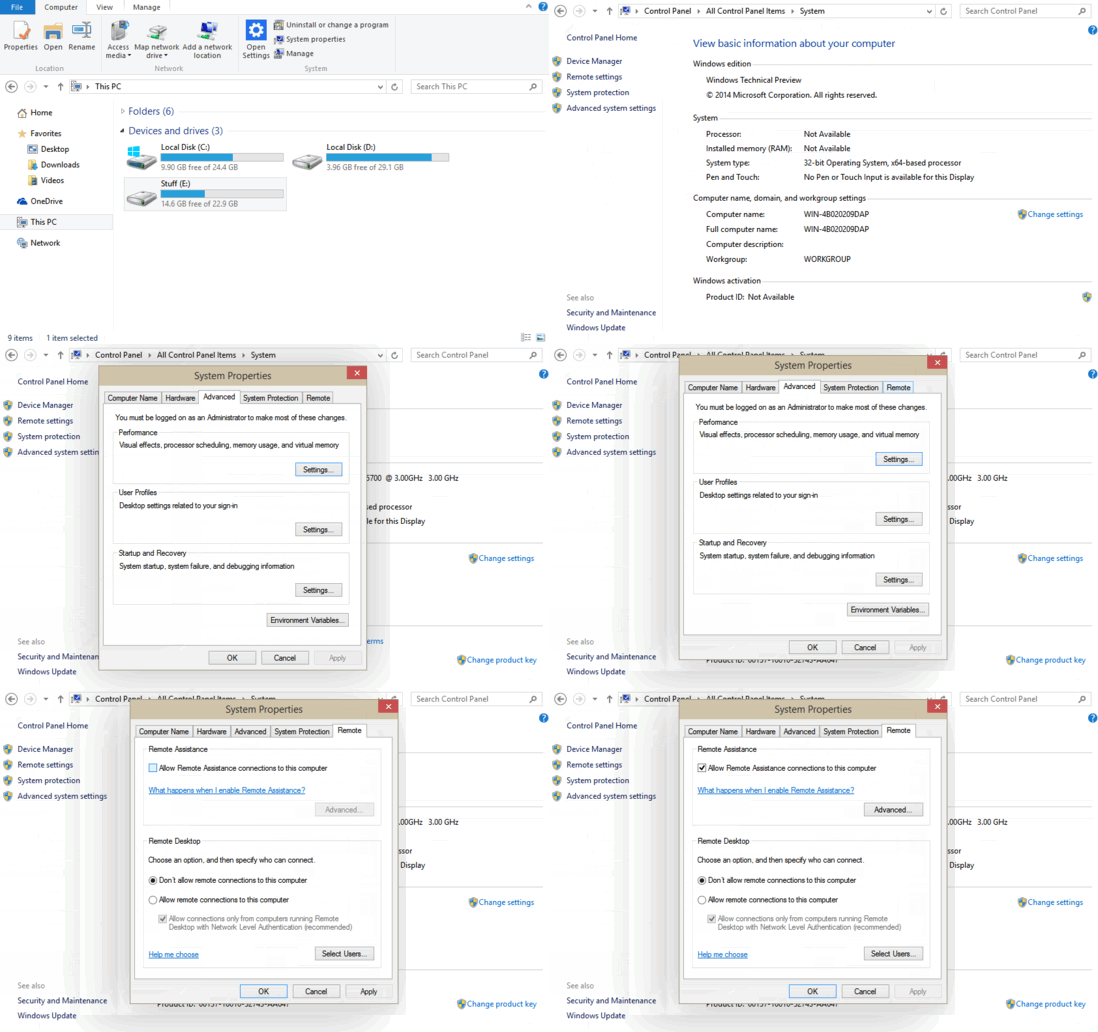
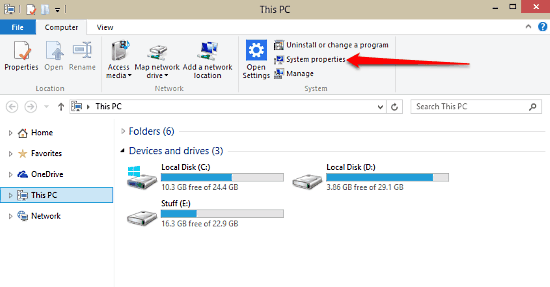
Step 1: Open up This PC (previously known as My Computer). Hit the System Properties option on the Computer tab of the Ribbon Menu.

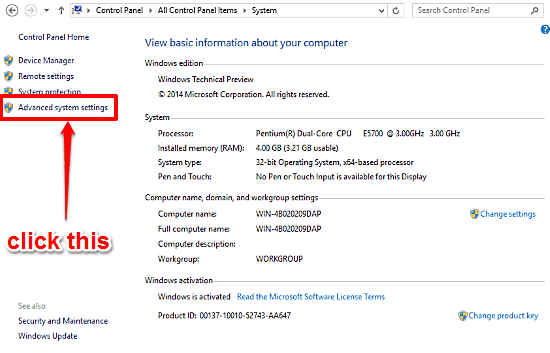
Step 2: The System Information pane shows up, where you can see important information about your computer. Click on the Advanced system settings link on the top left.

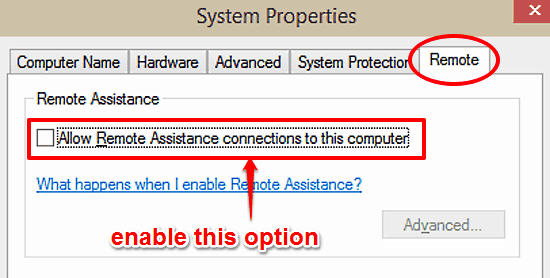
Step 3: The System Properties dialog box, featuring a tabbed interface, lets you change your computer’s important properties on a much more granular level. Click on the Remote tab, and under the Remote Assistance sub-section, enable the “Allow Remote Assistance connections to this computer” option. Click Apply > OK. That’s it. Not so hard, right? Check out the screenie below:

Also See: Change Idle Time Duration After Which PC Goes To Sleep In Windows 10
Conclusion
The Remote Assistance feature is an extremely useful Windows native functionality and can come in really handy when you’re stuck in the middle of an important installation/setup. All you have to do is enable it. Give it a shot, I’m sure you’ll love it.