This tutorial explains how to reset thumbnail cache in Windows 10. Microsoft’s line of Operating Systems has always been incredibly feature loaded and user-friendly ever since its early days, with each subsequent iteration of the popular OS introducing a barrage of new improvements over its predecessor(s). And the newest offering, Windows 10 is no different, having more enhancements than can be counted. Specifically, Windows Explorer is now more powerful than ever and lets you manage and organize your files easily and efficiently.
You already know that Windows Explorer can automatically display thumbnails for supported image file types (e.g. JPG, PNG). In fact, this is something it’s been doing for quite some time now. And while this is certainly a useful feature, there are times when the thumbnails aren’t properly displayed (or not displayed at all). This can be due to a number of reasons (e.g. such as a large number of files) and makes up for a less than perfect user experience.
But it can be easily set straight in Windows 10, simply by clearing and resetting the thumbnail cache. Sounds interesting? Head over to the other side of the break, and find out how to delete and reset thumbnail cache in Windows 10.

What Is Thumbnail Cache, And What Does It Mean To Reset It?
Every time Windows displays thumbnails for supported file types (JPG, PNG etc.) in a folder, it also caches them, so that the thumbnails don’t have to be regenerated every time the contents of the folder are accessed. While this does achieve its intended purpose of speeding up the display of previews, it can sometimes also lead to problems, such as incorrectly displayed thumbnails. This mostly happens due to thumbnail cache getting corrupted. However, this can be easily fixed by deleting the existing cache file. This essentially resets the cache, as the thumbnail previews have to be generated and cached afresh.
How To Delete And Reset Thumbnail Cache In Windows 10?
Deleting (and hence, resetting) the thumbnail cache in Windows 10 is an extremely simple and straightforward affair. Here’s how to get this done, illustrated via a step by step tutorial:
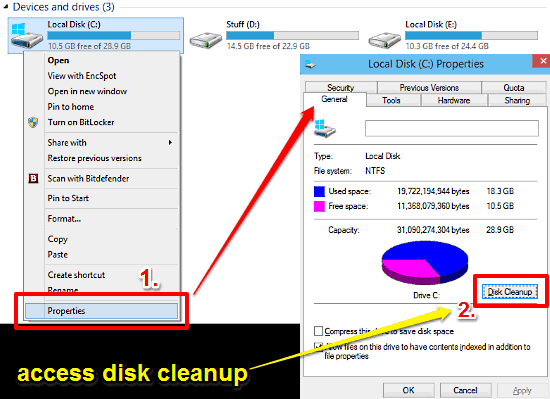
Step 1: Right click on the system partition (the one Windows is installed on), and click on Properties. When the disk properties dialog box comes up, click on the Disk Cleanup button.

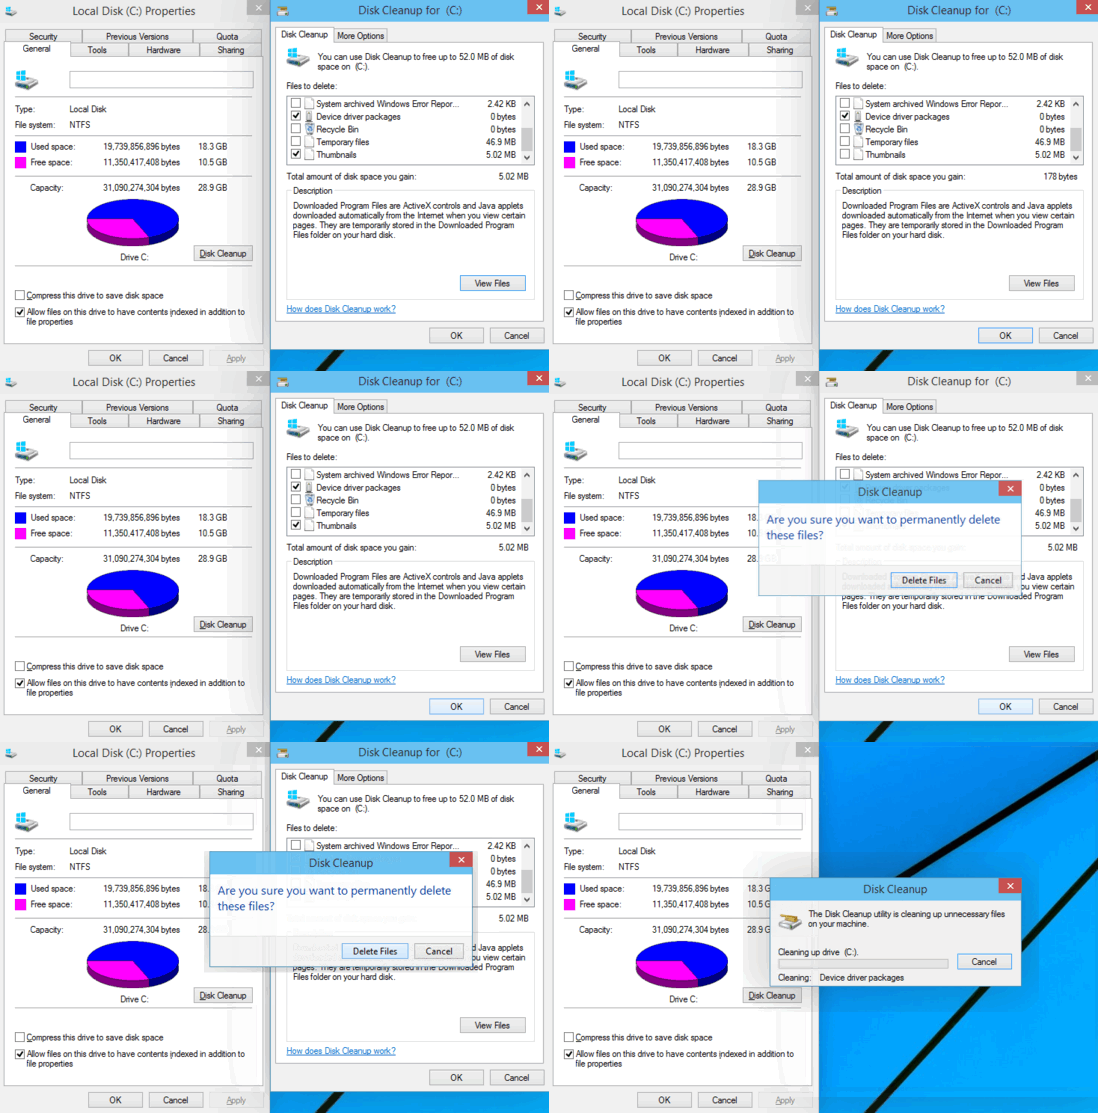
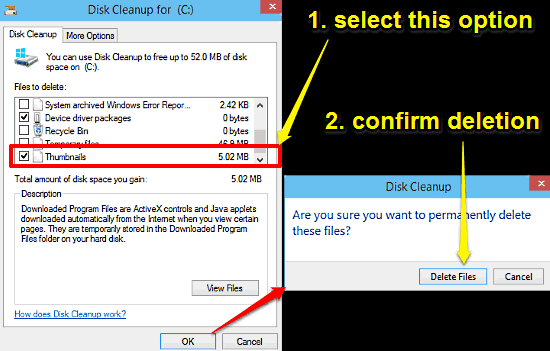
Step 2: In a few moments, the Windows Disk Cleanup tool will come up, listing the different type of junk files (Temporary Internet Files, Device driver packages etc.) taking up space on the disk partition. Select the Thumbnails option (though you can choose to delete other files as well, now that you’re at it) from the list, and hit the OK button. When the confirmation prompt appears, click on the Delete Files option. Check out the screenshot below:

That’s all there’s to it. The existing thumbnail cache will be deleted and will be generated from scratch the next time you browse a supported file type via Windows Explorer. Simple, isn’t it?
Related: How To Disable File And Folder Thumbnails In Windows 10?
Conclusion
Thumbnail cache is an important feature, as it speeds up the loading of image previews of supported file types when browsing them. However, when corrupted, it can also lead to thumbnails being displayed incorrectly, or not being displayed at all. But now you know, all it takes to fix that. is a few minutes. Give it a shot, and let me know what you think in the comments below.