This tutorial explains how to remove “Add to Favorites” context menu option from Windows 11. This context menu option is probably one of the least used ones, and thus you can disable this using the Registry Editor. I will walk you through step-by-step process that you can follow in order to disable it.
Add to Favorites option appear when you right-click on some file. And Favorites is a section to quickly access your files, which is found in the Home section of File Explorer. But a lot of people do not use it, and it makes the context menu a bit longer as well. So, it is better to disable it. And in case you want to get it back, then you will be able to do it.

How to Remove Add to Favorites Context Menu Option from Windows 11?
If you are familiar with Registry Editor of Windows, then you will understand the process easily. But if you haven’t used it before, then you need to follow these steps below carefully.
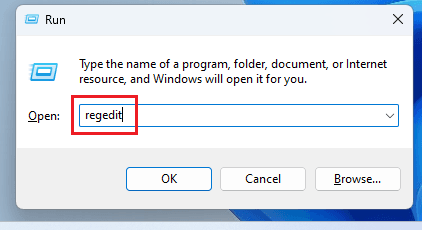
- Press Win+R keyboard shortcut to open Run, and then type
regeditin it to open Registry Editor.

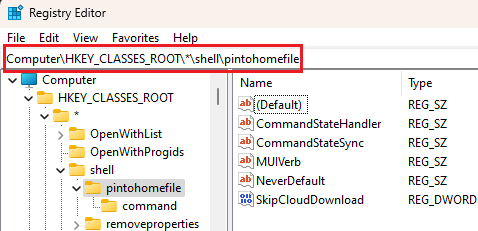
- Navigate to this key:
KEY_CLASSES_ROOT\*\shell\pintohomefile.

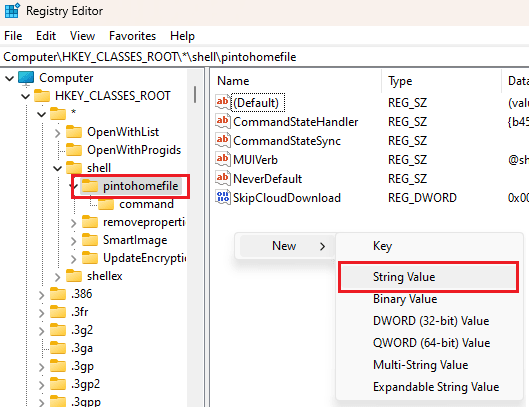
- Right-click on pintohomefile key to create another key using New > String Value option.

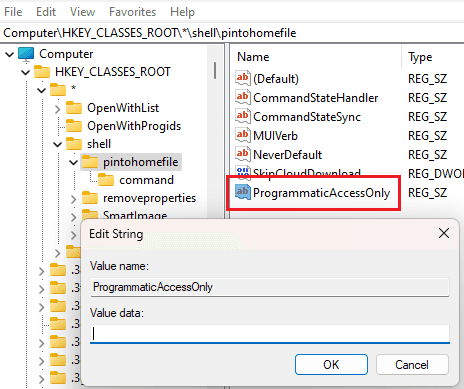
- Set ProgrammaticAccessOnly, as it name, and keep its value empty.

- Done.
Now, just sign out and then sign in again. Open Explorer and right-click on a file, and you will see that the “Add to Favorites” option is gone. You have now successfully removed the context menu to add a file to the context menu.
Final thoughts:
If you are looking for ways to disable the context menu from Windows 11 to remove add to favorites option, then this is the tutorial for you. Just follow the steps mentioned here and remove this option easily. Later, if you decide to get it back, then you can always delete the key created in step 3.