This tutorial details how to change the number of recent items displayed in jump lists in Windows 10. As I’ve said in a number of my previous articles, the Windows family of Operating Systems has come a long way since its early days, becoming more advanced as well as more user friendly with each subsequent iteration. Consequently, it’s only obvious that the freshest Windows 10 is the best of the bunch, having a whole slew of new features and functionalities.
One such feature, first introduced in Windows 7, is Windows Jump Lists. The Jump Lists let you quickly access your most frequently accessed documents, files, and etc., all from one place. And this includes recent items as well. However, the good thing is that you can easily change the number of recent items the jump lists show. Confused? Head over to the flip side of the break to see how you change the number of recent items displayed in Jump Lists in Windows 10.

What Exactly Are Jump Lists?
Jump Lists are a unique accessibility feature of Windows, first introduced in Windows 7. Incredibly easy to use, Jump Lists let you quickly access your frequently accessed documents, songs etc. with one click. An interesting feature of Jump Lists is that they are application specific. So if you access the Windows Explorer jump list, you’ll see a listing of your frequently accessed apps. On the other hand, if you access the Windows Media Player jump list, you’ll see the media files that you play the most. To access a program’s jump list, all you have to do is right-click on its icon in the taskbar. Pretty awesome, right?
How To Change The Number Of Recent Items Displayed In Jump Lists In Windows 10?
Tweaking the number of recent items shown in the jump list in Windows 10 is a piece of cake:
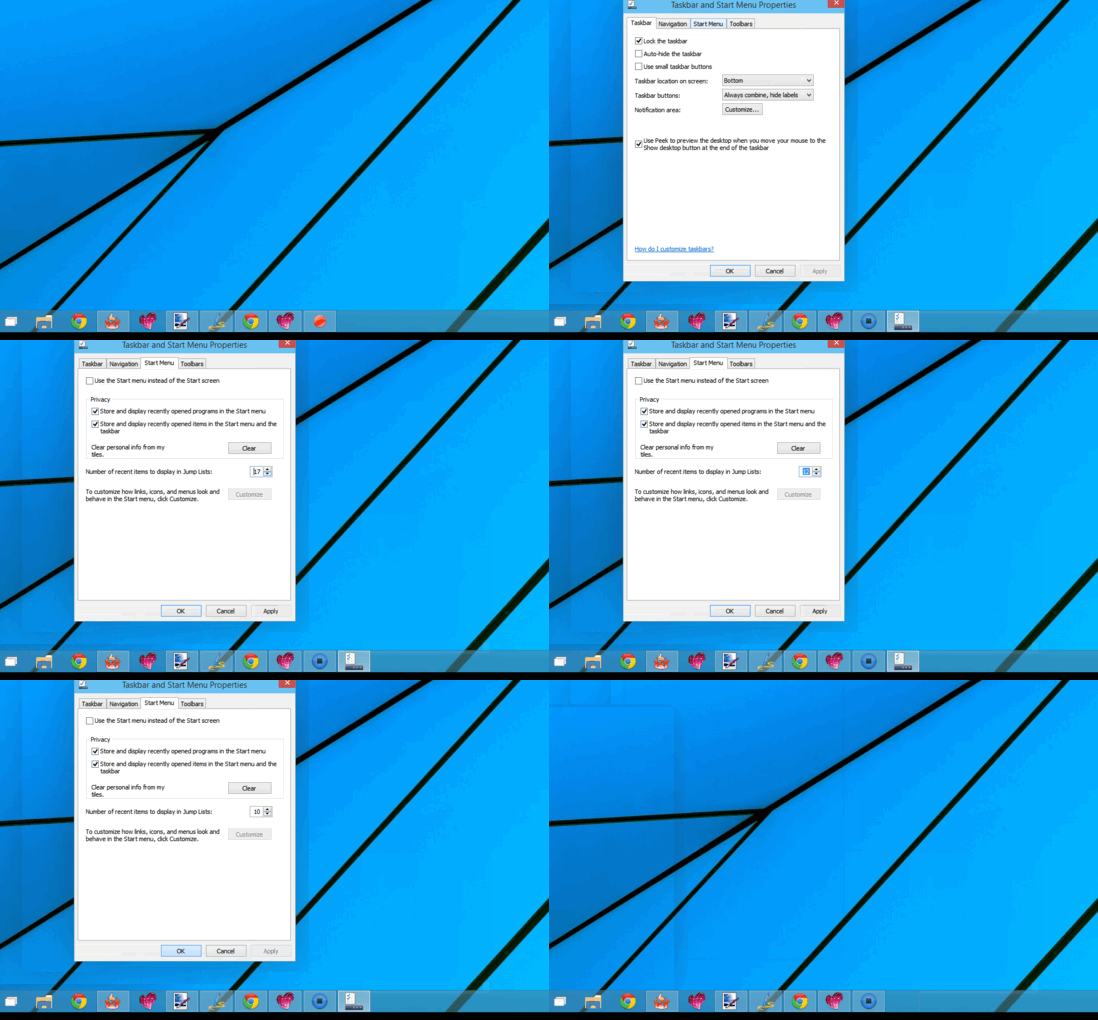
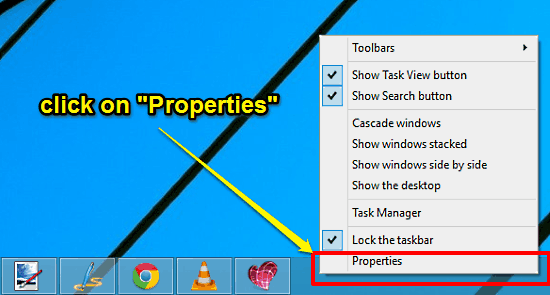
Step 1: Navigate to the Windows 10 desktop and right click anywhere on the taskbar. When the context menu pops up, click on Properties.

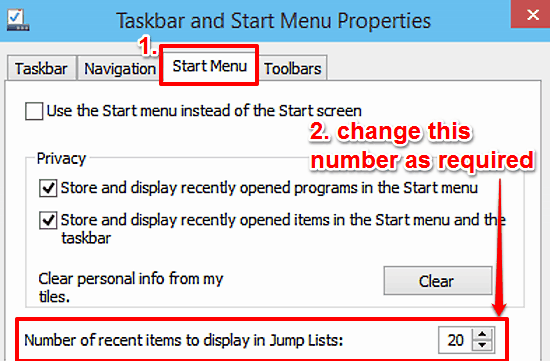
Step 2: The Taskbar and Start Menu Properties dialog box should now pop up, where you can tweak various options related to the desktop and its elements. Click on the Start Menu tab, and tweak the count of the recent items to be shown in the Jump Lists, marked with the “Number of recent items to display in Jump Lists” words. Can’t get any easier than that, right? Here’s a screenshot:

Also Check: Disable Storing Of Recently Accessed Programs In Start Menu And Taskbar In Windows 10
Conclusion
Jump Lists are a simple and incredibly functional accessibility feature that let you quickly access your frequently visited docs, music etc. in a matter of a click or two. And as you know now, they’re also hugely customizable. So what are you waiting for? Try this thing out, and let me know what you think in the comments below.