In this article we will be explaining the steps to save your emails in Notion using an online application called Notion Sender. The application converts your chosen Notion Page / Database into an efficient email hub and works by assigning the Notion database an exclusive email address.
Once an email is forwarded to the specified email address it is directly saved in your Notion workspace along with details like sender information, date, and attachments. Alternatively, when you compose and send emails to others you can direct them to the specified email address using ‘to’, ‘cc’, or ‘bcc’ and they will be saved directly in your Notion database.
Working:
1. Click on this link to navigate to Notion Sender and click on ‘Get Started’
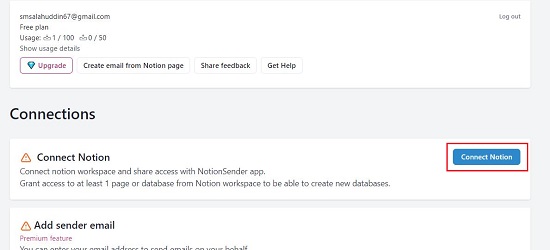
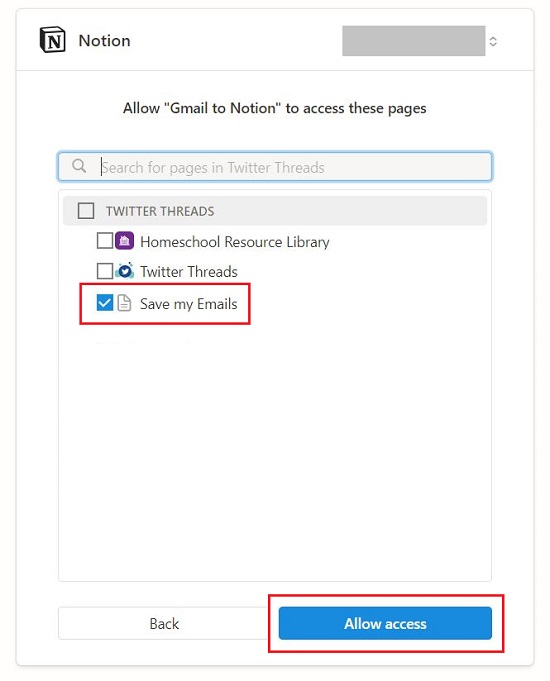
2. Make sure you have signed in to your Notion workspace. Next, hit the button ‘Connect Notion’, click on ‘Select Pages’, choose the Notion page where you wish to save the emails and click on ‘Allow access’.
3. Wait for the Notion page to be connected successfully. This will be indicated by the ‘Notion Connected’ notification in the ‘Connections’ section.
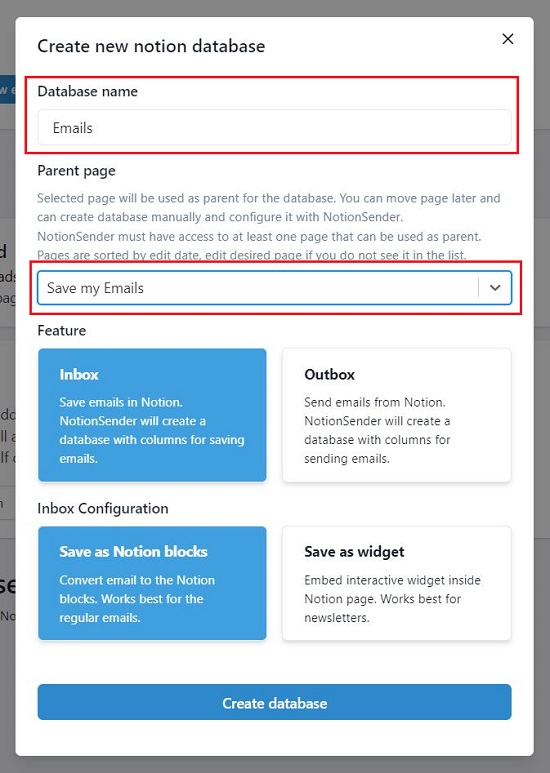
4. Now, click on the button ‘Create new email database’ at the top of the page and assign a name to the database. Next, click on the drop-down list in the ‘Parent Page’ section and choose the Notion page that you connected above in step no. 2.
5. Wait for a few seconds for the settings to be updated and reflected and then scroll down till you reach the ‘Notion Databases’ section.
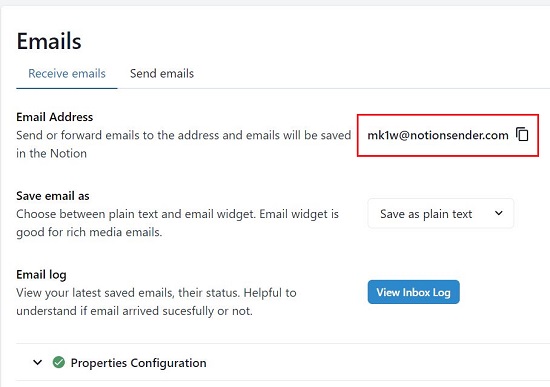
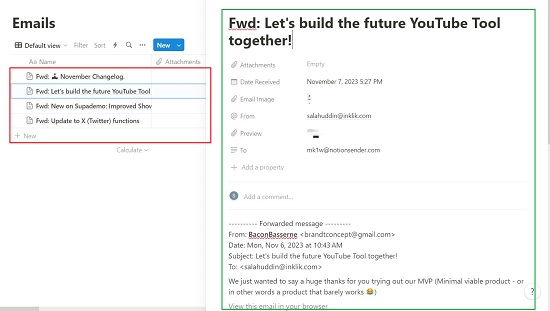
6. Observe the unique email address that has been attached to the chosen Notion page. You can choose to save your emails as plain text or an embedded email widget by selecting the corresponding option ‘Save email as’ section.
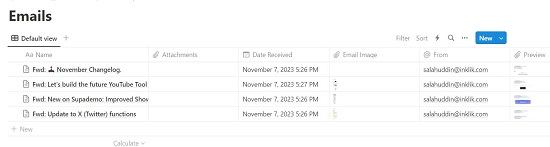
7. You can now forward any emails to the specified email address and they will be saved in your Notion Workspace in the Database that you have chosen.
8. If you are composing a new email, you can direct it to the specified email address using ‘to’, ‘cc’, or ‘bcc’ and they too will be saved directly in your Notion database.
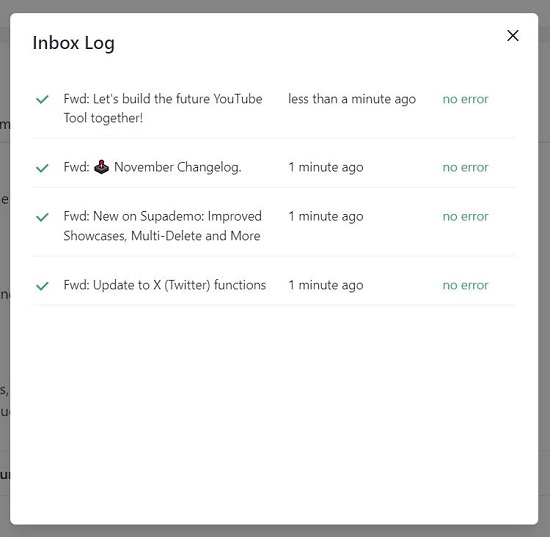
9. You can check the current status and review your most recent saved emails by selecting the ‘View Inbox log’ button. This feature is useful for determining whether the emails are being delivered successfully or not.
Closing Comments:
Notion Sender provides a free and easy way out to save emails in Notion by attaching an exclusive email address to a Notion Database. When you send or forward emails to the specified email address, they are directly stored in your Notion Database.
Click here to navigate to Notion Sender.
If you want to send emails using Notion Sender, you can click here to read the instructions.