CloudWright lets you build and host serverless apps in the cloud using Python. Think of this like Heroku but better and it only uses Python. With this, you can make any kind of app in the cloud and host it. In the free plan, you can create 10 apps and an app can have 10 minutes run time in a day. CloudWright is good for creating simple scraping scripts, reporting tools, monitors, etc. For example, you can use it to scrape a weather data website and update that in Google Sheet. You can create your script by writing pure Python code and use PyPi modules along with some really cool modules that it offers you out of the box.
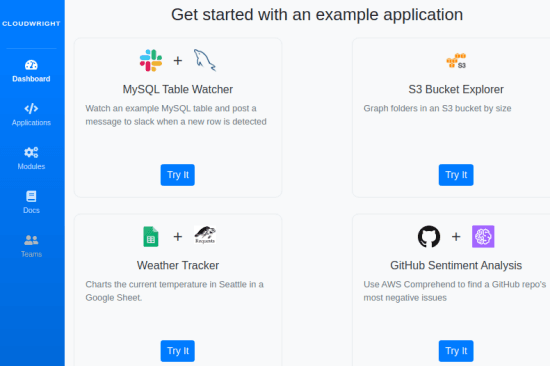
GitHub sentiment analysis, weather tracker, file reformatter, s3 bucket explorer, MySQL table watcher are some example apps that are included in this. If you want to create any of the aforementioned apps then you just use the template from the dashboard. It supports dry run and you can even schedule your apps to run on specific times. However, the only thing that is required in order to use it is good knowledge of programming Python. If you have some good Python skills then you will love this.
Using CloudWright Build and Host Serverless apps in Cloud using Python:
In order to use CloudWright, you just need to sign up using your Google or GitHub account. After that, on the main dashboard, you will see some templates of the apps that it already has. You can select any one of them. Or, you can just move to the Applications section and create one from scratch. It has a very nice code editor that supports smart suggestions so it will very helpful while you are writing the code.
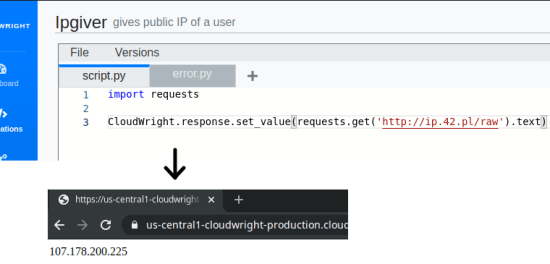
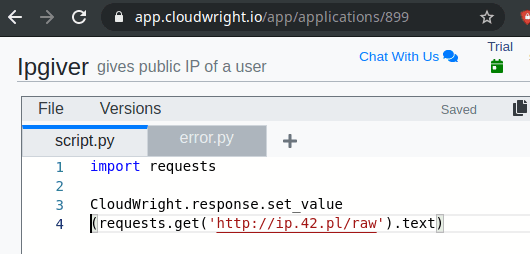
Create your first app from the Applications section and then start writing code for it in the IDE. You can include the module that you want with ease and then write the code accordingly. In my example, I have written a very simple code to get the current public IP address, see below.
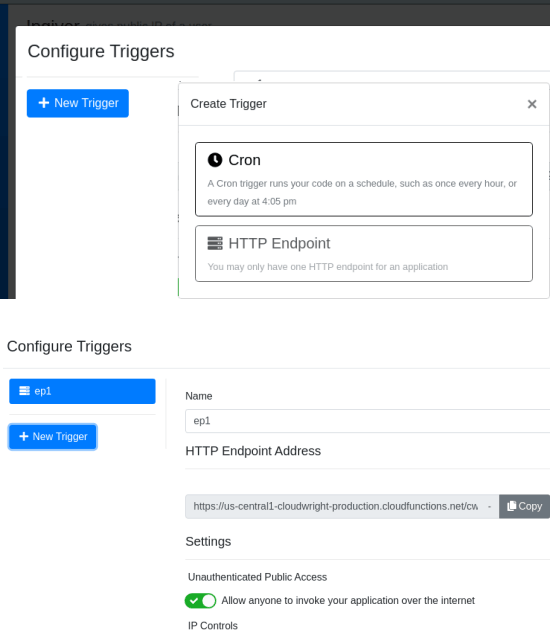
Now, after creating the code, you have to add a trigger to it to specify how you want it to run. You can either opt for the “Cron” option to run it periodically or create an endpoint to run the app whenever you want by making an HTTP call to the endpoint. This is as simple as that. Below, you can see I have created the endpoint for my app.
Now, it is time to publish the app. You can simply publish it and then it will be live. Based on your trigger you can run the app. Either let it run automatically or you can just invoke the app by making a request to the added endpoint. You can see in my case, I just hit the endpoint and it gave me the IP assigned to my machine.

Now, you have seen how to use CloudWright to build and host Python-based applications in the cloud. You can just come up with any application you want and publish it. However, you have to keep the limitations of the free tier in mind. As it supports almost all Python modules so you can work with complex objects with ease such as Google Sheets. Also, you can keep track of the history of the live applications from the “History” section of the app.
Closing thoughts:
If you are good in Python and want to run some small general-purpose apps then you can try it. You can use CloudWright to do some micro-tasks in your applications such as fetching IP, parsing JSON, etc. Just create whatever app idea you have in mind then just host it. If you want to get most out of CloudWright then you can simply upgrade to any premium plan as well.