Here is a tutorial that covers how to kill all the not responding tasks in Windows 10. When some program fails to respond and you are not able to close it, then the methods covered in this tutorial can come in handy. You must also have encountered this problem when one or more programs become unresponsive because their processes are not working. Even Windows 10 Task Manager sometimes fails to close those not responding processes. So in that case, you can easily close all not responding tasks or programs using different methods I have detailed here.
To kill all not responding tasks in Windows 10, you can use Command Prompt, a shortcut, and Registry Editor. I have added the steps for each individual method here separately. You can check all the methods and then select the best one for you.
Method 1: Close All Not Responding Tasks Using Command Prompt In Windows 10
This is the simplest method available here to kill or close all not responding tasks. You need to use Command Prompt and execute a very simple command to do this.
Open Command Prompt and then type taskkill.exe /F /FI "status eq NOT RESPONDING"
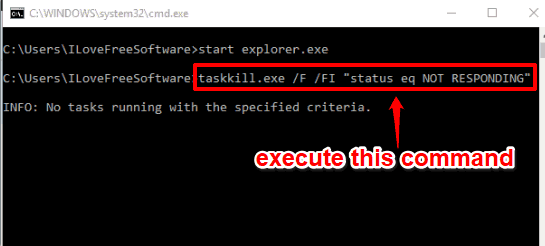
Here, the command contains a filter “/FI” and task “find not responding tasks”. So the command is used to find all the not responding processes and kill them. Execute this command and it will automatically check if there are any not responding processes or tasks running. If no, it will show a message that there are no such tasks. If yes, it will help to close all those processes.
Method 2: Kill All Not Responding Tasks Together In Windows 10 Using A Shortcut
This is also an easy method available to kill all the not responding processes. You just need to create a shortcut and execute that shortcut whenever you have to close unresponsive tasks. Basically, in this method, we are going to use the above mentioned command to create the shortcut. So, instead of using Command Prompt window again and again, we can use shortcut and kill all not responding tasks.
Step 1: Create a new shortcut on desktop by right-click on empty area of desktop → selecting New → and clicking shortcut option.

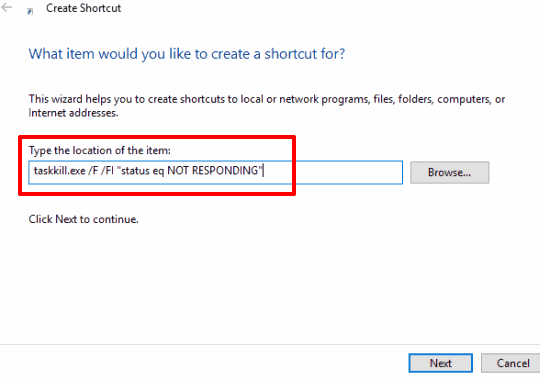
Step 2: Shortcut wizard window will be in front of you. Here, you need to enter taskkill.exe /F /FI "status eq NOT RESPONDING" in the available text box. Enter the command and then go to the next step.
Step 3: Set a name for this shortcut. You can give it any name.
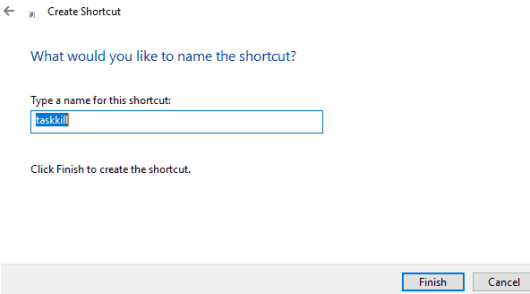
Give the name and complete the wizard.
Now whenever you will execute that shortcut, it will search for not responding tasks and will kill them.
Method 3: Close All The Not Responding Tasks Using Windows 10 Context Menu
This is a very lengthy method. We need to use Registry Editor of Windows 10 for this. First, we have to add “Kill all not responding tasks” option in Windows 10 context menu and then add a command that will be executed to close all the not responding processes or tasks.
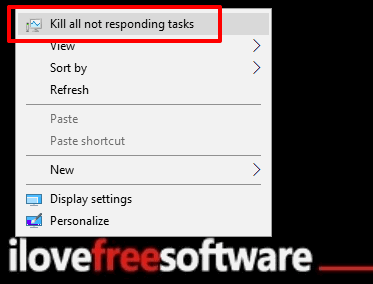
These are the steps:
Step 1: This is a basic step. In this step, we need to open Regedit (or Registry Editor).
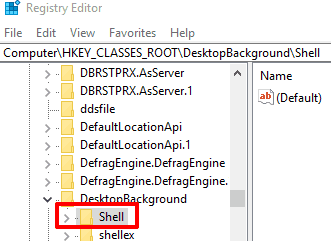
Step 2: Registry Editor has tons of keys. You need to expand HKEY_CLASSES_ROOT key, then explore DesktopBackground key, and click on Shell key.
Step 3: Right-click this Shell key, then access New option, and tap on the Key option. We are doing this for creating a new key. When new key is created, enter its name as “KillNRTasks“.
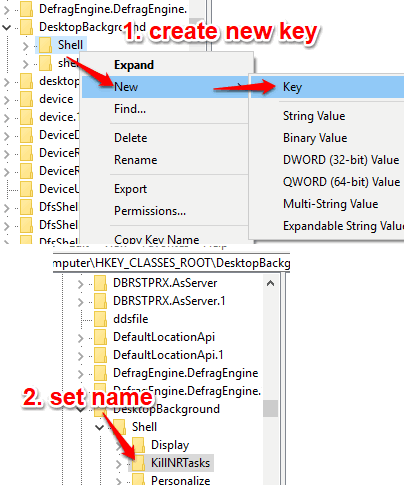
Step 4: Now you have to create three different Sting Values under this KillNRTasks key, rename those values, and set their Value data. A Sting value can be created by right clicking on empty space or KillNRTasks, New, and selecting String Value option.
- Create icon String value. After that, double-click on icon value and add “taskmgr.exe,-30651” in its Value data box. This will help to show icon for Kill all not responding tasks option on right-click menu.

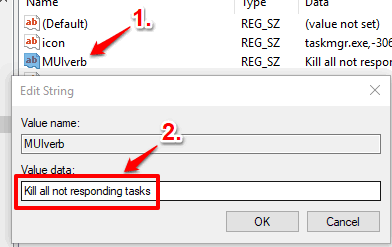
- Create MUIverb String value. When it is created, add “Kill all not responding tasks” text in Value data. This will show Kill all not….. option in right-click menu.

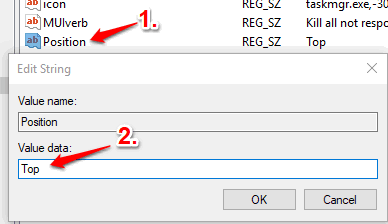
- Create Position String value. This is the last String value which is used to set the position of Kill all not responding tasks in right-click menu. You can add Middle/Bottom/Top in its Value data box and that position will be reserved for this option in context menu.

Now when you will right-click on desktop, you will see that “Kill all not responding tasks” option is visible. However, this option is meaningless unless we enter command that will take the action and close the not responding programs. So, move to the next step.
Step 5: Right-click on KillNRTasks, select New, and then click Key. Again, a new key is created, but under KillNRTasks key. Rename this new key with “command“.
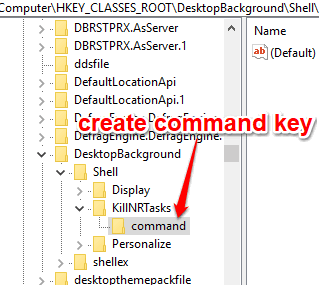
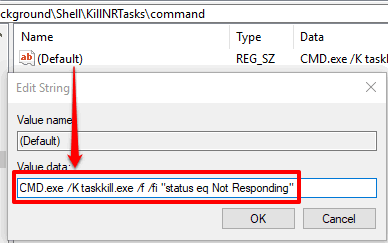
Step 6: Under command key, you will notice that a Default name String value is already available. Double-click on that value and then add CMD.exe /K taskkill.exe /f /fi "status eq Not Responding" in the Value data.
That’s it! Now your work is done. Whenever you find some processes are not responding, you can right-click on desktop and select Kill all not responding tasks option. This will execute the command that you have set and close all such programs.
When you don’t want to use this option, you can just delete KillNRTasks key from Registry.
You can also try How To Deactivate All Settings of Windows 10 Taskbar and How To Disable Startup Items Delay Time In Windows 10.
The Verdict:
Not responding tasks make PC unresponsive and dramatically consume memory and CPU, until we close them forcefully. So instead of closing the hanged programs one by one using Task Manager, you can kill them easily with the help of these three methods. It is quite clear that Command Prompt method is the easiest method. However, other two methods are also useful and can be used whenever you need to kill all the not responding tasks in Windows 10 PC.
