This tutorial explains how to configure Data Execution Prevention in Windows 10. Operating Systems have surely come a long way in their developmental journey over the years. They can accomplish a vast array of tasks, and are much more capable and efficient as compared to their progenitors. And since an Operating System is the primary interface employed by the end user for managing and organizing data, modern OS’ come with a number of built-in security features to make sure your digital data stays safe.
Data Execution Prevention (DEP) is also one such feature, that has been a part of almost all major Windows versions since XP, and is included in the freshest Windows 10 as well. DEP protects your computer against malware and other threats by ensuring proper usage of system memory by programs and services. Sounds like something you can use? Head past the break to know more about DEP, and how you can configure Data Execution Prevention in Windows 10.

So What Exactly Is Data Execution Prevention?
Simply speaking, Data Execution Prevention keeps tabs on all the programs and system services (e.g. device drivers) to monitor how they use the system memory, as well as the data stored in it. Thus, if a program or service tries to access the data in an unsafe manner, Data Execution Prevention automatically blocks the program or service, thus preventing it from making any changes to the data stored in system memory. By default, DEP only monitors core system services and essential applications. However, you can configure it to monitor all the programs, for extra security.
How To Configure Data Execution Prevention In Windows 10?
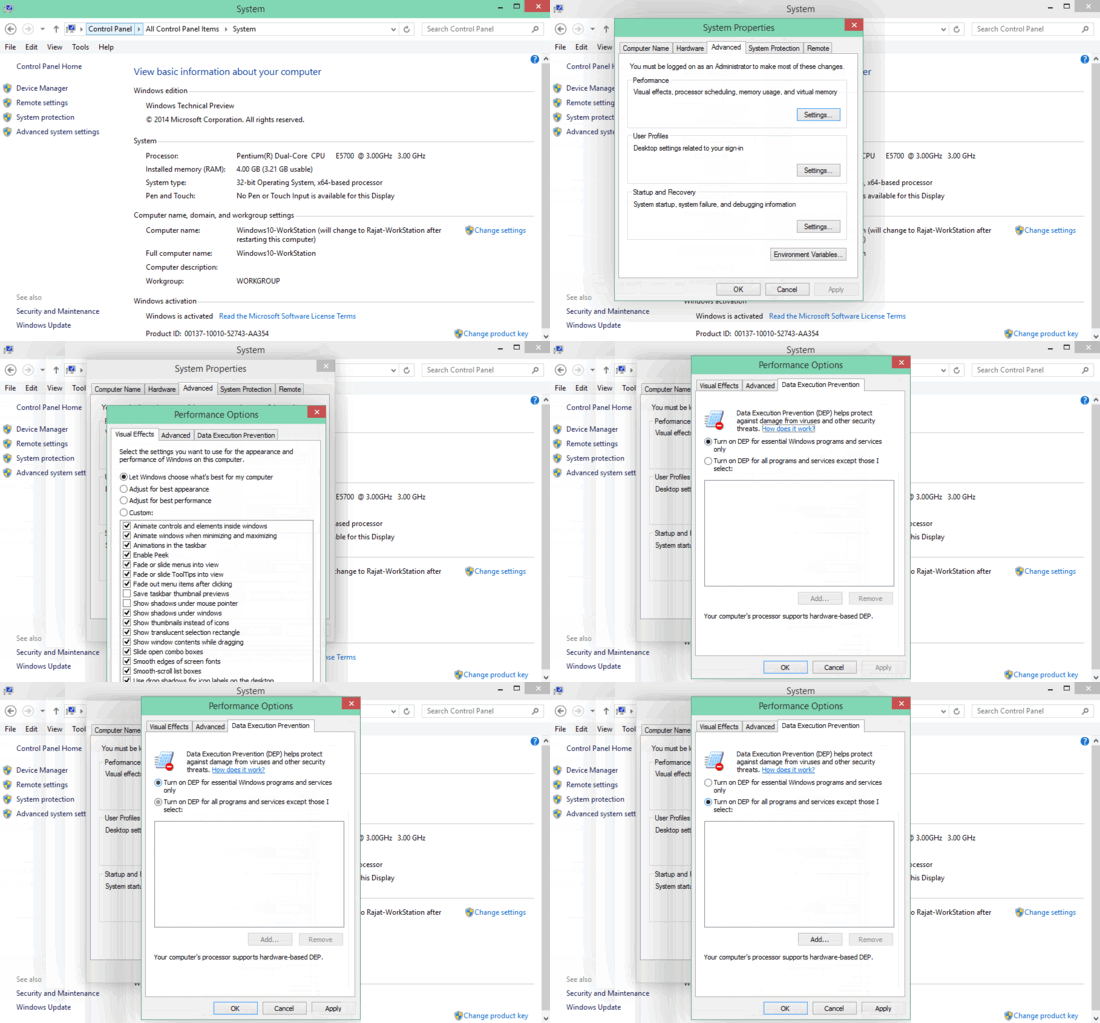
It’s easy to configure Data Execution Prevention in Windows 10, and takes nothing more than a couple of seconds. Check out the following illustrative walkthrough to see how it’s done:
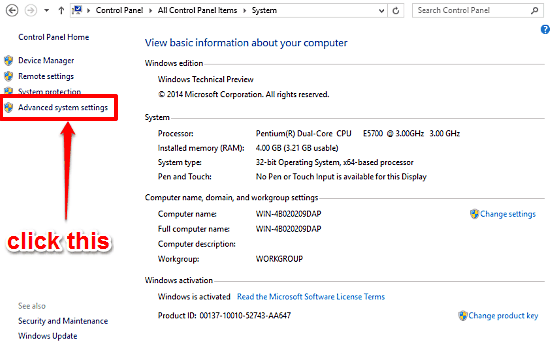
Step 1: Open up Windows Control Panel, and click on the System item. Once there, click on the Advanced system settings option in the left column.

Step 2: The System Properties dialog box should now launch. Click on the Advanced tab (if it’s not selected already), and then click the Settings button under the Performance sub-section.

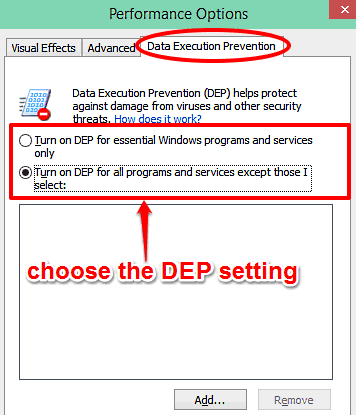
Step 3: Another dialog box, titled Performance Options will now come up. Click on the Data Execution Prevention tab, and you’ll see two options, selectable via individual radio buttons. These let you either enable Data Execution Prevention for only essential system programs and services, or turn Data Execution Prevention for all programs and services, except for the ones that you add to the whitelist. If you choose to select the latter, use the Add button to add the programs that you wish to be excluded from DEP. When done, click Apply > OK. Here’s a screenshot:

See Also: How To Disable System Services In Windows 10?
Conclusion
Data Execution Prevention is an extremely useful security feature of Windows, that ensures the data stored in system memory stays secured, even if the programs accessing it are not. And the fact that you can selectively enable/disable it makes it even better. Try it out, and let me know what your thoughts in the comments.