This tutorial explains how to save Windows Spotlight images to a folder. Windows Spotlight Tool is very tiny software that lets you export Windows Spotlight images to a desired folder. It searches for all the new images that are downloaded in background by Windows 10 to show them on Lock Screen, and saves them in folder of your choice.
Windows Spotlight is a new feature from Microsoft in Windows 10. In this, it automatically downloads new images and ads using Bing and shows them on Lock Screen. Microsoft shows some pretty awesome images on Lock Screen via its Windows Spotlight feature. If you want to download those photos, and use them as wallpaper etc., then this tool lets you create your collection of Windows Spotlight images.
Do note that it is possible to access Microsoft Spotlight images directly, without using any software. However, those images come without any extension, and so you need to manually rename them to add extension to their name, so as to view them with your image viewer. If you don’t want to do that, just use this software to access Microsoft Spotlight images, and it will also automatically rename them for you, so that you can start using the images right away.
How to Save Windows Spotlight Images to a Folder
It’s pretty simple to use Windows Spotlight tool. You don’t even have to install it as it is a portable software. Just double click on its exe file to launch it.
Following steps will guide you how to save spotlight images to a folder.
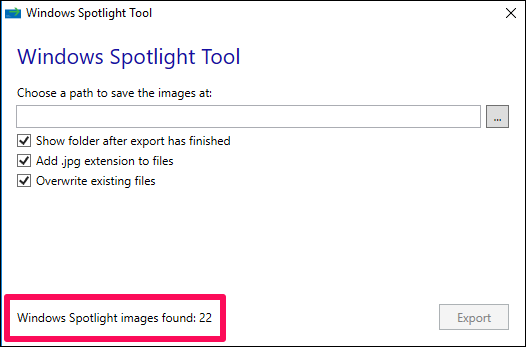
Step 1: Run Windows Spotlight tool. At bottom of its interface it shows number of spotlight images that it found on your PC.
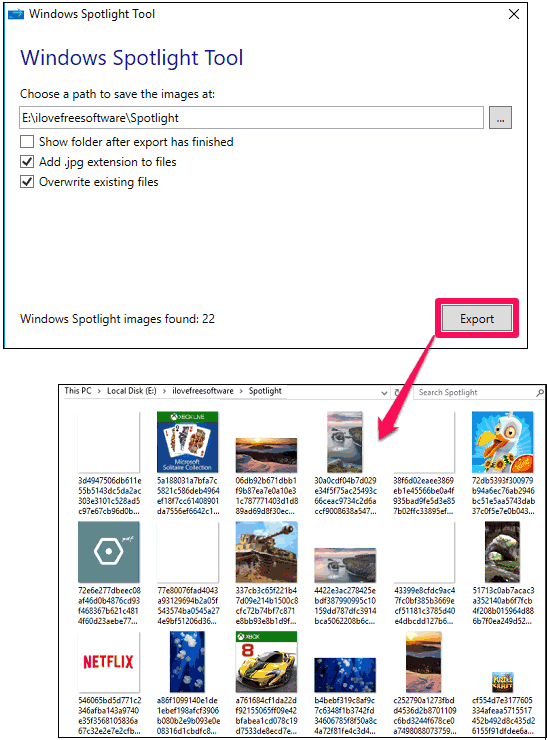
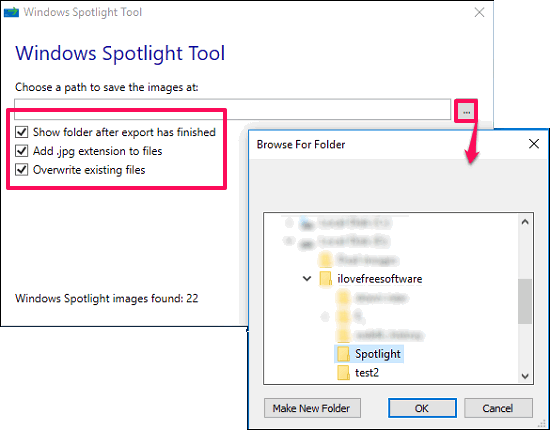
Step 2: Provide the path of the target folder that will be used to save these Spotlight images. You can also check various options here such as opening of the target folder, automatically adding JPG extension to images and overwriting existing files.
Step 3: Finally, hit the Export button. As it doesn’t show any progress bar to it’s quite difficult to guess whether all the images are exported to the folder or not. So, it will be wise to check the option Show folder After Export has Finished to be sure that the export is successful.
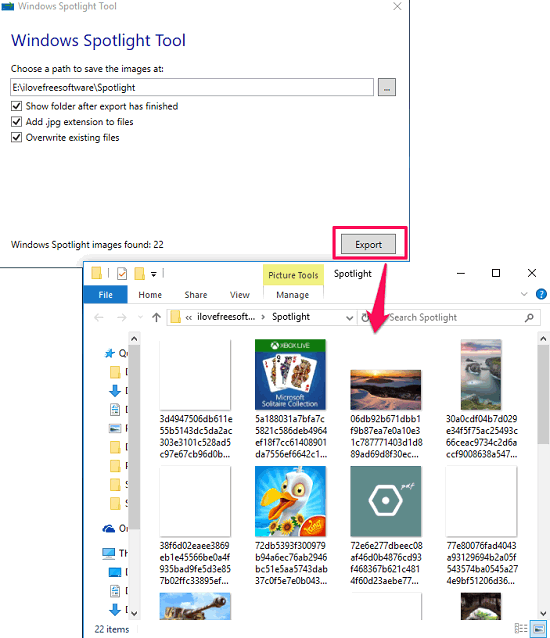
Another thing that is to be noted that it may export images that are blank or unknown to your image viewer software. It’s because it grabs and store all the image files including ad covers, icon files and apps thumbnails it finds in Windows Spotlight folder. So, you will need to delete those unnecessary images.
Once you have the Spotlight images, you can manually set them as desktop wallpaper, or use some automatic wallpaper changer to shuffle through all the Spotlight images automatically.
My Final Verdict
If you ever wanted to save Windows 10 lock screen images without going through the process of manually looking for them and then renaming them, then this software is for you. Just provide the destination folder, and it will move all the Spotlight images there. I wish it had an option to remove those files that are not Spotlight images (probably by looking at the size of the file). Nevertheless, it does takes care of a part of the problem.
Give it a try by downloading it from the link given below.