This tutorial explains how to disable device manager in Windows 10. Modern day Operating Systems are the result of years of ongoing developments in computer science, so it’s hardly a surprise that they are incredibly complicated. And this is true for all the OS’ (regardless of factors like manufacturer and platform), including the freshly minted Windows 10. As such, Operating Systems have a whole bunch of important built-in applications, sometimes also called system tools, that let you tinker with a whole bunch of advanced system settings.
One such useful system module that I’m sure everyone is aware of, is the Device Manager. It lets you view a listing of all the hardware devices connected to the computer. In addition to that, it can also be used to perform advanced operations such as disabling/uninstalling devices, and updating device drivers. Since these operations can affect the overall functioning of the computer, it’s very important that only authorized users are allowed to access device manger.
Thanks to Windows 10, you can easily curb user access to Device manager. Excited to know more? Jump past the break to find out how you can disable device manager in Windows 10.

How To Disable Device Manager In Windows 10?
Restricting user access to device manager in Windows 10 is a fairly simple task. However, it requires you to tinker with the local group policy. So make sure you know what you’re doing, before going ahead. Given below is a step by step tutorial, explaining how to do it:
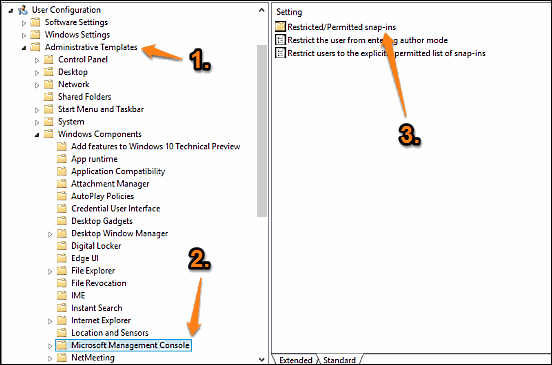
Step 1: Type in gpedit.msc at the Run prompt, and hit OK to launch the Local Group Policy Editor. Once it’s up and running, use the left pane to navigate to User Configuration > Administrative Templates > Windows Components > Microsoft Management Console. From the options presented in the right pane, double-click Restricted/Permitted snap-ins.

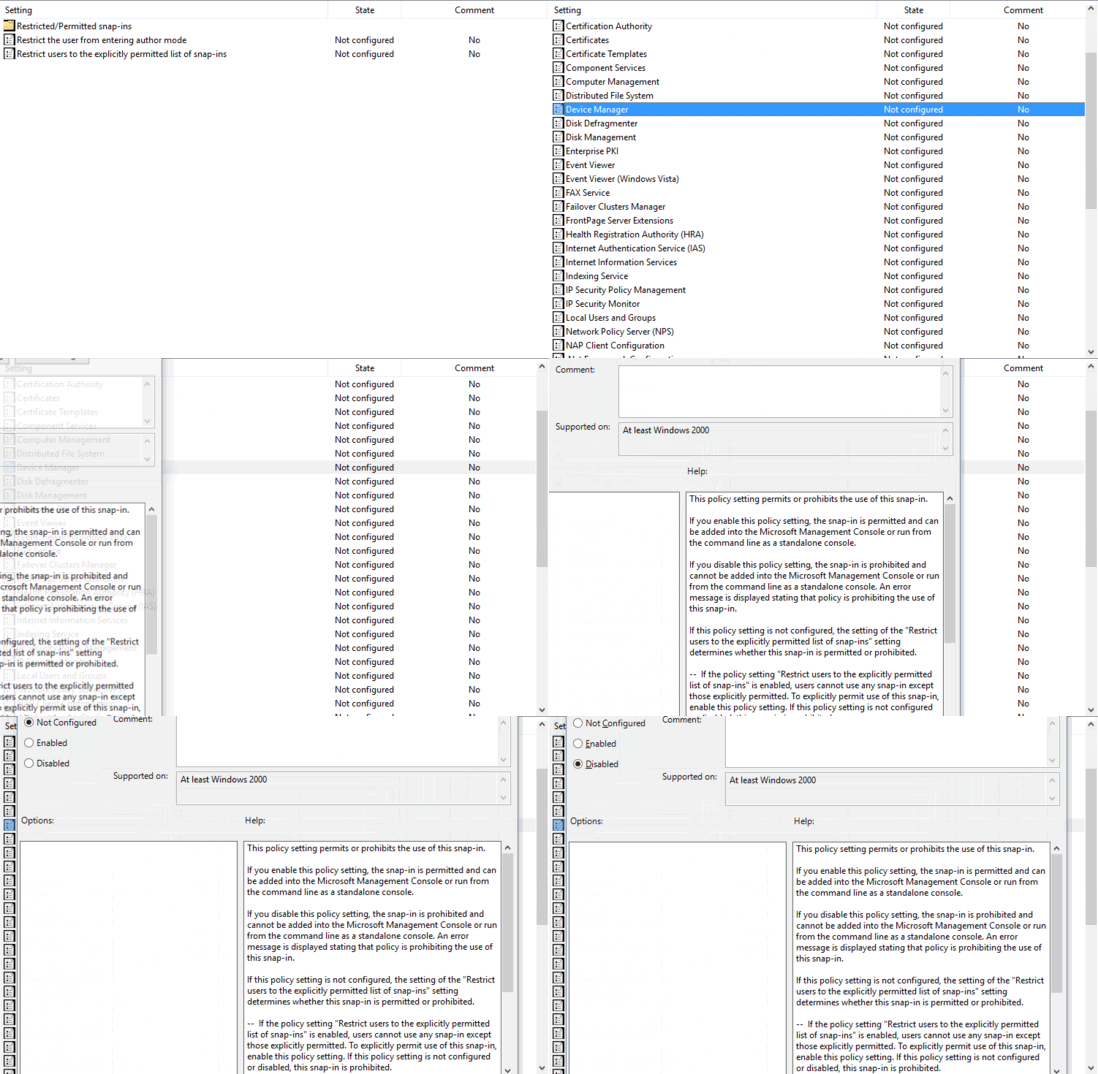
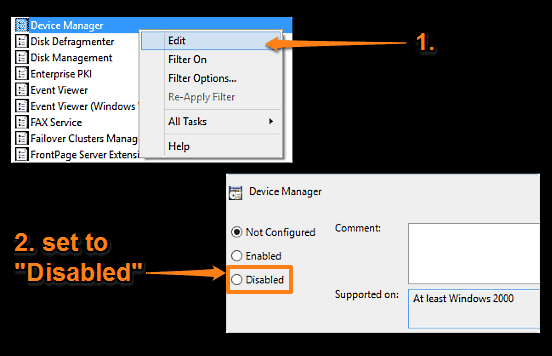
Step 2: The right pane will now display a number of sub-options. Scroll down to the one that says Device Manager, right-click on it and select Edit. Finally, when the configuration box pops up, change the value of the setting to Disabled. Once done, click Apply > OK. Here’s a screenshot:

And we’re all set. Going forward, any user trying to access the Device Manager would be returned an error message explaining that the module cannot be accessed due to security restrictions on the computer. How cool is that?
Do Check Out: Remove Security Tab From Properties Dialog Box Of All Objects In Windows 10
Wrap Up
There are a bunch of important Windows system tools that can be used to make important changes to the computer, and the Device Manager is one of them. Hence, it’s important that only authorized users are allowed access to it. And thanks to the method described above, you can easily restrict user access to Device Manager in a few clicks. Give it a shot, and shout out your thoughts in the comments.