Here, In this article, you will read about how to create tournament bracket with Google Sheets? You just need to install an add-on named “Flippity“. The add-on has different templates in which one is tournament bracket template. You can use the template and follow the steps in order to create tournament brackets. The template has a column with the name of Competitors which you can edit by adding or replacing names. Thereafter, publish the template to the web. After that, you can generate a Flippity.net URL to get the URL of your tournament bracket. Then, you can start the series of the game and lead the players to the winning level.
As mentioned above, Flippity has various templates such as Crosswords template, Bingo template, Flashcards template, etc. This article is focused on creating the tournament brackets. The process is quite simple. With just a few steps, you can easily create tournament brackets and start the knockout tournament.
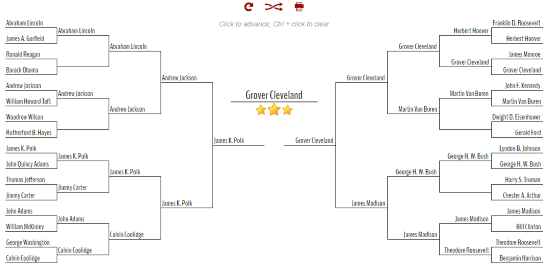
The above image is an example of how the tournament bracket looks after being created. Here, you will read some steps so that you can understand from where to pick a tournament bracket template and how to publish it.
How to create tournament bracket with Google Sheets?
Step1: Firstly, you need to install this Flippity add-on. Thereafter, a new Google Sheet opens in a new tab. Then, it prompts you to give permission in order to run the add-on in Google Sheet. You can click on Continue to start and then enter your email id to proceed.
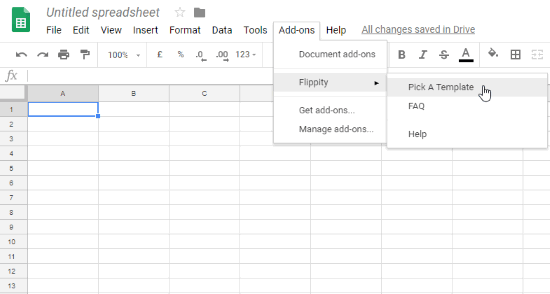
Step 2: Now you have a fresh Google Sheet that has Flippity add-on added. To pick a Tournament bracket template, you need to click on Add-ons -> Flippity -> Pick A Template. It displays a few templates, you can choose the tournament bracket template among those templates. After that, you can click on Use in order to get the template in your Google Sheets.
Step 3: You will see a pop-up of Flippity.net URL which you can close because firstly, you need to edit the template before sharing the link with people. You will see a column named Competitors as shown below. You can edit the tournament bracket template by adding or replacing names.

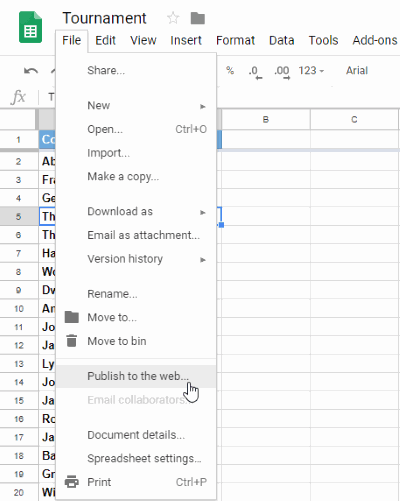
Step 4: Once you are done with the editing, you can publish the template. To do so, click File -> Publish to the web as shown below. A pop-up will appear where you can click on Publish in order to publish the tournament bracket template to the web. Right after, you get a link of the document that you have prepared in Google Sheets. You can close the pop-up or if you want to share the link with your friends then you can do that.
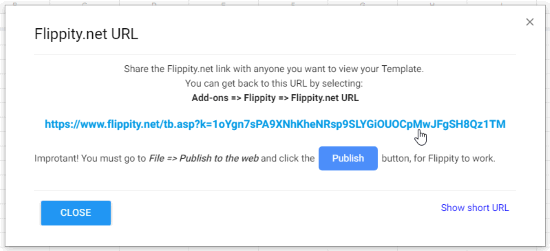
Step 5: You have now prepared the tournament bracket template. All you need is to get the URL so that you can share the link with your friends. To get the link, click on Add-ons ->Flippity -> Flippity.net URL. The link which you are getting is the link to view tournament brackets. You can click on this link, it will take you to a new tab.
Step 6: Your tournament bracket is completely ready. Now you can see the tree diagram of your tournament along with the competitor’s name that you have mentioned in Google Sheet. You can shuffle the names and take prints as well.

The link can also be shared in several ways. For example, you can share the link by Google classroom, email, QR code, Twitter, Facebook, etc. The sharing link can be found at the bottom of the tournament brackets.
In brief
I personally like this Flippity add-on. This is perhaps the best Google Sheets add-on which offers different templates for games, puzzles, quiz, etc. It is quite simple to create tournament bracket using this add-on in Google Sheet. Give it a try.