This tutorial describes how to delete file explorer search history in Windows 10. Modern day computers are incredibly powerful, and can be used to accomplish a varied array of tasks. This includes media consumption, productivity stuff, and everything in between. And why shouldn’t that be the case? After all, the Operating Systems that power them are hugely advanced as well. And these super advanced OS’, including of course, the latest and greatest Windows 10, enhance the capabilities of our computers even more. It’s a win-win combo. However, there are certain basic operations that every computer user, whether casual or seasoned, performs on a daily basis. These include file/folder management, and importantly, file searching.
In a couple of my recent articles, I’ve talked about the rock-strong built in search functionality of Windows 10, and how it uses indexing to quickly find you the stuff that you’re looking for. All you have to do is the type in the search string in the file explorer search box, and the results are found in real-time, in mere seconds. To make future searches faster, the OS automatically maintains a history of the searched files and folders. While that makes perfect sense, what if you find it a little irksome from the privacy perspective?
Not a problem, as Windows 10 lets you purge the file explorer search history. Intrigued? Let’s find out how you can delete file explorer search history in Windows 10.
How To Delete File Explorer Search History In Windows 10?
Getting rid of the file explorer search history (appearing as auto-complete suggestions every time you start typing into the search box) is pretty simple. Here’s how to do it, courtesy of a little step by step tutorial:
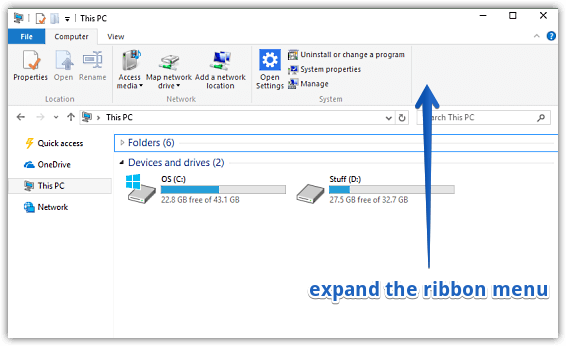
Step 1: Open up File Explorer, and navigate to any location. Now, use the Ctrl+F1 keyboard shortcut to expand the Ribbon Menu (if it’s not already showing up).
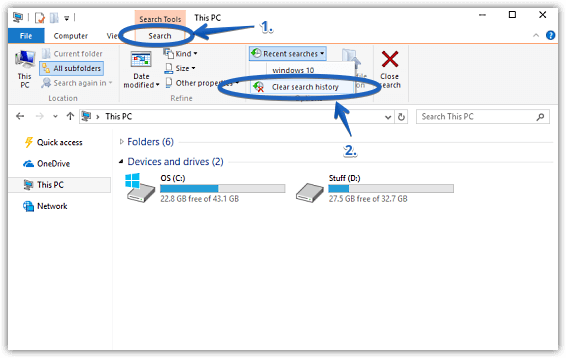
Step 2: Click on the Search box, and select the Search tab (highlighted by Search Tools title) to view its options. Now, click on the Recent Searches option, and you should see a record of the previous search strings. Hit the Clear search history option. Here’s a screenshot:
That’s it. You’ve just cleared the file explorer search history. Simple as pie.
Check Out: How To Edit Indexed Locations In Windows 10?
Wrap Up
Fast and effective indexing powered search is one of the most important and useful built-in functionalities of Windows 10. However, the automatically maintained search history can be a little problematic from the privacy point of view. But now you know, deleting it is a matter of a click or two. Try it out, and let me know what you think in the comments below.