This tutorial is all about how to blur specific faces in YouTube videos. YouTube comes with a simple blurring tool which allows you to choose specific faces in a video and then it will automatically blur them throughout the video. To do this, all you gotta do is upload a video to Youtube and then the blurring tool will process it to detect all the faces which appear in the video. Once it finds the faces, you will be able to select any of the faces which you want to blur. That’s all, the faces will be blurred automatically in the entire video.
You may have used many video editor software or online video editors, but most of them don’t allow you to blur faces in motion. However, the built-in blurring tool of YouTube makes it possible for you to blur faces in motion. the best thing about this tool is that it can automatically detect faces and also doesn’t require you to manually apply the blur effect to the entire video.
How to Blur Specific Faces in YouTube Videos:
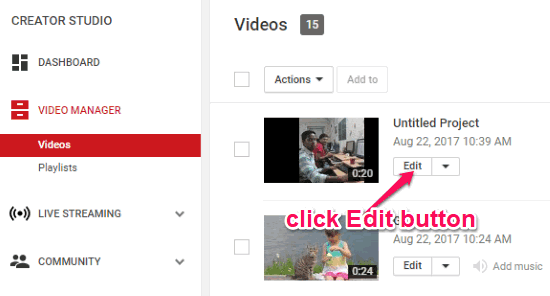
Step 1: To get started, simply upload the video to YouTube in which you want to blur specific faces. After that, go to the “Video Manager” under YouTube’s Creator Studio. There you will see the uploaded video and you would need to click on the “Edit” button associated with the video.
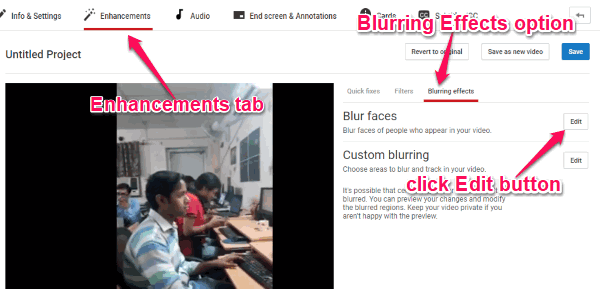
Step 2: Once you do that, the video editor will open up where you need to go to the “Enhancements” tab. Now, click on the “Blurring Effects” option visible on the right. After that, you would need to click on the “Edit” button associated with the “Blur Faces” option, as shown below.
Step 3: As soon as you do that, it will start processing the entire video for finding all the faces in the video. Once the processing is completed, it will display all the detected faces in the video, as you can see in the below image.
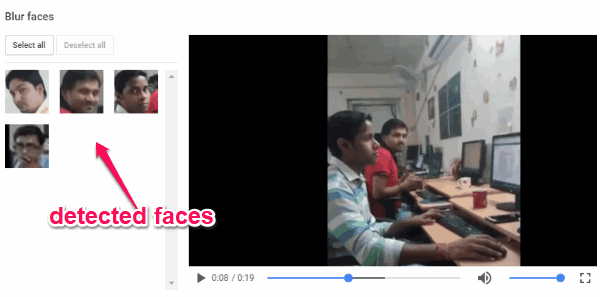
Step 4: To blur specific faces in the video, all you gotta do is select the faces on the left by clicking on them. You can either choose a single face or multiple faces for blurring. When you’re all set with selecting faces, you can go ahead and click on the “Save” button to save the changes.
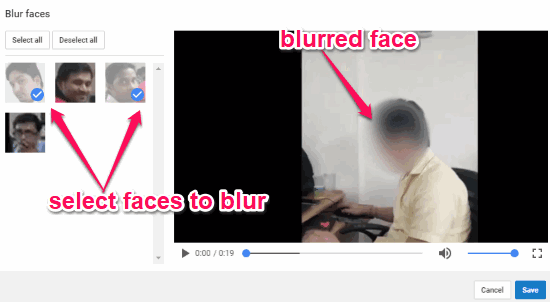
Now, the YouTube’s blurring tool will apply the blur effect on the selected faces throughout the video. That means whenever the selected faces will appear in the video, they will get automatically blurred.
Closing Words:
This is how you can blur specific faces in YouTube videos. Personally, I am very impressed by the accuracy of face detection and auto blurring ability of YouTube’s blurring tool. You can now easily blur specific faces in a video which you have uploaded to YouTube in a minute or two.