This tutorial explains how to change Windows 10 lock screen timeout. Going through the steps in this tutorial, you’ll be able to change the default timeout of Windows 10 lock screen with ease. By default, the lock screen of Windows 10 times out in only one minute and there is no direct option to change the lock screen timeout. So, if you’re looking for a way to tweak and change the default lock screen timeout on Windows 10, then this tutorial is definitely for you.
With the anniversary update of Windows 10, you can add various options like Cortana, tips, notifications, and more on the lock screen. Now, let’s say you want to use Cortana for a longer time on the lock screen, but the one-minute default timeout will automatically turn off the lock screen. Well, in such cases, changing the lock screen timeout will be the best option for you. You can customize the lock screen timeout with few changes on the registry and power options.

How to Change Windows 10 Lock Screen Timeout:
As mentioned, there is no direct option to change the lock screen timeout on Windows 10, however, with a simple registry edit you will be able to do the same. So, let’s get started with the steps.
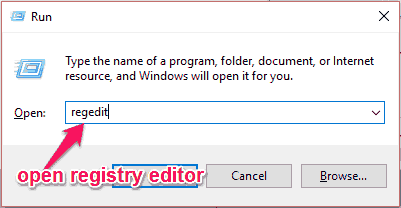
Step 1: First, press “Windows Key + R” to open up the “Run” program and then type regedit in the input field. After that, hit Enter to open up the registry editor.
Step 2: Now, you need to browse the following registry key location:
HKEY_LOCAL_MACHINE\SYSTEM\CurrentControlSet\Control\Power\PowerSettings\7516b95f-f776-4464-8c53-06167f40cc99\8EC4B3A5-6868-48c2-BE75-4F3044BE88A7
Either you can browse to the above key manually, or you can use this software to directly navigate to a registry key.
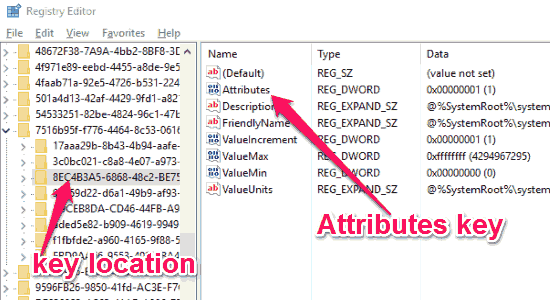
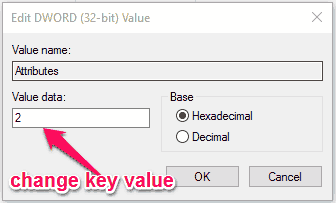
Step 3: As soon as you do that, you’ll see various keys on the right of the registry editor where you need select the “Attributes” key. After that, a small pop-up window will appear with the default value data as “1”. Now, simply change the value data from “1” to “2” and click “OK” save the value modification.
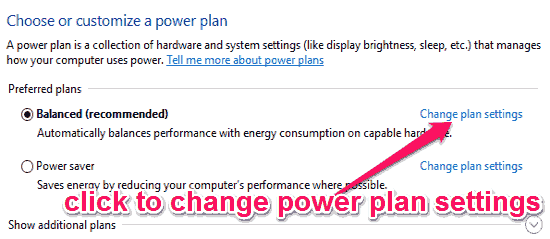
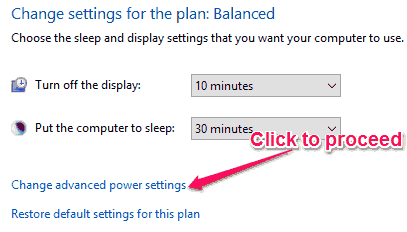
Step 4: When you’re done changing the value data of the “Attributes” key, you need to restart your PC to apply the changes. After the PC restarts, you need to make some changes in the power options to be able to change the lock screen timeout on Windows 10. For this, open up the “Power Options” from Control Panel and then select the “Change Plan Settings” link associated with the power plans.
Step 5: Once you do that, you’ll be able to see a link named, “Change Advanced Power Settings” which you need to click to proceed and change the lock screen timeout.
Step 6: After clicking on this link, the “Power Options” window will appear with various advanced power settings. Now, simply scroll down and go to Display → Console Lock Display Off Timeout → Settings. Here, you’ll be able to change the Windows 10 lock screen timeout to any specific time (in minutes) of your choice.
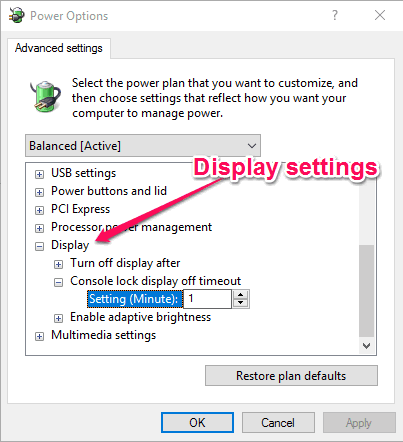
Once you’re done setting a custom timeout period, simply click “OK” and from now on the lock screen will not time out after one minute. That means the lock screen will time out after the time period assigned by you.
My Final Verdict:
If you’re looking for a way to stick around for a longer time on Windows 10 lock screen by changing the default one-minute timeout, then you can go through this tutorial and learn how to tweak the lock screen timeout manually. With some changes in the registry and power options, you can stay on the lock screen for more than one minute.
I hope you find this tutorial useful.