This tutorial talks about how to apply Prisma filters to photos on desktop.
If you’re a photogenic person and addicted to stunning photo filters like me, then you might be using Prisma app on your iPhone or Android phone. However, if you’re more into desktops than smartphones, then you might be missing Prisma filters on your Windows PC, as there is no desktop client for Prisma yet. But do not worry, there is a way using which you can use Prisma on Desktop.
Well, if you’re not aware of Prisma, then let me briefly explain Prisma for you. It is actually a trending app that allows you to apply mind-blowing art filters to your photos inspired by famous artists like Picasso, Heisenberg, etc.
In this tutorial, I will use the Telegram application for applying Prisma filters to photos. Actually, there is a free Prisma bot for Telegram which allows you to import photos and then apply all the stunning Prisma filters right on the Telegram web application.
How to Apply Prisma Filters to Photos on Desktop:
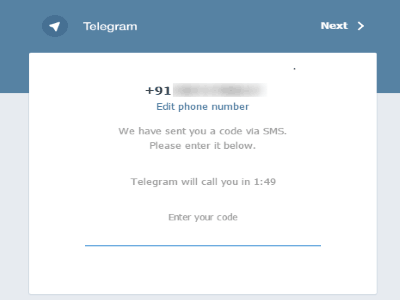
Step 1: First, go to the web application of Telegram on your browser. After that, follow the login process to access your Telegram account. Actually, it will ask you to verify your phone number using which you’ve created your Telegram account. Once you do that, you can go ahead and start using your Telegram account.
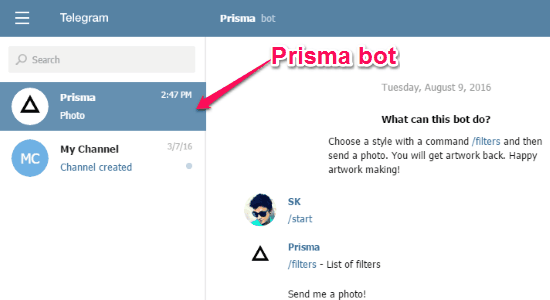
Step 2: When your telegram account is accessible, simply click on this Prisma bot link. As soon as you click the link, the Prisma bot will automatically get integrated with your Telegram account and you’ll see a username “Prisma” in your messenger list.
Step 3: Now, simply click on the “Prisma” username and type “/filters” where it says “Write a message” at the bottom. After that simply hit the Enter key and the bot will automatically display the Prisma filters in the messenger. Each filter will be associated with a button named, “Use Filter” which can be used to select any particular filter as the default Prisma bot filter.
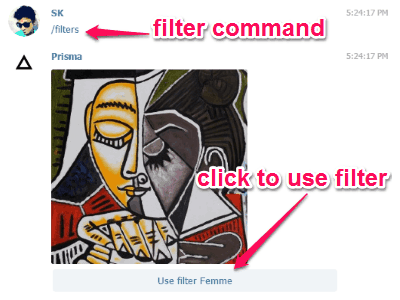
Step 4: To view all the filters of Prisma, keep clicking the “More” option below the last filter until you find your favorite one. Once you find the filter which you want to apply to your photos, simply click on the “Use Filter” button and you’ll be all good to go.
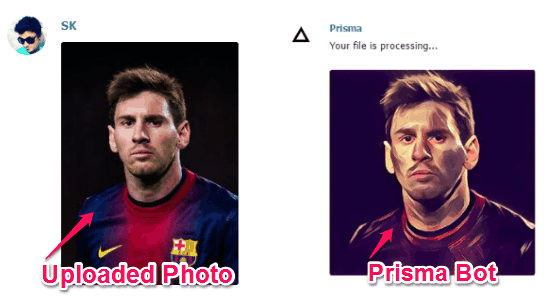
Step 5: Now, you can start importing photos to the messenger (while chatting with the Prisma bot) and apply the Prisma filters to them automatically. As the selected Prisma filter will become the default filter for the bot, each time you import a photo the default filter will be applied to the photo. However, if you want to change the filter, then again type “/filters” and press Enter” to explore and use all the filters.
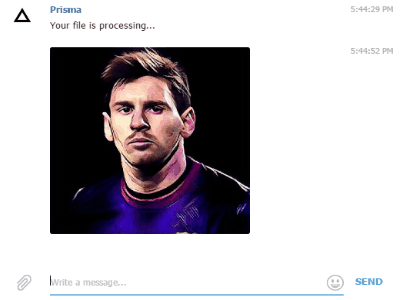
Step 6: To import a photo, simply click on the “Attachment” icon and select any of your favorite photos. Once the photo is uploaded, the Prisma filter will be applied to the photo in a flash.
My Final Verdict:
If you’re looking for a method to apply the astonishing Prisma filters to your photos on desktop instead of using the mobile apps, then this tutorial can assist you to do that with ease. All you need is a Telegram account and the Prisma bot for Telegram, that’s all.
I hope you find this tutorial interesting and useful.