This tutorial details how to use file and folder compression in Windows 10. Computers, and the technologies associated with them have grown manifold over the last few years. Whether it’s the hardware devices or the software applications that power them, everything is much more powerful and capable than ever. While this has led to a lot of “regular” computer tasks being rendered obsolete, there are some that are still as relevant today, as they were before.
One such operation is file and folder compression, which is something that every computer user is familiar with. We’ve all used (and still use) programs like WinZip to make our files take up less space than they originally do. But did you know, that Windows also features native file and folder compression as well? Surprised? Then let’s jump over past the break, and find out how you can use file and folder compression in Windows 10.

How To Use File And Folder Compression In Windows 10?
Native file and folder compression has existed in almost all major Windows Operating Systems, but what we’re talking about here is NTFS compression, which is a feature provided by NTFS, the dominant file system now used by Windows (hence the name). Since it’s native to the OS, NTFS file and folder compression works surprisingly well and can help you reclaim a bit more of that valuable disk space. And the best part is that you can use it on a per file/folder basis. With that being said, here’s a simple but well laid out tutorial, illustrating how to do it:
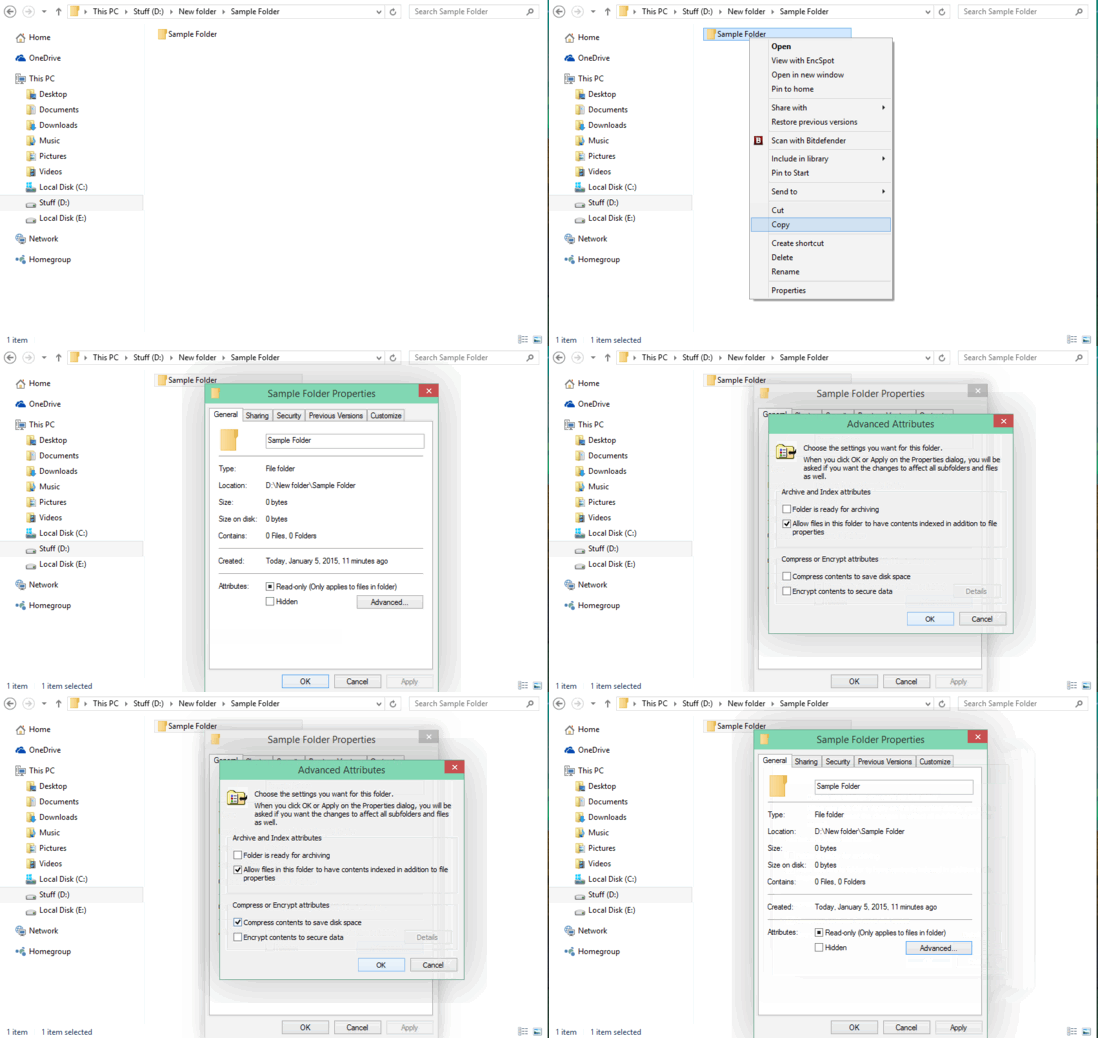
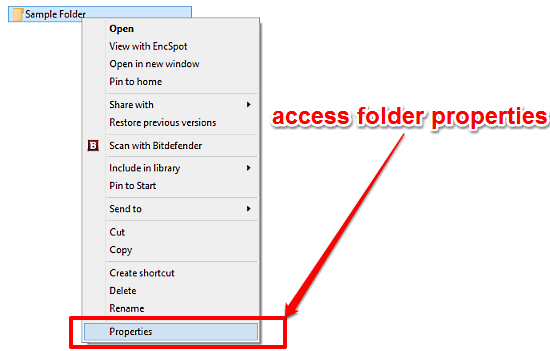
Step 1: Launch Windows Explorer, and navigate to the file/folder that you want to compress. Right click and select Properties from the context menu.

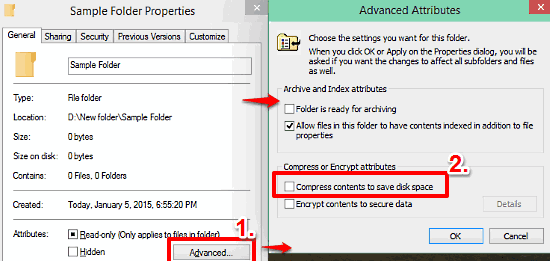
Step 2: When the folder properties box comes up, select the General tab (if not selected by default) and click the Advanced button under the Attributes sub-section. This should bring up the Advanced Attributes configuration dialog box. Move to the Compress or Encrypt attributes sub-section, and click the checkmark against the Compress contents to save disk space option. Here’s a screenshot:

That’s all there’s to it, folks. On a side note, if you’d rather have the contents of the entire disk drive (or partition) compressed, you can use the same method as above to apply the compression attribute to the disk partition as well. How cool is that?
Also See: Roll Back A Device Driver To Previous Version In Windows 10
Conclusion
Native file and folder compression is a simple but useful feature, that can help you free up some much-needed disk space. And the fact that it’s natively available with the OS makes it an even sweeter deal. Try it out and let me know your thoughts in the comments below.