This tutorial explains how to disable WiFi Sense in Windows 10. To disable WiFi Sense (also known as WiFi Services feature), you can use three native features of Windows 10. You can disable WiFi Sense using Windows 10 Group Policy, Settings app, and Registry Editor.
WiFi Sense feature helps to connect to “suggested open hotspots”, “networks shared by contacts”, and access “Enable paid services” options. But if you never use this feature or remain conscious about your privacy, then you can simply disable WiFi Sense using any of the methods mentioned above. Using Settings app, you can disable WiFi Sense options temporarily. Using Group Policy or Registry Editor, you can permanently disable WiFi Sense (or WiFi Services) feature. That means you will be able to access WiFi Sense feature under Settings, but connect to suggested open hotspots and other options of WiFi Sense will remain disabled.
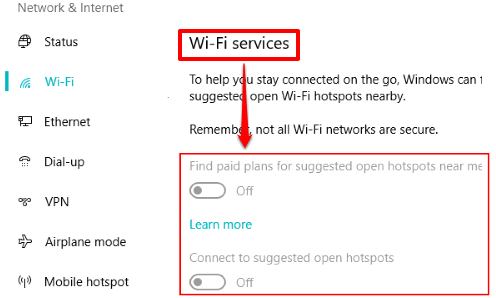
Before moving further, do note that Group Policy is not available in Windows 10 Home edition, unless you have used some third-party software to install Group Policy in Windows 10 Home. In that case, you have to use Registry Editor method or Settings app method to disable WiFi Sense. Also, if you are using Windows 10 Anniversary Update, then this feature is visible as WiFi Sense. If you are using Windows 10 Creators Update, then you will see its name is visible as WiFi Services.
You may also check this video to help you turn off WiFi Sense in Windows 10:
Let’s see the first method to disable WiFi Sense in Windows 10.
Method 1: How To Turn Off WiFi Sense Using Windows 10 Settings App
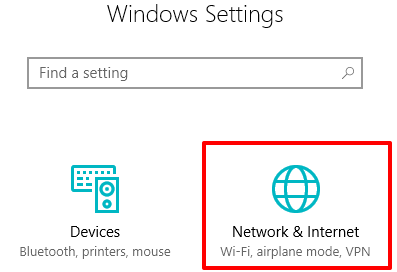
Step 1: You can press “Win+I” hotkey or type settings in the Search box of Windows 10. This will open Settings app. Now click on the “Network & Internet” menu visible in Settings app.
Step 2: Under the Network & Internet menu, go to Wi-Fi option. It is available on the left side. After accessing this option, you will see WiFi Services/WiFi Sense section on the right part. That section has two options:
- Connect to suggested open hotspots.
- Find paid plans for suggested open hotspots near me.
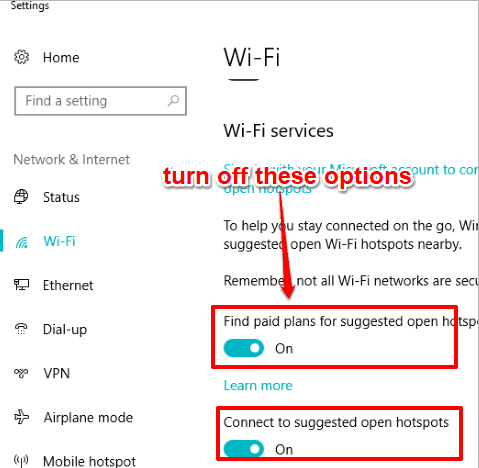
Turn off both of these options. That’s it! Now you have disabled or turned off WiFi Sense feature in Windows 10.
To enable or turn on WiFi Sense feature again, you have to turn on the above options again.
Method 2: How To Disable WiFi Sense Using Group Policy Editor In Windows 10
Step 1: Use Search box of Windows 10 and enter gp or gpedit. This will help you start the Group Policy Editor of Windows 10.
Step 2: Explore Group Policy and find “WLAN Settings” folder. To make it easier for you, I have placed the path below:
Double-click on Computer Configuration, then double-click on Administrative Templates, and expand Network. After that, you will see WLAN Service folder. Expand it and WLAN Settings folder will visible. Click on that option.
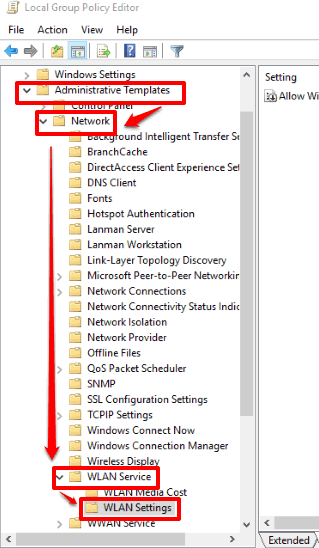
Step 3: At the right side, a “Allow Windows to automatically connect to suggested open hotspots, to networks shared by contacts, and to hotspots offering paid services” option will visible. Double-click on it.

Step 4: A very big window related to this option will open. Now in that window, you will see a “Disabled” option. Select that option and then save this change.
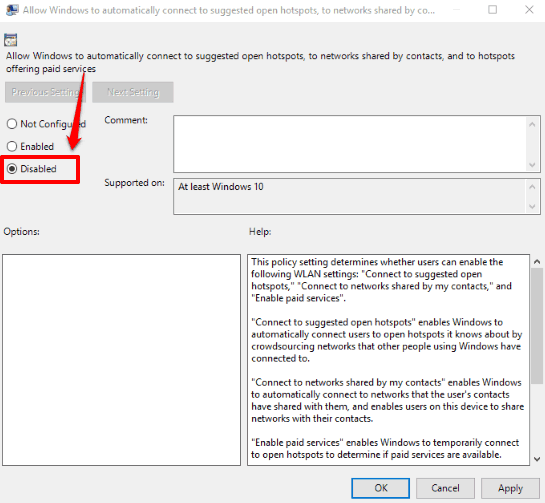
That’s it! You have disable WiFi Sense in Windows 10.
To enable this feature again, you can use the same big window and this time you have to choose “Enabled” option. Save your new setting again and then you can use WiFi Sense (or WiFi services) feature again in Windows 10.
Method 3: How To Disable WiFi Sense or WiFi Services Feature Using Registry Editor In Windows 10
Step 1: Take the help of Search box and write regedit. This way you can start Registry Editor of Windows 10.
Step 2: Now find a key named as “config” present under the HKEY_LOCAL_MACHINE main key. You can follow this path to find it easily:
HKEY_LOCAL_MACHINE → expand SOFTWARE → double-click Microsoft key → expand WcmSvc key → double-click on wifinetworkmanager → and finally you can access config key.
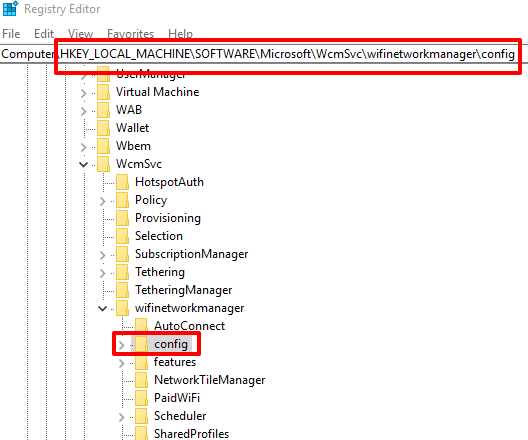
Step 3: In config key, you will see a “AutoConnectAllowedOEM” DWORD value. This value by default has “1” in the Value data field. You have to set that data to ‘0‘. You can do this by double-clicking on AutoConnectAllowedOEM DWORD value, adding ‘0’ in Value data, and pressing OK button.
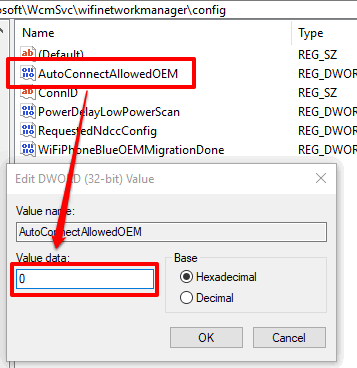
Now you have disabled WiFi Sense in Windows 10.
In case you want to turn on WiFi Sense again, you can again enter “1” in the Value Data of AutoConnectAllowedOEM DWORD value.
You may also try How To Automatically Turn On WiFi At Scheduled Time In Windows 10 and How To Check WiFi Network Adapter Speed In Windows 10.
The Verdict:
I haven’t used WiFi Sense/WiFi Services feature of Windows 10 till now and I think I won’t use it ever. So for me, it’s OK to disable WiFi Sense feature. If you also don’t want to use this feature, then carefully follow steps of any of these two methods. My favorite method among these two is Group Policy Editor as it is easier to use than Registry Editor.