Tiddi is a free and open-source image hosting platform for quick image sharing. This is a very simple server that you can either run locally or deploy on a cloud provider such as DigitalOcean, Google Cloud, etc. Here you basically upload an image and it will instantly give you URL of the image. It comes with API support and you can make simple calls to upload, update, and even delete the images you have uploaded.
After uploading the images, you will get direct links to images that you can use anywhere you like. If you have deployed it on a server then the images will stay there as long as the server lives. You can use those images on websites or blogs. Or, you can simply use them for sharing with someone. To convert any image to URL, it only takes one click.
If you need your own quick image sharing solution then Tiddi is one of the best options. When you use this then you will not have to upload your images to other third-party image hosting services. Since it is deployed on your own server, you will own your data.
Installing this Open Source Image Hosting Platform, Tiddi:
The best way to install Tiddi server is via Docker. Even if you want to try it locally on your PC or laptop then I will suggest the Docker method. It is very easy as you just have to make sure that you have Docker available on your PC.
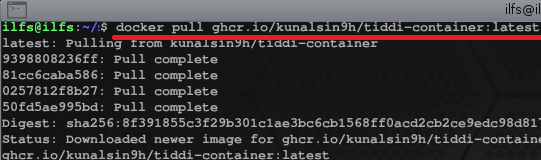
So, open the terminal and then type the following Docker command to fetch the image.
Now, you need to execute these commands one by one to create a database folder and SQLite file.

Finally, you can now run the Docker command like this to get the Tiddi container up and running. This is as simple as that.

If there are no errors in the terminal then it means the installation was successful. Now refer to the next section to see how to use it to upload, host, and share images.
Uploading and Sharing Images via Tiddi:
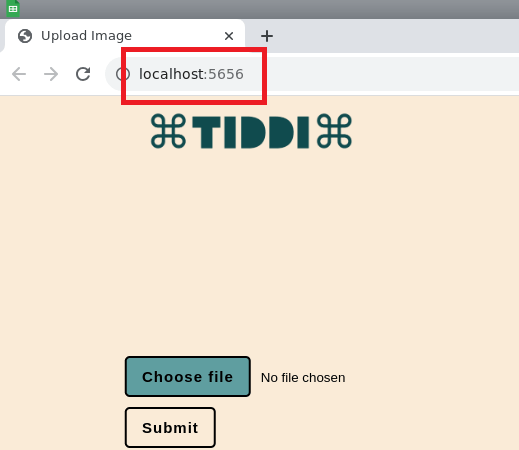
After running the container, type localhost:5656 in the browser and then you will see the main UI of the web app. There is no other screen or pages in this simple app. This is the main UI of this tool and looks like this.
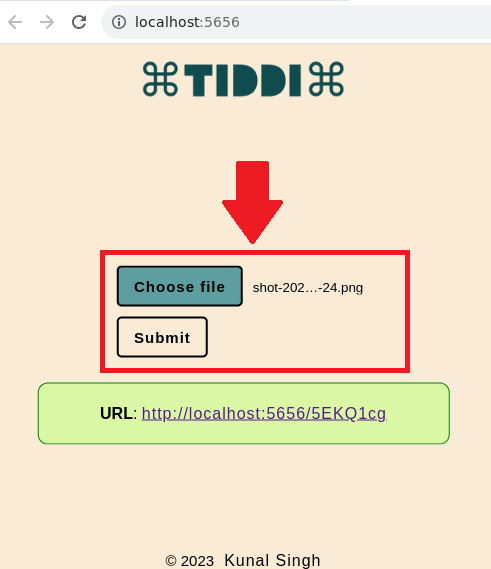
Now, upload an image from your PC and then click submit. It will reveal a URL to you.
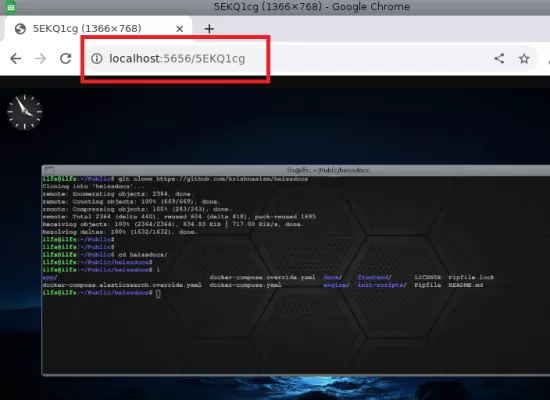
Paste the generated URL on address bar of the browser and now you have the link to your image, hosted on Tiddi. You can copy this link and send it to anybody you like. When they open it, they will see the image in full resolution.
After creating an image, you can delete that as well. But delete operation is available through the API. Apart from delete operation there are other operations that the API supports such as:
Upload an image: POST /image/
Getting image details: GET /get-image/{uuid}
Delete an image: DELETE /delete-image/
Update an image: PUT /update-image/

All the above operations are supported and when you use the associated endpoints, you have to specify an image UUID that you can copy from the URL of the image. This is as simple as that.
In this way, you can use this simple image hosting platform on your own server. You can even assign your own domain name and use it for whatever purpose you like. The installation is straightforward and the usage instructions as well. This is completely open source and maybe there will be more features in the coming update.
Closing:
If you are looking for a free and personal image hosting server that you can self-host then Tiddi is one of the best options out there. With minimum effort, you can deploy it anywhere you like and start uploading images to instantly convert them to URL. I liked the fact that it supports deleting images too. But I hope the developer adds a UI or admin panel to manage the uploaded images.