In this tutorial, I will try to explain how to convert Jupyter Notebook to web app and export as HTML. Mercury is a free open-source project that can turn a Jupyter Notebook in to an interactive web app. It uses a configuration file and introduces HTML input fields such as drop downs, buttons, sliders, and more. You just enter some output and the Notebook will produce some output.
In case you want to share a Jupyter Notebook with some no technical user then they may not be able to use it properly. To make things easier for people like those, you can simply turn your Notebook into a web app. After that, they will just enter the input and get the output. For now, Mercury can generate simple text-based output, generate charts, and even create files.
Mercury replies on a YAML configuration file. In the configuration you basically have to define the properties of the web app. Those properties include the name of the Notebook and type of input controls that your web app is going to have. After that, you just run the server, run and test the code, and export it as HTML or PDF file.
How to Convert Jupyter Notebook to Web App, Export as HTML?
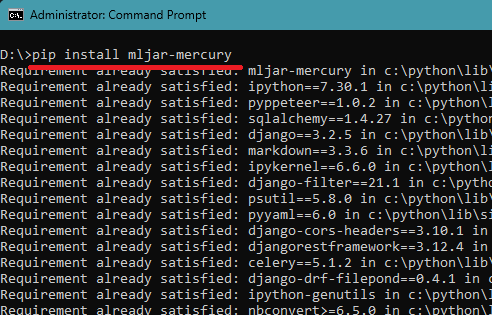
Using Mercury to generate web app out of a Jupyter Notebook is actually very simple. Simply start by installing it first. I am assuming that you have Python or Anaconda installed already. Run the command below to install it.
pip install mljar-mercury
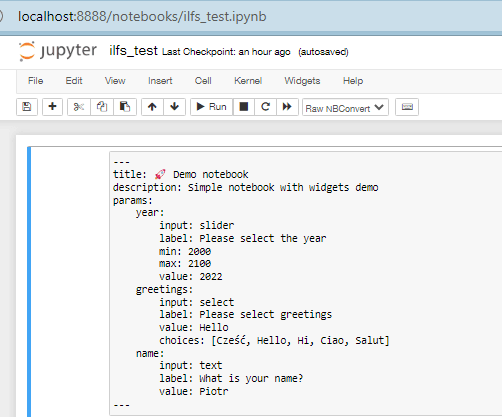
Next thing we have to do is create a Jupyter Notebook. So, start the Jupyter server from another command prompt and then create a new Notebook. Make the first cell raw and then create a YAML configuration. For demo purpose, you can use the following YAML code.
---

title: 🚀 Demo notebook

description: Simple notebook with widgets demo

params:

year:

input: slider

label: Please select the year

min: 2000

max: 2100

value: 2022

greetings:

input: select

label: Please select greetings

value: Hello

choices: [Cześć, Hello, Hi, Ciao, Salut]

name:

input: text

label: What is your name?

value: Piotr

---
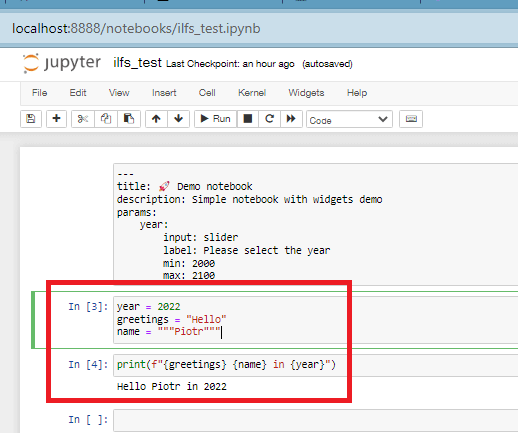
Next, you write the Python code for the logic in the next cell and then save the changes.
It is now time to run the Mercury server in a directory. Run it in the same directory where you have created and save the above Jupyter Notebook. When the server starts, open localhost:8000 and then it will show you your Notebook there.
mercury run

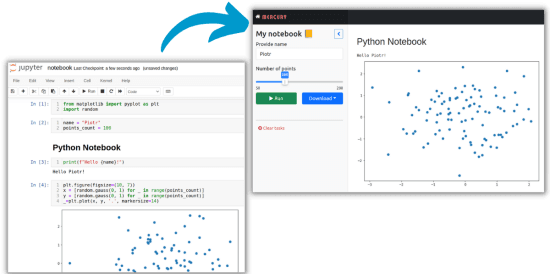
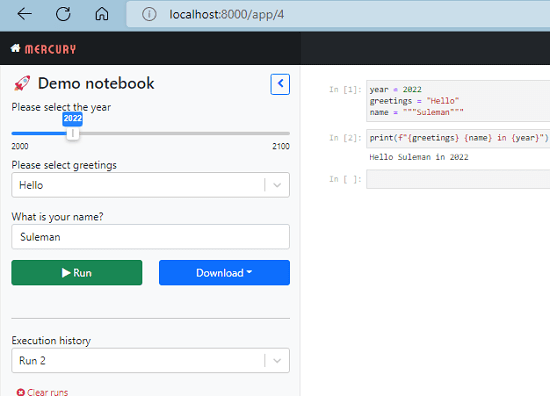
Open the notebook in Mercury and it will load it with all the controls. It intelligently understands what inputs to use. Depending on your configuration, it will add the required controls to the Notebook. You can see this in the screenshot below. From here, you can use the Run button to test if the Notebook is working correctly.
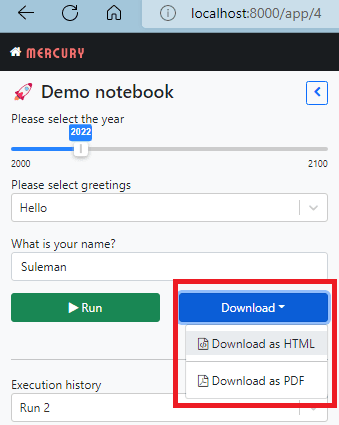
Later if you want then you can easily export this web app as well. Just use the Download button and then use the HTML/PDF export option. And if you want to share it in an interactive way then you will have to copy the Mercury URL and then share it with anyone. Given that you ran Mercury on a server or PC which can be accessed over WAN.
In this way, you can use this simple Python library to convert Jupyter Notebooks to webapps for free. You can read about Mercury in detail on its GitHub repository here. There are some examples which you can open to see how to implement it correctly. I have used a very basic app example but you can create complex web apps with multiple types of input and involving graphs.
Final thoughts:
If you use Jupyter Notebook a lot then I am sure you will like Mercury. It is a great tool to quickly convert any Jupyter Netbook to web app using a simple configuration file. At first, it can seem intimidating. But as you start building web apps, it will get easier. I will suggest you try some complex examples on its GitHub page and then let me know what you think about it.