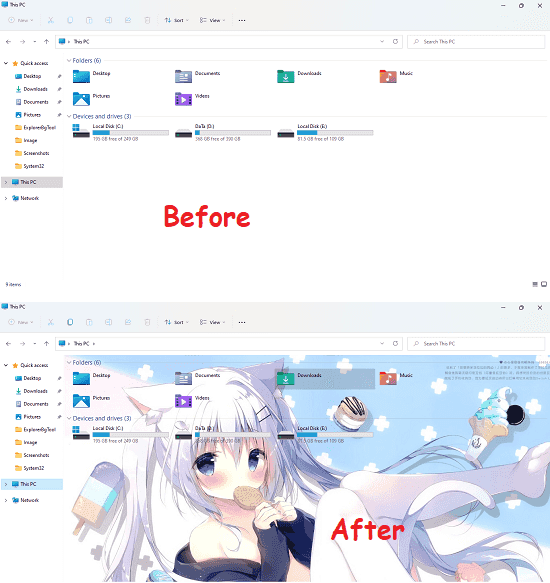
In this post, I will talk about how to set any image as Windows Explorer background in Windows 11. To do this, I will use an open-source application called, explorerTool. This is a desktop customization tool and it can set any JPG or PNG image as a background for Windows Explorer. It works with Window 10 as well and basically a batch script that you can run in a click without installing any dependency.
explorerTool works with a configuration file in which you can specify at which position you want to align the background image. It can even set multiple images as background that it will keep toggling with time. However, for now there is no way for you to run it automatically at startup. You will have to manually configure it to run at Windows logon.
How to Set Any Image as Windows Explorer Background in Windows 11?
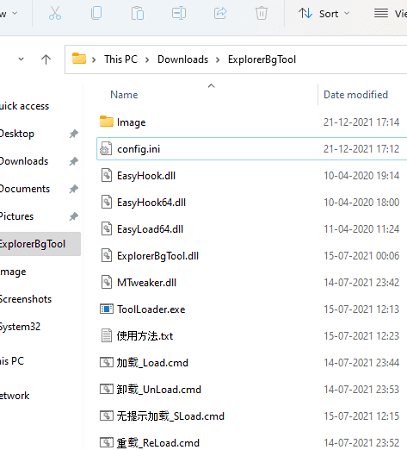
Download the explorerTool archive and then simply extract it using 7-Zip. In the extracted folder, you will see some files even some with Chinese names. But don’t worry, it doesn’t put any impact on the functionality.
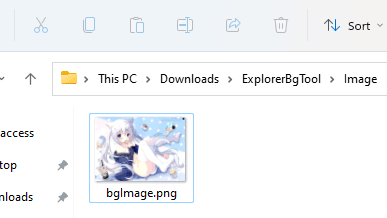
There is folder called “Image” which contains a default image that can be set as background. If you want to use a different image then just delete the one and paste or the move the image in this folder that you want to use.
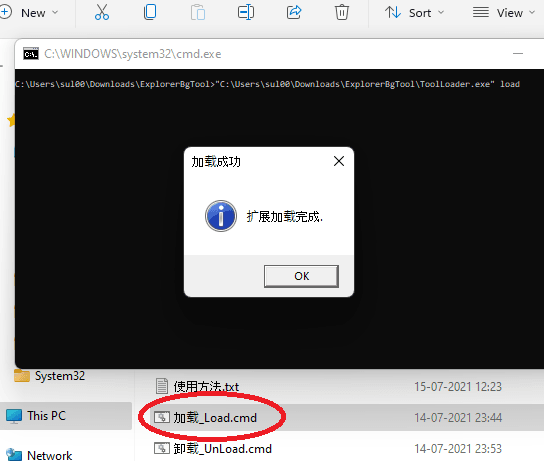
Now, come back to the root folder and to set the image that you have placed in the Image folder as background, just double click on the “加载_Load.cmd” file. A command window will open and when a dialog with OK button shows up, it means the script has run successfully.
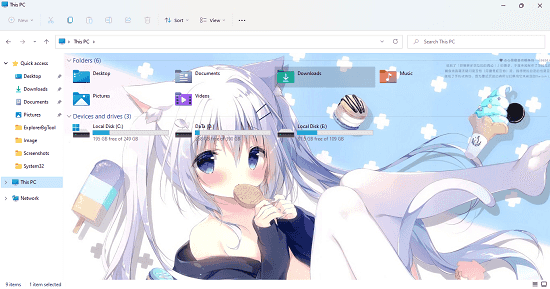
Go to This PC to see the newly set background. It will stay there as long as your current Windows session persists. See the background that I set.
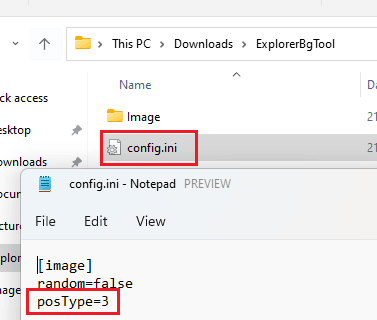
Now, if you want to use a small image and want to place it at corners of the screen then you will have to specify that in the configuration. In the ExplorerBgTool folder, there is a config.ini file, just open it. Here you modify the posType value. Just set it to any of the following values.
- 0: For placing the image at upper left corner.
- 1: Put this value to place image at upper right corner.
- 2: For placing image at bottom left corner.
- 3: For placing image at bottom right corner.
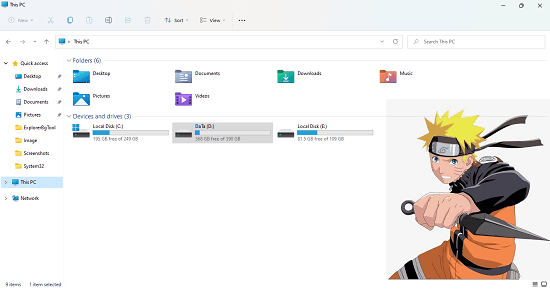
After you make the changes in the config.ini file, just double click on the “重载_ReLoad.cmd” file. And if this fails then you can simply run the “加载_Load.cmd” file again instead. If it restarts Explorer then it is okay, just open it after it loads and you will see the newly added image at the specified position. See in my case, I have placed an anime character at bottom right side.
This is it. In this way, you can use this simple tool on a Windows 10 or 11 PC. Set any image as Explorer background and then the do whatever you like. You can keep changing the background as many times you want. Also, to make the script run automatically at startup, you will have to place the CMD file in Startup folder. You can open startup folder by typing “shell:startup” in Run. You will also have to make changes to the script such as specifying correct path to the EXE file and run the script silently.
Final thoughts:
I never thought that an image can be set as background for Windows Explorer. And then I came across this project on GitHub and I am really amazed by its functionality. If you are also interested in setting a photo as Windows Explorer background then you can give it a try. Once good use case would be using it to brand your PC to add your company logo as background in Windows Explorer.