Enter TravelMap, a website to create travel blog on Map with routes, photos, and posts. Here, you can easily create your own travel blog in simple steps which will be based on a map. Share information about your travel experience, all on a map. Add locations you have been to on the map, add photos, write posts and share your travel experience, tell how you traveled, and more. After adding all this information, you will be given a unique URL, which will show your travel experience in form of a blog. Sounds interesting? Read along, as I will tell you all about this website to create travel blog on map of your own.
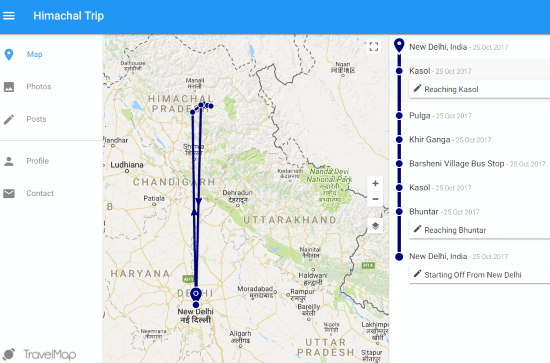
The above screenshot shows how your final blog will look like once ready. The map shows the route and places where you went on a trip. Posts can be viewed on the right panel, where you have to click on one to read it.
To explain this map based travel blog maker in a better way, I have decided to introduce you to it in the form of a tutorial. This way, you will get to know about the features, and also learn how to create your own travel blog.
Checkout Radar, a Travel Guide Plus Itinerary Tracker from Yahoo.
How To Create Travel Blog on Map?

For the first step, you have to sign up to TravelMap. You will need to select a username for this. The username you enter, followed by .travelmap.net will be the URL to your travel blog. You can enter you email ID to sign up, or sign up using your Facebook or Google + accounts.
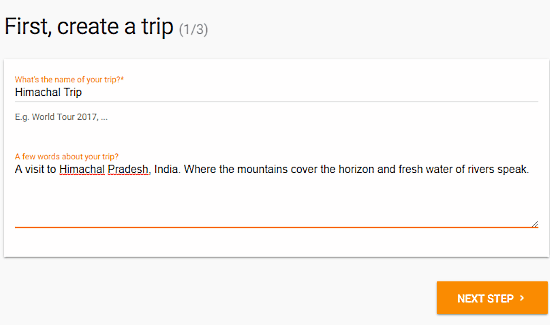
After completing signup, you will be taken to a page to create a trip. Here, you can enter the name of your trip, followed by few words about your trip.
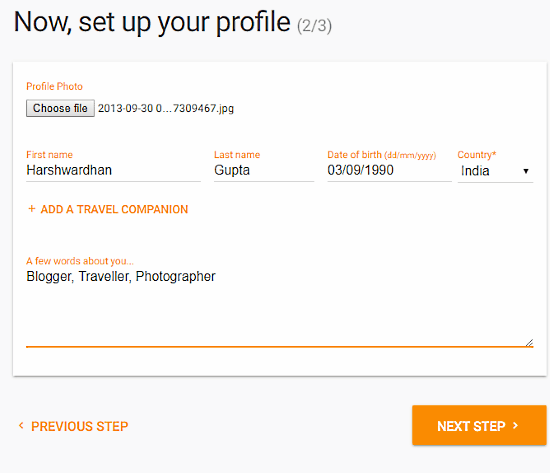
The next step lets you create your Profile. Here, you can add your profile picture, name, and other necessary information. If you have friend who travelled with you and is on TravelMap, you can add the person as companion here.
After completing this step, you are ready to create map based travel blog of your own.
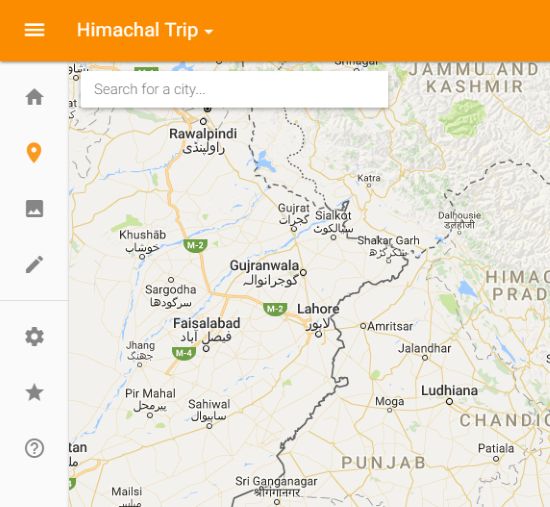
A map will appear. This is where you have to start creating your map based travel blog. Begin with entering the location where you started off with your travel. To find the place, enter the name of place in the small box at the top left corner of map and select appropriate location.

Now, after adding the location, you will have to conform the location by clicking on the Save option, that will appear on the right panel of map.
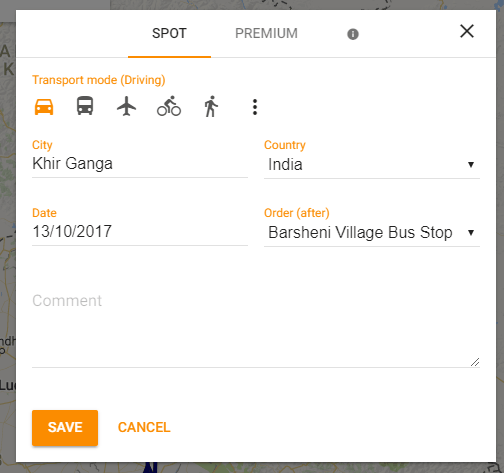
Once you have added a location, you can also edit it. Above is the screenshot of the edit box. Here, you can change the location, select mode of transportation, change date, change order, and add comment.
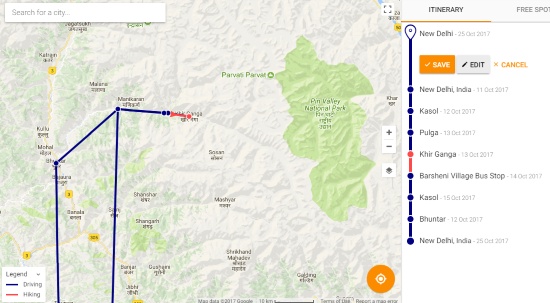
Based on the locations you travelled, keep adding the places on map in order. If you miss out a location or its order, you can always add a location and change order and date from edit menu. As you add all the locations, your travel route will appear on the map.
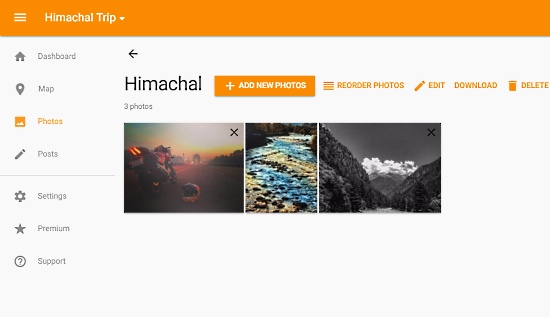
After you are done with map, its time to add photos of your trip. Go to the Photos option on the left panel of the website to create an album for your trip. You can add various info to your Album. Add description, add location, and date. In an album, you can add multiple photos. When you add a photo, you can write its description at the same time. Above is the screenshot of an album that I created.
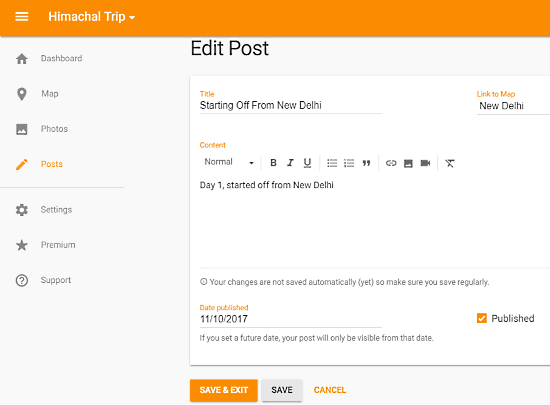
Now, for the final step, you will be creating posts. You can create a post for each location you travelled to or just selective locations. Go to Posts options to add posts. For a post, you will have to add a title, link to map, add content, and the date of travel. In the content section, you can write text, add photo, link URLs, and add videos. You can save a post as draft or immediately publish it.
When you have published all your posts, your travel blog will be ready. To access your blog, you can visit your unique URL that you created in the beginning.
This is how the blog looks like. On the right, there are the locations that you visited. If you have added posts, the posts will appear with the location where you have tagged them. I added posts for Kasol, Bhuntar, and New Delhi, so, they are showing up on the right panel with location. Click on the post to view it.
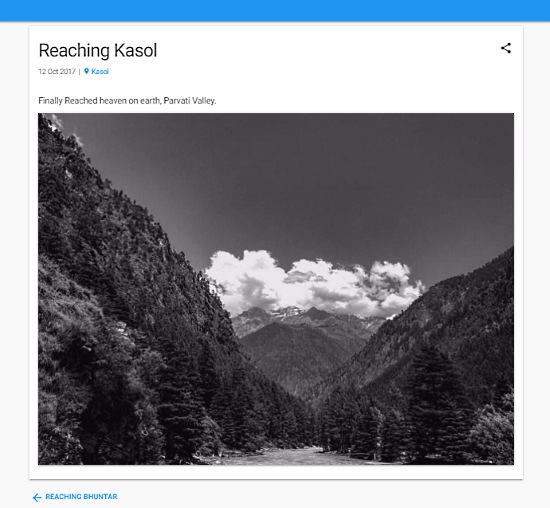
Here’s the screenshot of a post that I created with text and photo.
You can view all the photos of the blog as well from the Photos menu on the left panel.
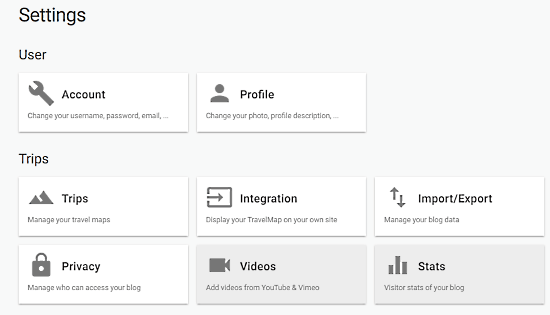
The Settings menu lets you change your Account and Profile info. Options to integrate your log with your website is also available. Manage privacy of your blog if you want a limited audience to view it.
Closing Words
TravelMap stands out from regular blogging services and provides free and out of the box travel blogging experience for you. As a traveller, I really liked its concept and look forward to create map based travel blog of my own on TravelMap.