In this tutorial, we will talk about how to create custom map KML file and import to Google Maps. In case some of you are not familiar with the KML file, KML stands for Keyhole Markup Language, which is an XML data format. Basically, a KML file is used for annotating maps and whatever geographic data is there in a KML file will be shown on a map, in this case, Google Maps.
Google Earth lets you create a KML file easily. You can create a custom map with annotations, areas, path, etc. A custom map can be very helpful for many purposes, like camping, hitchhiking trip, tracking trip, etc. You can create a custom map for your camping area, define waypoints, placemarks, paths, etc. Share it with your crew members. Once they add it to their Google Maps, they can access it on their smartphones, even in offline mode.
Here are 4 Best Free KML Viewer Software For Windows where you can preview and test your custom map.
How To Create A Custom Map KML File?
For creating a custom map, we gonna need Google Earth which you can download by clicking here. Once installed, open it and delete all the pre-marked places from My Places section.
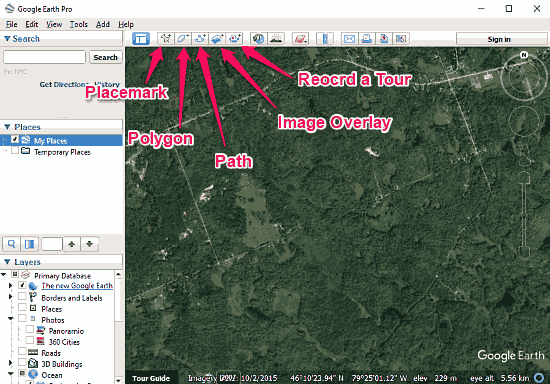
Here you find five annotation tools in Google Earth, we will use some of these tools to create a custom map. These tools are defined below.
- Placemark: This tool is for marking a place.
- Polygon: With Polygon tool, you can define a custom area for your map.
- Path: Path tool is used for define a path on the map.
- Image Overlay: You can add an image overlay to your custom map with the help of Image overlay tool.
- Record a Tour: With Record a Tour tool, you can record a video in Google Earth where you can define the custom map, navigate waypoints, paths etc.
Follow these simple steps to create a custom map KML file using Google Earth:
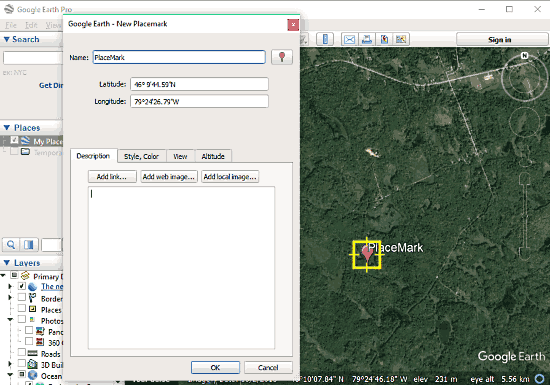
Add Placemark:
Navigate to the area where you want to create a custom map and click on Add Placemark to add a placemark on the map. This will open a New Placemark pop-up. Here, you can name the place and can change the placemark icon as well. This New Placemark pop-up has four tabs.
Description: In this tab, you can write a description about that place (you can also write XML code here for click to pop or hover to pop if you are into that kind of stuff). You can add links and images here, which can be seen later in your custom map.
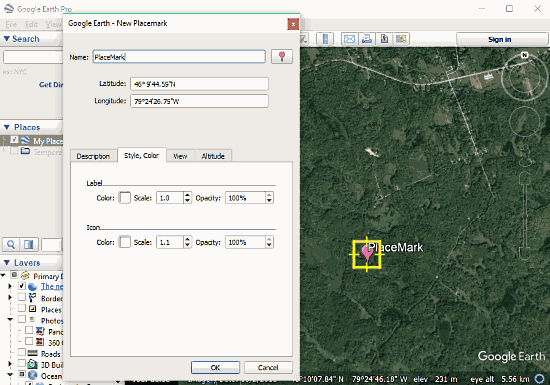
Style, Color: You can tweak the placemark label and icon here. You can change the color along with their scale and opacity.
View: This tab shows you all the geographic data about that place, You can see the latitude, longitude, range, tilt, etc. here and can take a snapshot of these details by clicking on Snapshot button below.

Attribute: Here you can enter the altitude of that area in case it is a top of a building or mountain otherwise just keep it clamped to ground.
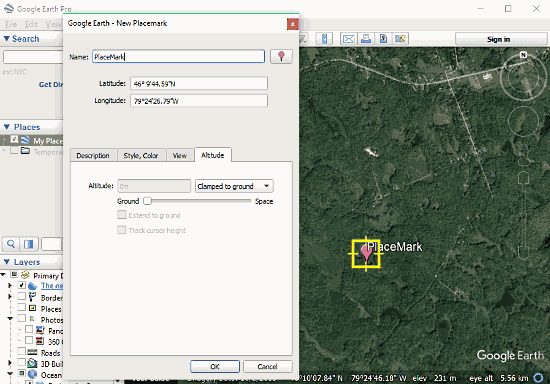
Finalize the details and click on OK to add the placemark on the map.
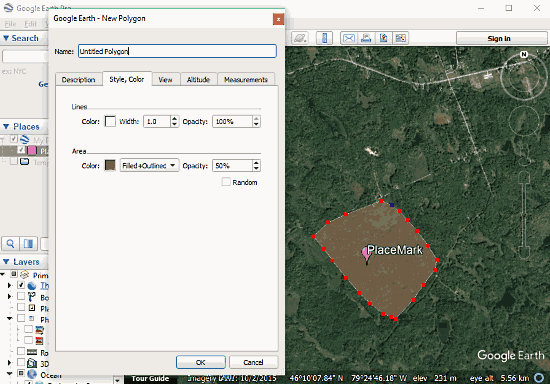
Add Polygon:
After adding the placemark, click on Add Polygon and mark the area. Use left click to place a point and use right click to remove it. You can tweak the appearance in the tabs below in the same way we discussed in the placemark. It has an extra tab Measurements, which shows you the measurements of the marked area. Click OK after finalizing your polygon.
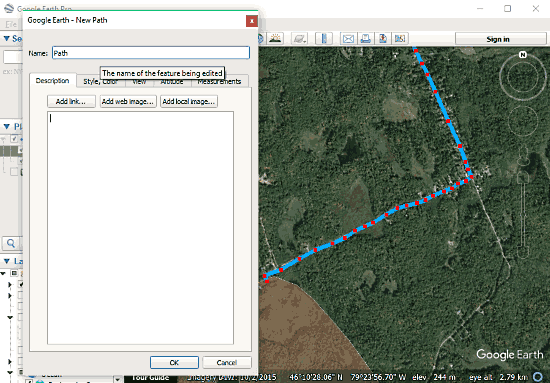
Add Path:
Now, the only necessary thing remaining is the path to your placemark. With Add Path tool, define a path from a known/famous location to your placemark. Use different colors and vary the width for the different type of paths. Like, walking/cycling path is narrow, driving path is wide, this will help others to differentiate between those easily.
You can add image overlay in the same way and can also record a tour for easy assistance. These are the additional options, so we are skipping them in this tutorial. Try them yourself.
Once all done, you can see all the things you defined under My Places section in the left side panel. Now, right click on My Places, here you will see an option, Save Place As, click on that and save your map with whatever name you like. Save it with KML file type.

At this point, you successfully create a custom map KML file. Now, let’s move to the next step.
How To Import Custom Map KML File To Google Maps?
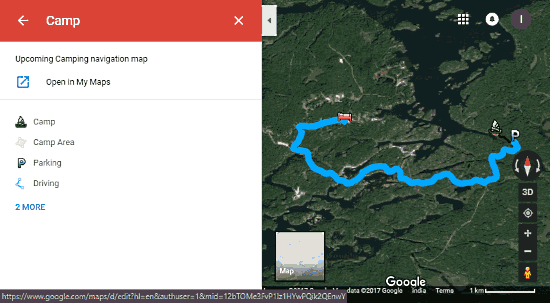
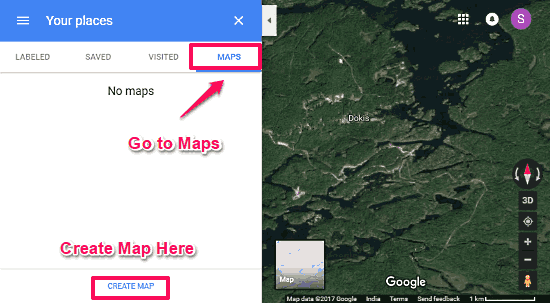
To import your custom map KML file to Google Maps, go to Google Maps and sign in with your Google account. You can do the same on your android phone as well.
Open Google Maps and go to Your Places from the left side menu. In Your Places, go to Maps tab and click on Create Map. It will take you to Google My Maps. For Android users, there is an app for this purpose called Google My Maps. Install it by following this link and rest of the process is similar.
You can also open Google My Maps in Google Maps app. For that, follow this tutorial, How to Open Google My Maps in Google Maps Android App.
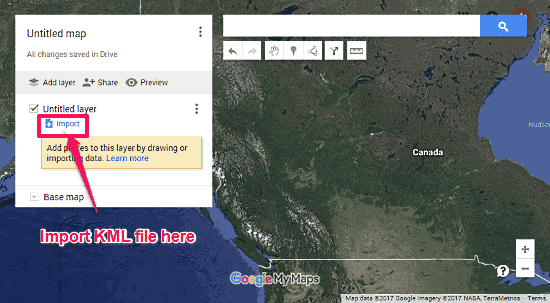
In My Maps, click on Add layer and import the KML file you saved earlier.
It will load that custom map, you can preview it in Google Maps. Click on Save button to save the custom map in Your Places. Google will sync it with your account and you can access it on any device by signing in with your Google account.

Final Words:
Custom map is very easy to create and you can share it with others easily as well. This can be very helpful if you’re planning a hitchhiking or tracking trip. Also, you can create a map for your company, shop, business etc., and upload it to your website, so that people can find it easily.