Google Sheets comes with lots of in-built functions and it lets you create your own functions as well. This feature was available earlier too but it could be done only using Apps Script. Fortunately, now Google Sheets offers Named Functions that you can use to create your own functions easily.
Using Named Functions, you can provide Customized Name and Description to the function, and type the Formula Definitions. Once you create a Named Function, you can use it across all the sheets in your workbook. You will also be able to import the created function to other workbooks.
So, let’s go ahead and see how you create Named Functions in Google Sheets. We will use a sample Google Sheet as example to show you the process of creating a Named Function. In this we will create a function to apply a remark to the Expected Revenues based on some values. This example is only to explain the process of creating a Named Function. You can set up any function that you want based on your requirements.
Here are the steps that you can follow:
1. Login to your Google Account and create a new Sheet or open a Google Spreadsheet with some existing data to be used.
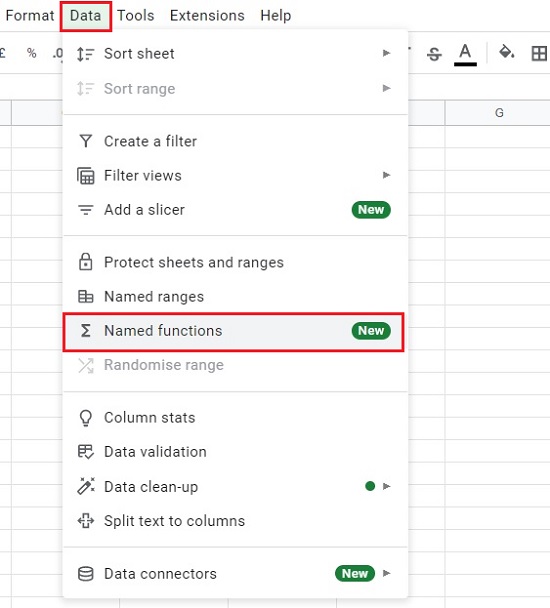
2. Click on ‘Data’ in the top menu and then click on ‘Named Functions’ to open the sidebar from where you can create the Function.
3. Next click on ‘Add New Function’ at the bottom of the sidebar and type a Name for your function in the box that has been provided for the purpose. The default name that has been provided is MY_FUNCTION1.
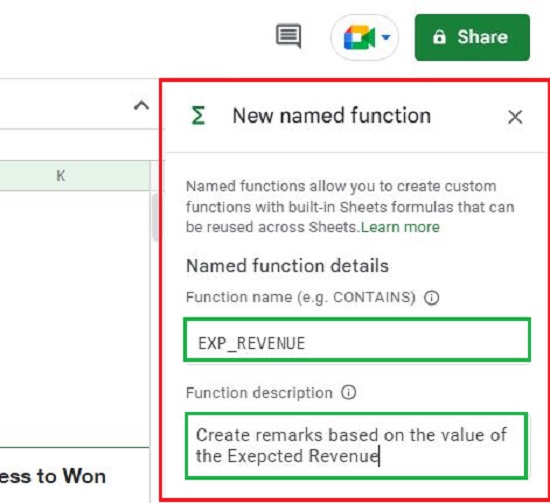
4. Provide an optional description for the function as a good practice which is very helpful for you as well as the people with whom you collaborate on this sheet.
5. Next, type the Argument Placeholders which are also optional but are very important for creating most of the common formulae. For example, you may use a cell or range as an argument depending on whether the function will utilize a single cell or a range of cells as the input. All the placeholders that you type and select will be displayed below with a different color and this comes in handy while creating the formula definitions.
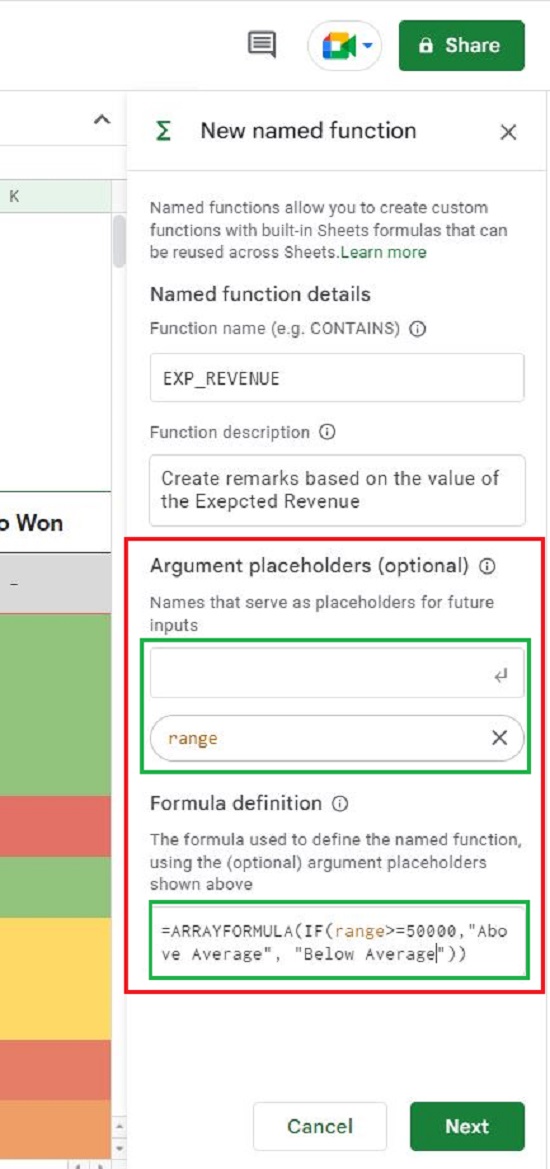
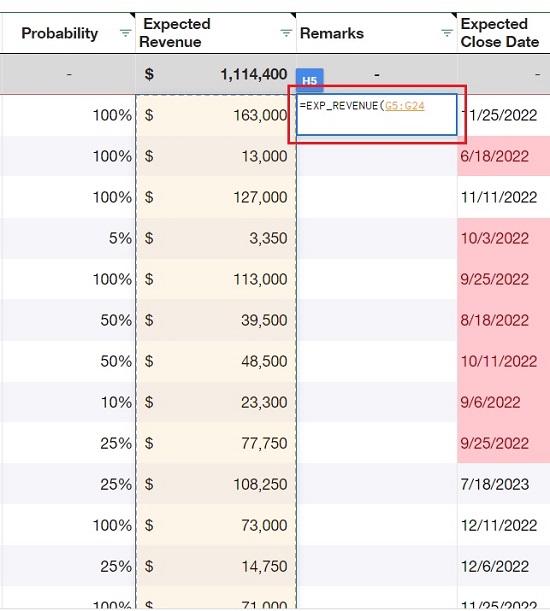
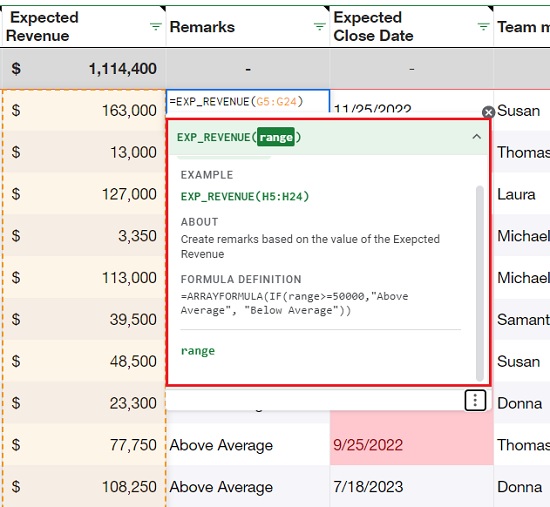
6. Finally, type the Formula Definition which is the main formula that defines your Function. Use placeholders you added above within the formula. The formula definition that we will be using in this example is given below. Note that we are only using the range argument in the formula definition.
=ARRAYFORMULA(IF(range>=50000,”Above Average”, “Below Average”))
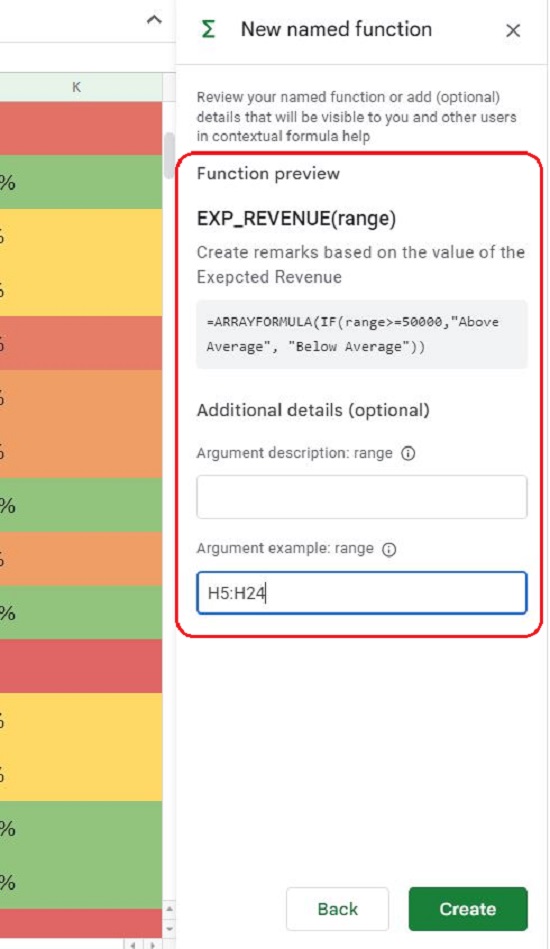
7. Verify all the details in the sidebar and click ‘Next’. This brings up the Function preview screen where you can provide additional details for the Help box such as a description and example of each argument that has been used. Now click ‘Create’ to save your new function.
8. Now you will be navigated back to the main sidebar where you will be able to see the function that you just now created.
9. Lets now see how we can use the Named Function that we created above. Click on the cell where you wish to use the output of the Function, type the equal to sign followed by the name of the Function and the necessary arguments and press Enter. If everything is correct you will be able to see the output as expected.

10. If you open the Help box of the function, you will be able to view all the details and information that you entered above.
You can use the Named Function that you just created in all the Sheets in the Workbook. But, if you desire to use it in other Workbooks, you will have to import it.
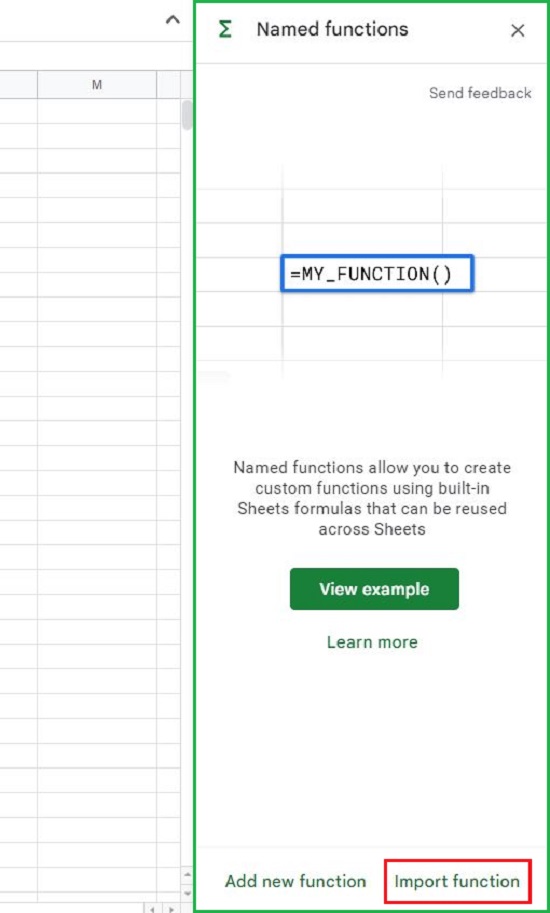
Here are the steps to import the Named Functions in other Workbooks.
1. Open another Workbook sheet. Make sure this is the one where you want to import the Named Function. Like earlier, click on ‘Data’ in the top menu and then click on ‘Named Functions’ to bring up the sidebar. Next, click on ‘Import Function’ at the bottom right.
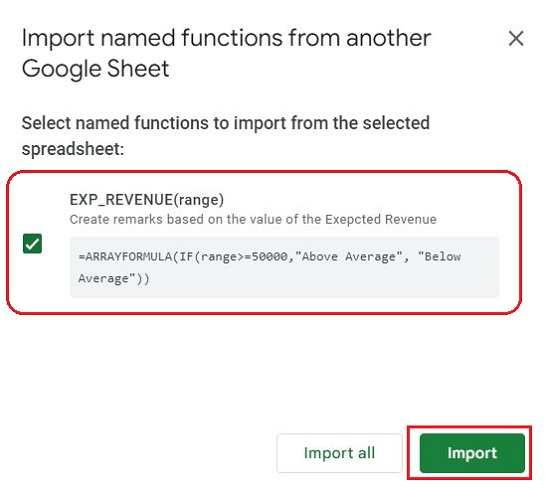
2. Locate the Workbook that contains the Named Function that you want to import. This can be done using the pop-up windows and tabs showing on it. Then click on ‘Select’.

3. You will be able to view all the Named Functions in the selected Workbook. You can use the checkmarks to choose the functions that you want to import and click on the ‘Import’ button. Alternatively, you can click on ‘Import All’ to import all the functions in the Workbook. Once the import is done, you will be notified of its success.
4. All the imported functions will now be available in this Workbook. You can view them in the Named Functions sidebar.
You may have been using JavaScript or Apps Script to design your customized functions earlier. But you should give the Named Functions tool a try as it’s a great feature and extremely easy to use.