In this post, I will explain how to convert VMDK to ISO in Windows. Here I will discuss about two handy methods and a bunch of free tools which will help you convert any given Vmware virtual hard disk file to an ISO file. There are various kind of virtual hard disk files but here I will be talking about VMDK. With the following two simple methods, you can easily access and convert a VMDK file to a live CD image that you can either put on your server to let others download or simply burn it to a CD. In the following post, I will talk about some software and command line tools that you can use to do the same.
The problem with VMDK files is that they are not recognized by Windows unless you mount them via third-party software. But this is not the case with ISO files. You can easily mount an ISO file as a virtual CD drive and then you can easily access all the files. This is why it is probably a good idea to keep the VMDK files by converting them to ISO. And there are not so many tools out there which can do it painlessly which is why I decided to find some free ways to do it I did find two that I will discuss in the post below.
How to Convert VMDK to ISO in Windows?
Method 1: Mount VMDK file and then Clone the Virtual Drive as ISO
The very first method that you can use to convert a VMDK file to ISO is by mounting it as a virtual drive and then simply convert all the files in the virtual drive to ISO. To do this, you will need help of two different software which are free. The first software that you will need is the ImDisk Toolkit and the second is ISO Toolkit. Using, ImDisk, you can mount a VMDK file as a virtual drive in Windows. After that, you can use the ISO tool kit to easily clone the entire drive that you mounted earlier to a ISO file in a just a few seconds.
You can download ISO Toolkit and get ImDisk Toolkit from here. ISO Toolkit is a portable software so keep it aside for a while and install ImDisk toolkit. After successful installation of ImDisk Toolkit, you will see an option in the right-click menu or Windows to mount a VMDK file. Now, follow these steps to use this method to convert VMDK to ISO file in Windows 10.
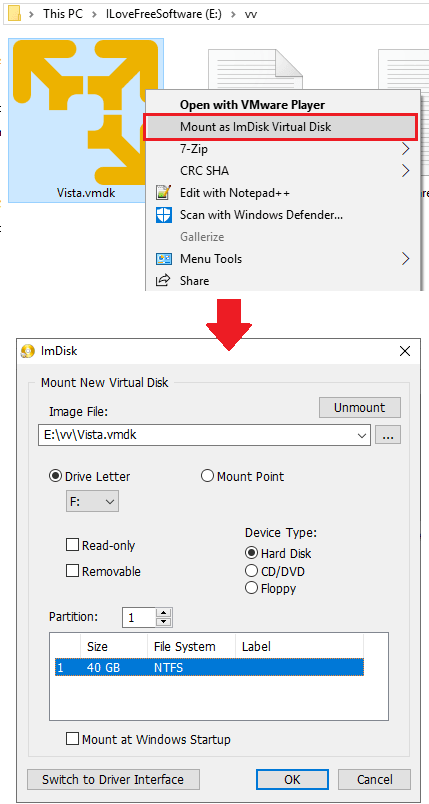
Step 1: Navigate to the target VMDK file that you want to convert to ISO. Next, right-click on it and then mount it as a virtual drive. You can assign any letter to it and if there are multiple partitions in the VMDK then you can choose the one the you want to mount.
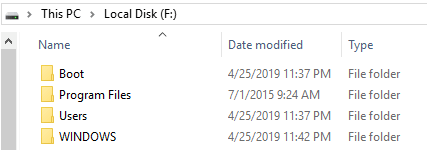
Step 2: Now when you have mounted the VMDK file, you can see all files in the virtual drive.
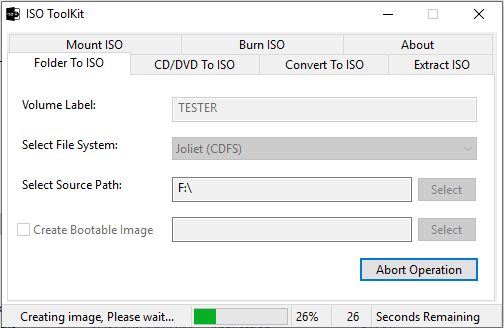
Step 3: Now, launch ISO Toolkit and from its interface, choose the “Folder to ISO” option. In the “Select Source Path” option, specify the drive that you want to clone as an ISO file. Next, hit the “Create Image” button and it will ask you to specify the target location where you want to save the final ISO file. When the process finishes, you can get the ISO file and then do whatever you want.
If you follow these step carefully, then in the end, you will get an ISO file that you can mount or simply burn that to a disk. This method takes less time as compare to the method below but if there are a lot of files in the VMDK, then it will take a long time to convert ISO too. If you don’t want to get into the trouble of operating command line tools then you can use this method for VMDK to ISO conversion.
Method 2: Convert VMDK to ISO using DD
If you have used Linux then you must be familiar with dd. This is one of the built-in utility in Linux which is responsible for copying files and conversion purposes. To convert a VMDK file to ISO , you will first have to convert it to a raw image and then you can use dd command to convert it to a ISO file. And to convert the VMDK to a raw image file first, you will need help of another command line utility called, qemu-img. This is also a part of Linux and it can convert disc images from one format to another. And luckily bit these utilities are available for Windows a well. So, you can easily use these two to make the conversion of VMDK to ISO possible.
Download qemu-img and DD for Windows from here. Put both; DD and qemu-img in the system PATH and then open a command prompt window in the folder where the source VMDK file is. Next, follow these steps for successful VMDK to ISO conversion.
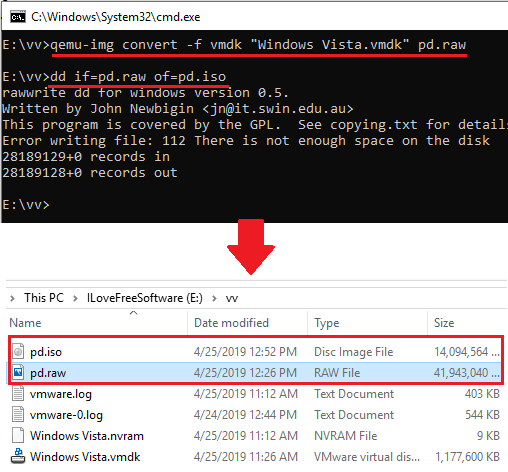
Step 1: Open the command prompt and then run the following command. It will take the source VMDK file and then convert it to raw image (RAW file extension). Do note that, this command will take time. And the file that it will create will be of same size as the partition in VMDK. So, you have to make sure that you have enough space in your PC.
qemu-img convert -f vmdk [VMDk File] pd.raw
Step 2: Now, run this command in the same folder to convert the generated RAW file to ISO. This process will take less time than the above command. And when it finishes, you will have the ISO file in the same directory.
dd if=pd.raw of=[Output ISO]
You just have to execute these two commands in order to get the ISO out of the VMDK file. You can see the following screenshot how these two commands work.
This is a good method but best suited for programmers and people with technical background. Also, if you like command line tools then you can also use this methods for VMDK to ISO conversion. If you have hard disk image in other format than VMDK then you can use these same commands for the same.
Wrap up…
If you use virtual machines a lot to set up different OS and other tool then you will like this post. You can take out all the virtual drives from the Vmware or any other software and convert them to ISO. By converting them to ISO, you can mount them or you can simply put them on a server. I have discussed two different methods in the above post and based on your interest, you can go with anyone.