LosslessCut is a free lossless video trimmer to trim video without losing quality. It allows you to select almost any type of video files like MP4, AVI, MKV, etc. and easily trim specific video parts. The best part about this software is that you can trim video parts without losing the video quality. It actually uses FFmpeg to help you trim videos. Another interesting feature is that the video trimming is super fast as it doesn’t do any encoding or decoding. It also comes with other features like trim audio files losslessly, take screenshots from videos, etc.
There are many other video cutter software available which also allow you to trim videos. But, if you see the output videos then you will notice that the quality of the videos has changed a bit or more. So, if you don’t want to lose the quality of your videos while trimming, then using this lossless video trimmer is probably the best option for you. It is an open-source and cross-platform video trimmer and is available for Windows, Mac, and Linux.
How to Trim Video without Losing Quality with This Free Lossless Video Trimmer:
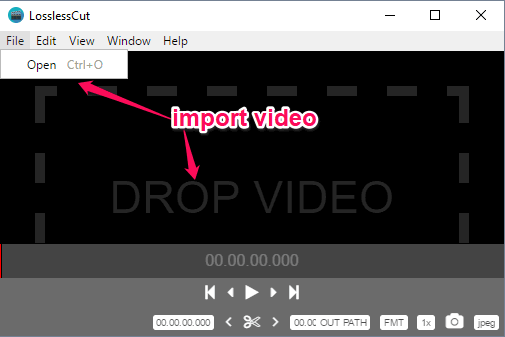
Before you get started, download “LosslessCut” and install it on your PC. The download link is provided at the end of this article. After you’re done installing it, simply open it up and then click on the “File” menu to import the video which you want to trim. You can also drag and drop a video file on the interface to start trimming.
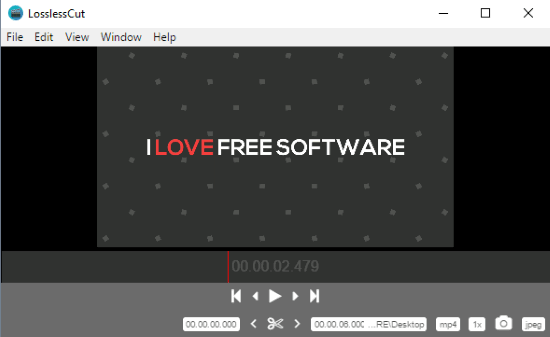
When you have imported a video to this software, you will be able to play it using the playback control at the bottom of the interface. Now, to trim any specific part of the video, the first thing you would need to do is select the start and end time. To do this, simply click on the timeline where you want to set the start time marker first. After that, click on the “Arrow” icon associated with the start time field.
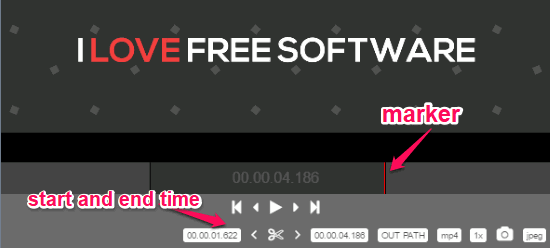
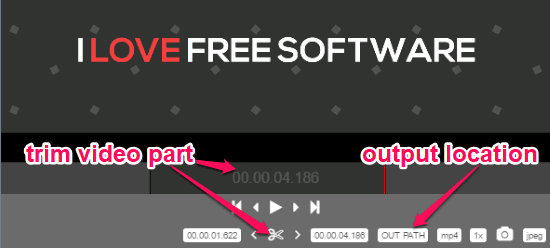
After you’re done setting the start time, click again on the timeline where you want to set the end time. The click on the “Arrow” icon associated with the end time field at the bottom. Once you’re all set, simply click on the “Scissor” icon between the arrows to trim the selected video part. The select video part will be trimmed instantly and saved to the output location. You can choose the output location manually.
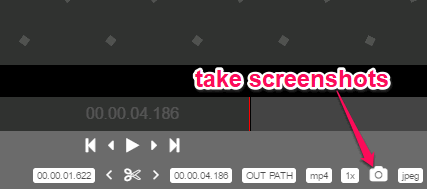
Now, when you play the output video file, you will notice that the quality is almost the same as that of the original video. Similarly, you can also import audio files and trim them without losing the quality. At the bottom right corner, you will see an option to take screenshots from the video. You can take screenshots just by clicking on the “Camera” icon. There you will also see the option toggle JPG or PNG as the output format for the screenshots.
Closing Words:
LosslessCut is a very useful software which makes it possible for you to easily trim videos without losing the quality. Personally, I like this free lossless video trimmer as it can trim videos really fast. It is perfect for trimming large and RAW video which you have recorded using DSLR, GoPro, Drone, etc.