This article covers an easy way to schedule dark mode in Windows 10. In recent times, the trend of the “dark mode” or “night mode” is one of the most popular features going on in application and software updates. It provides you a dark user interface to each new window that increases the visible readiness and reduces the eye strain. However, in order to activate this service in your PC, you need at least 3-4 clicks on Windows 10. And, there is no such direct approach that supports to schedule the switch by itself.
Although, in this tutorial, we come with a Luna application that is a trusted tool and it lets you schedule switching times automatically. This is an open-source program that has been made available for the Windows 10 users only. This is an open-source program that has been made available for the Windows 10 users only. With a pretty simple interface, you can use this application without paying a single penny. Isn’t it sound interesting? So, let’s move to the below section and know more about it.
How to Schedule Dark Mode in Windows 10?
In this application, you will not find a massive list of features, but one thing is clear that you will not experience any flaw while operating it. If you want to schedule dark mode in Windows 10, you need to visit this link and let the Luna app download on your device. Once the application gets downloaded, navigate to the download location and double-click on it.
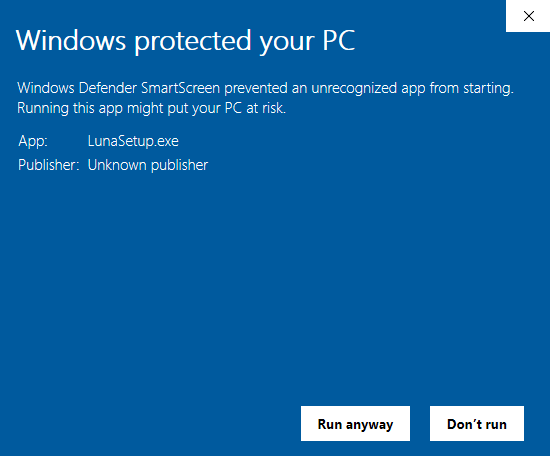
In the new window, click on the “More info” and hit the Run anyway button available as shown in the above snapshot. Now, proceed with the on-screen instructions and finally, click on the Finish button to complete the installation process.
After the proper installation, you need to open the application. So, click on the Start button and search for the “Luna” application. Select the result from the list and once it opens, you need to mark the checkbox against the “Enable automatic theme changer”.
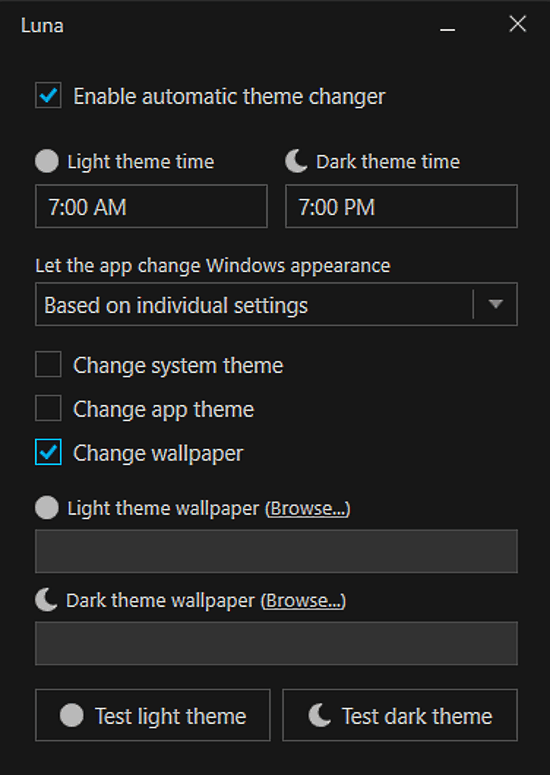
In the Luna app, you can easily enable or disable the dark theme attributes for a particular time period. To start this service, you need to schedule the time for Light theme time and Dark theme time. After that, mark the checkbox associated with the “Change app theme”. Once you do, the Windows Settings, File Explorer, and other applications will start receiving the dark theme.
Another feature is the “Change system theme” option. Once you enable this option, you can easily adjust the dark mode and light mode feature for your system as well.
The third option here is to “Change Wallpaper”. Since the inbuilt dark mode theme is not able to change the desktop wallpaper by itself. Therefore, this option becomes quite useful if you need to change the wallpaper for the dark theme. You can do it by selecting the separate wallpaper for the light theme and for the dark theme as well.
To do so, tap on the Browse button and then navigate to the wallpaper stored on your computer. Once you select it, click on the Open button.
Closing words:
Luna is an easy to use and super lightweight application that is available for Windows 10 users at free of cost. This software is designed using C# and WPF technologies that let you switch to the Dark Mode theme automatically. Inside this application, you will also find some other interesting features such as Change app theme, Change system theme, and Change wallpaper. During the run time of this tool, no program runs in the background so, it will not slow down the performance of the computer. Also, it doesn’t require to activate when the Windows starts. In order to download this tool, you need to go to the official page of the GitHub.