Buncee is a free online application to create interactive lessons and set up classes with multimedia files. This application is completely useful for teachers (to create lessons and classes) and for students (for assignments and projects). It offers a vast presentation canvas where you can add files like photos, audio, videos, links, drawings, stickers, etc. All your lessons and classes are stored in the cloud and can be shared or downloaded. You can create a virtual class where you can add students, review their grade, assignments, etc. Ultimately, it is a simple web-based tool to let you create digital presentations for the purpose of learning, story-telling, projects, and much more.
Similar to another online tool “Nearpod“, Buncee also supports drag-and-drop function for multimedia files. The best part is that apart from uploading files from your PC, you can also insert YouTube videos, Flickr images, Instagram images, SoundCloud audio, etc. After inserting different multimedia files, you can resize them, rotate them, expand canvas, and also hyperlink text.
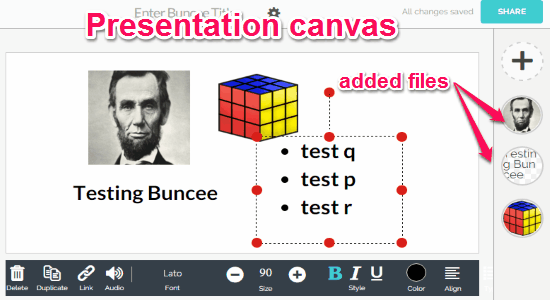
From the following screenshot, you can see the canvas filled with different multimedia files.
Note: The free version is restricted to 10 recipients, JPG download, etc. and these limitations can be overcome by purchasing the premium version.
How to Create Interactive Lessons by Adding Multimedia Files:
Step 1: Simply go to the homepage of this application and register yourself to start creating lessons or presentations.
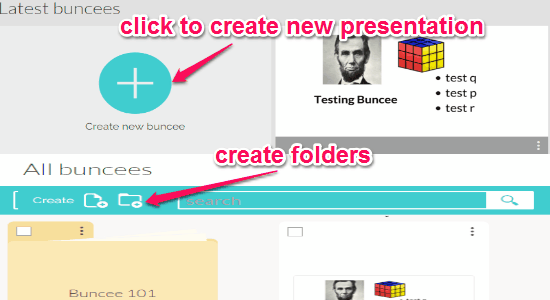
Step 2: After you log in, simply click the “Create new Buncee” option and proceed to the canvas. All your presentations will be visible on the main window and can be organized by creating new folders.
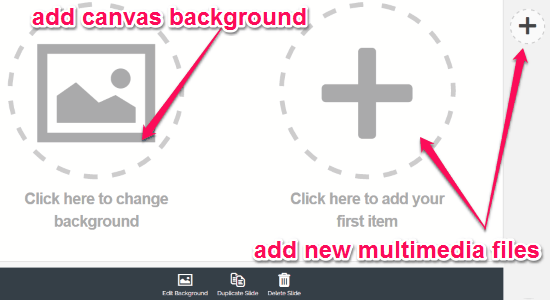
Step 3: After opening the canvas, it will ask you to add canvas background and your first multimedia file by clicking the “+” button. You will also be able to duplicate the presentation, delete it, or edit the background as required.
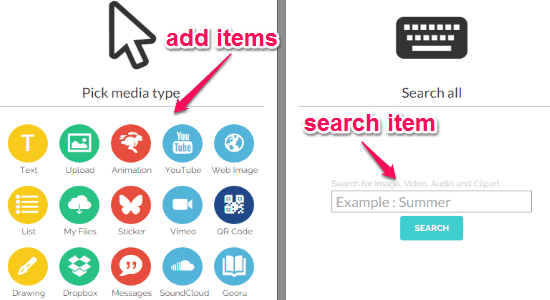
Step 4: As soon as you click the “+” button, a pop-up will appear with the options of adding and searching multimedia files. We have already discussed that you can add files like text, images, URLs, videos, stickers, drawings, Dropbox files, messages, SoundCloud tracks, QR code, YouTube videos, and much more. If you wish to search for any particular clipart, audio or video, then simply use the search function to do so.
Step 5: The best part of the editor is that you can add as many slides as you want, resize and rotate items, change font and color of the text, drag-and-drop items from PC, use dozens of built-in clipart and stickers, etc.

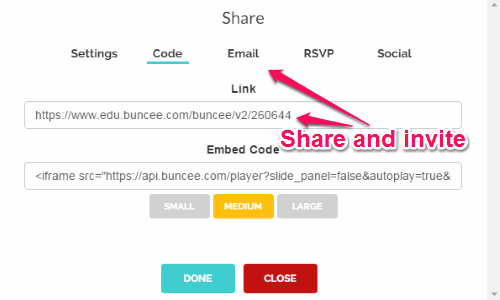
Step 6: After you’re done with creating presentations with multimedia files, you can simply share them via email or social networks, embed on your website, and download them in your PC. To add others (students, colleagues, etc.), simply share the unique URL or send an invitation via email and social networks.
My Final Verdict:
Buncee is a very useful online application which lets you create interactive lessons, set up a virtual classroom, collaborate on projects, etc. You can add different multimedia files on the presentation canvas including web items. Personally, I like application as it makes creating presentations so much easier.
Try this application from the link here.