This post contains some best free apps for Linux desktop to draw on screen. These are nothing but ink over apps for Linux that you can use to annotate the screen with free hand drawing and shapes. You can use them during a screen sharing session to demonstrate something to the participants. If your video conferencing app doesn’t have a whiteboard, then you can use your screen as a canvas, and the apps I have mentioned here will help you.
The annotation tools I have mentioned here can be invoked from a shortcut or like a program, and then you can draw anywhere on your screen. You can use different colors, shapes, and arrows for your drawing and even save it for later. Some of these apps let you save your drawing as an image.
A lot of people use Linux, but the naive ones do not know about the tools for Linux and how to install them. And with that in mind, here I will be listing 5 such tools you can use to draw on your screen. Since Linux doesn’t have any central package management system, so I have added some exclusive tools as well that work with a specific Linux distro.
Draw on Screen on Linux Desktop with these 5 Free Tools
Grompit-MPX
Grompit-MPX is a simple and one of the best software for Linux that you can use to draw on your screen. Here it lets you freeze your computer screen so that you can draw anything over it. It is an open source and straightforward tool available for Linux, and it comes with a minimal UI. However, for now it lacks the availability of shapes. You can only use it to draw freely and change the color and stroke.
It is a customizable Linux tool and comes with a global configuration file that you can teak based on your needs. You can toggle between the normal screen and drawing mode with the help of keyboard shortcut and do whatever you want.
To install it, you just have to run the following command in Debian based distros. If you are using Arch or openSUSE then you may want to install it using Flatpak
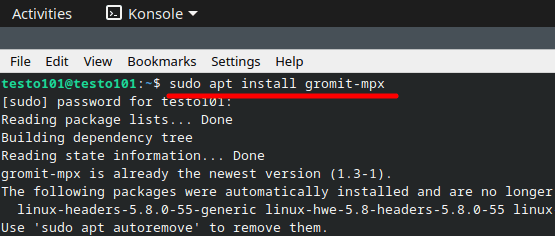
sudo apt install gromit-mpx
After you have installed, you can just launch it and then start drawing after toggling to the painting mode. You can draw anywhere on your screen and the drawing it pretty smooth. There are some options that you can configure from its try icon and they are:
So, just install it and use it in this way and do whatever you want. It is in active development, so I hope the maintainer or developer of this tool adds support for shapes in the coming updates.
Pylote

Pylote is another tool you can use on Linux desktop to draw on screen. Here it pretty much like Grompit above but offers more features. It offers you free hand drawing and rules for the screen. You can draw anywhere on the screen, and it even lets you add text. Apart from just annotating, you can add text and then save everything as an image or as an SVG file.
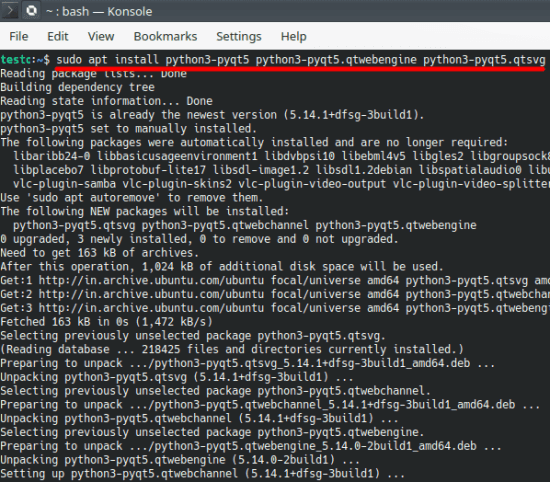
You can screenshot what you drew earlier, and you can also import it back to start the drawing from where you left off. It is also an open source tool and just needs a few dependencies to be installed first in order to function properly. The very first thing you have to do is open terminal and run the following command to set up modules needed for it.
sudo apt install python3-pyqt5 python3-pyqt5.qtwebengine python3-pyqt5.qtsvg
Now, you download the Pylote archive from the above link and extract it. From the extracted folder, you just double-click on the “pylote.pyw” file and its main UI will show up. From the dropdown, you can configure the drawing modes and then draw on the screen accordingly. Use the draw tool or the highlighter or the text tool and save it.
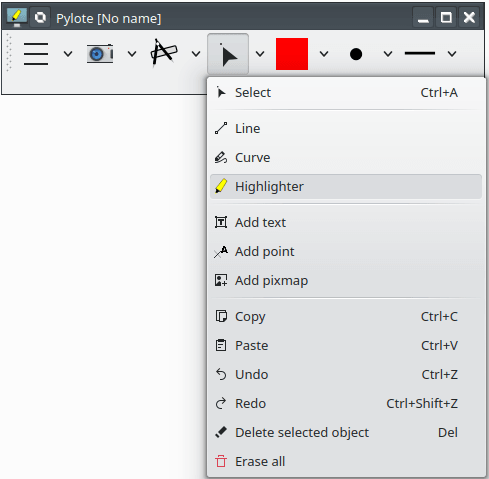
There is an option in it to save the drawing as PNG image and as a SVG. You can select what you want and then simply save and share whatever you have drawn.
This is how this tool works in Linux to draw on screen. Just like other tools in this list, you can use it during team meetings and then demonstrate things via freehand drawing.
Draw On Your Screen – GNOME Shell Extension

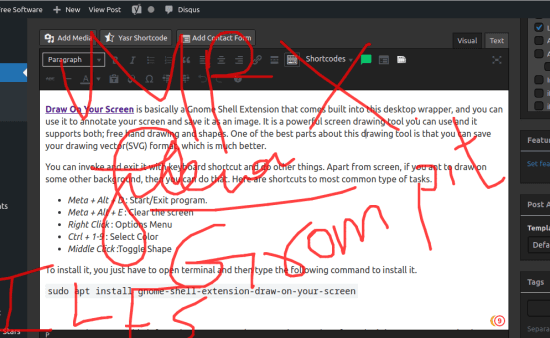
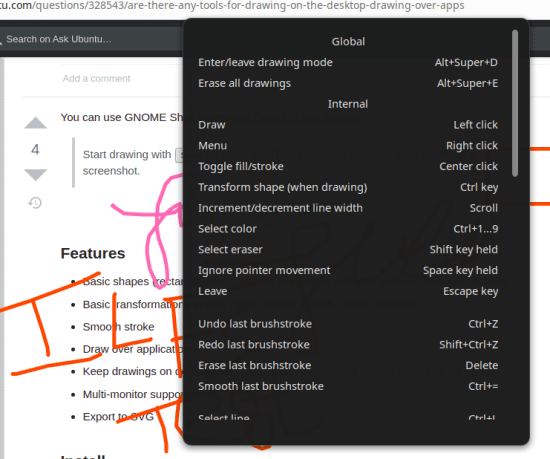
Draw On Your Screen is basically a Gnome Shell Extension that comes built into this desktop wrapper, and you can use it to annotate your screen and save it as an image. It is a powerful screen drawing tool you can use and it supports both; free hand drawing and shapes. One of the best parts about this drawing tool is that you can save your drawing vector(SVG) format, which is much better.
You can invoke and exit it with keyboard shortcut and do other things. Apart from screen, if you ant to draw on some other background, then you can do that. Here are shortcuts to most common type of tasks.
- Meta + Alt + D : Start/Exit program.
- Meta + Alt + E : Clear the screen
- Right Click : Options Menu
- Ctrl + 1-9 : Select Color
- Middle Click :Toggle Shape
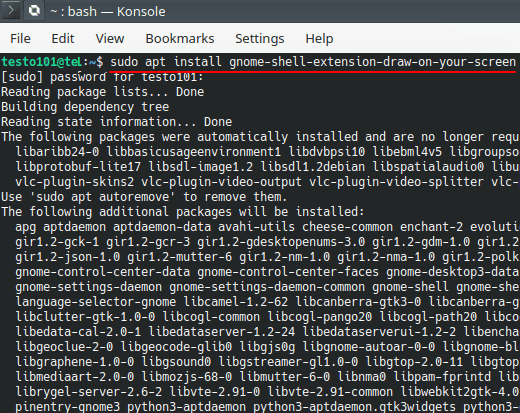
To install it, you just have to open terminal and then type the following command to install it.
sudo apt install gnome-shell-extension-draw-on-your-screen
Next, you have to enable it from the Gnome Tweaks > Extensions section. If you don’t have Gnome Tweaks then you will have to install it first from the Ubuntu Software.
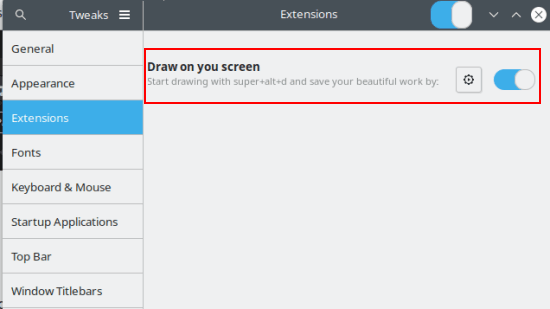
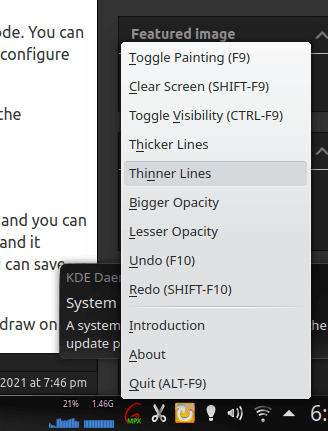
After it has been installed, you run it using the Meta + Alt + D and draw freely. To change the colors or switch to shapes, you only have to right-click and then select the whatever option from there. It is shown in the screenshot above. You can also open the help window and see shortcuts to all the tools and options supported by this screen drawing and annotation tool.
GNOME comes as a default desktop wrapper for a lot of distros. And if not default, then you can always install it additionally or choose it as a default desktop while installing a Linux distro such as openSUSE or Ubuntu.
KDE Mouse Mark
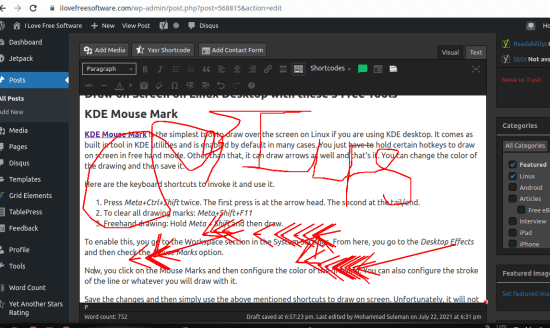
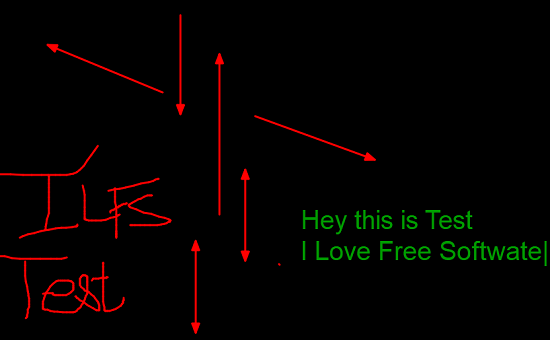
KDE Mouse Mark is the simplest tool to draw over the screen on Linux if you are using KDE desktop. It comes as built in tool in KDE utilities and is enabled by default in many cases. You just have to hold certain hotkeys to draw on screen in free hand mode. Other than that, it can draw arrows as well and that’s it. You can change the color of the drawing and then save it.
Here are the keyboard shortcuts to invoke it and use it.
- Press Meta+Ctrl+Shift twice. The first press is at the arrow head. The second at the tail/end.
- To clear all drawing marks: Meta+Shift+F11
- Freehand drawing: Hold Meta + Shift and then draw.
To enable this, you go to the Workspace section in the System Settings. From here, you go to the Desktop Effects and then check the Mouse Marks option.
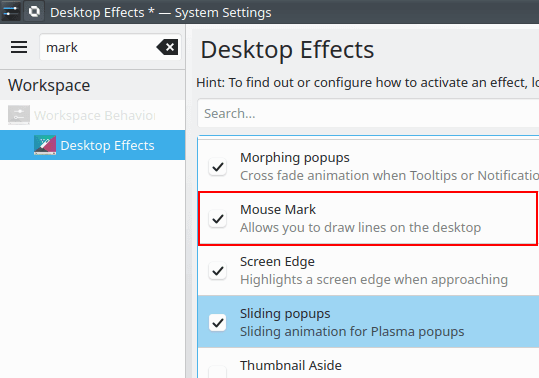
Now, you click on the Mouse Marks and then configure the color of the drawing. You can also configure the stroke of the line or whatever you will draw with it.
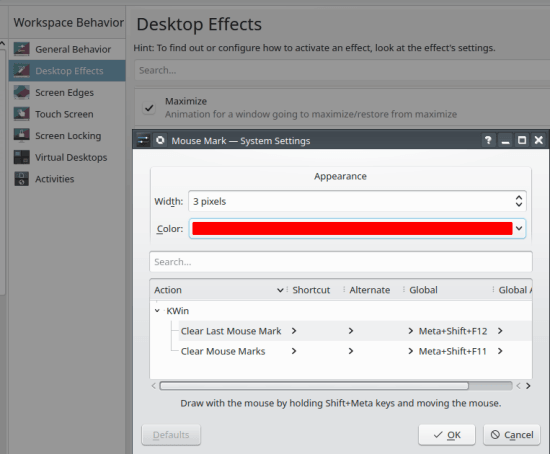
Save the changes and then simply use the above mentioned shortcuts to draw on screen. Unfortunately, it will not save your drawing, so you will have to take a screenshot of the entire screen and save it if you want to save or share your drawing.
TekaPoint
TekaPoint is the last free tool I am mentioning in this list that you can use to draw on screen. Just like the tools above, it offers you almost everything that you can hope for. It offers shapes, free hand drawing, text, and some other things. The best part about it is that you can use it to draw over the current screen, or you can draw on a white or a completely black background. It works with the help of keyboard shortcuts ad petty smooth as well.
It runs in potable mode and apart from Linux, you can use it on Windows as well. You don’t have to install it via package manager, as you just grab its ZIP file from the above link and then simply run the TekaPoint executable. It has single headed, double-headed arrows with shapes like triangles, squares, rectangle, and some custom figures.
By default, it will save all the drawings that you draw. Also, you can import them later to start drawing again and save the changes It can save your drawing as an PNG image and you can do whatever you ant with that. Before start using it, I will advise you to go through its documentation first. Learn how to bring back the help menu, change colors, and insert shapes on the screen or canvas.
Wrapping things up…
Out of all the tools I have mentioned here, I will say Grompit and TekaPoint are the best apps to draw over the screen. They offer great features and you can easily run them during a screen sharing session or whenever you want. Other apps that I mentioned are also good, but they are distro specific. If you have Gnome desktop on your Linux then you can use the one it comes with. Similarly, if you are on KDE, then you use the one comes with the system.