Pingvin Share is a free self-hosted file sharing services with antivirus scan, file expiry, file size limit, and more. You can self-host it on your own server and facilitate file sharing for users and your audience. Pingvin Share gives you full control of the file sharing services that it hosts, and you can anytime stop it as well if you want to. The installation part is easy as well since it supports Docker.
We have covered a self-hosted file sharing service before, but this one here is lite and even more configurable. You can also think of it as an open-source alternative to WeTransfer. As an administrator, you will be able to control every aspect of this file sharing platform from users to shared file size and more.
Here are the main features of this file sharing Service:
- Share files using a simple, custom link.
- Unlimited file size. You can limit the size though.
- Set an expiration date for shared files.
- Securely share files with any visitor while limiting access via passwords.
- Email recipients. In addition, you can also configure email alerts.
- Integration with ClamAV for file security and virus scans.
Installing and Setting Up Pingvin Share:
As I mentioned it already that it supports Docker installation, so you can follow that.
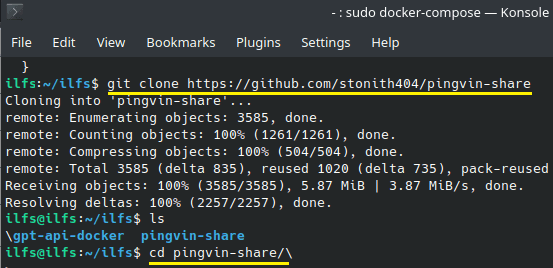
You start by cloning the GitHub repository of this service. After that, you only need to add cd into it and then find the docker-compose file.
git clone https://github.com/stonith404/pingvin-share && cd pingvin-share
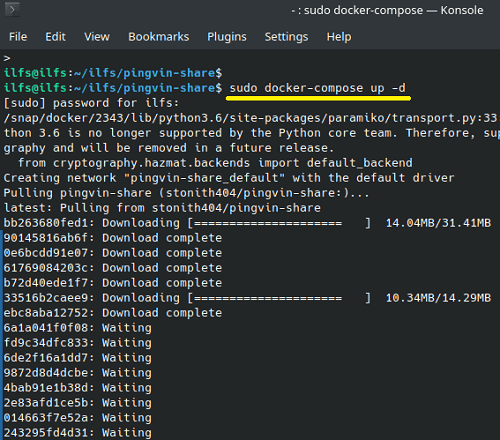
Now, you just have to make sure that Docker and Docker-Compose are available on the server or PC you want to install it on. Just run this command and then wait for it to deploy it. This process can take some time, so you need to be a little patient while it is setting all the dependencies and configurations.
docker-compose up -d
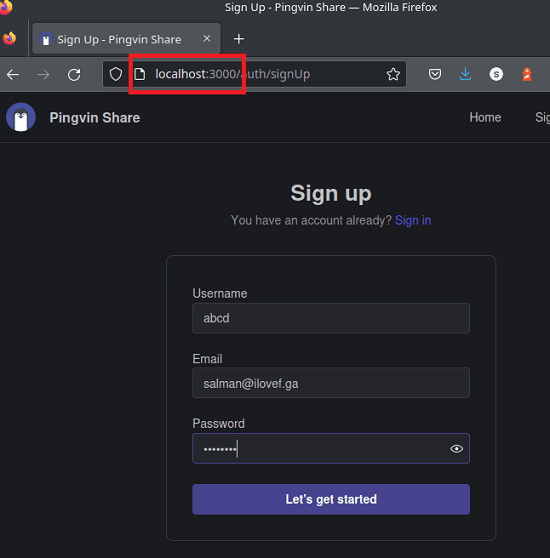
Finally, when the app has been deployed, you just need to go type localhost:3000 in the browser and the main UI of Pingvin Share will come up. You need to sign up to create an account. The first account will be treated as the master account.
At this point, you have successfully installed Pingvin Share. Now, go through the below sections to see how it works and the configuration process.
Configuring Pingvin Share for the First Time:
After you sign in, it will take you to the configuration page. From here, you need to configure a few things about it such as:
- SMTP: For email notifications and alerts. Enter the SMTP server details and save the changes.
- File Size: If you want people not to upload very large files on the server then from here you can limit that
- Allow/Disallow Registration: You can turn this option if you want users to register first.
- Email Messages: There are predefined email templates for new shared files, password reset, and reverse share. You can configure these templates and even specify your own.
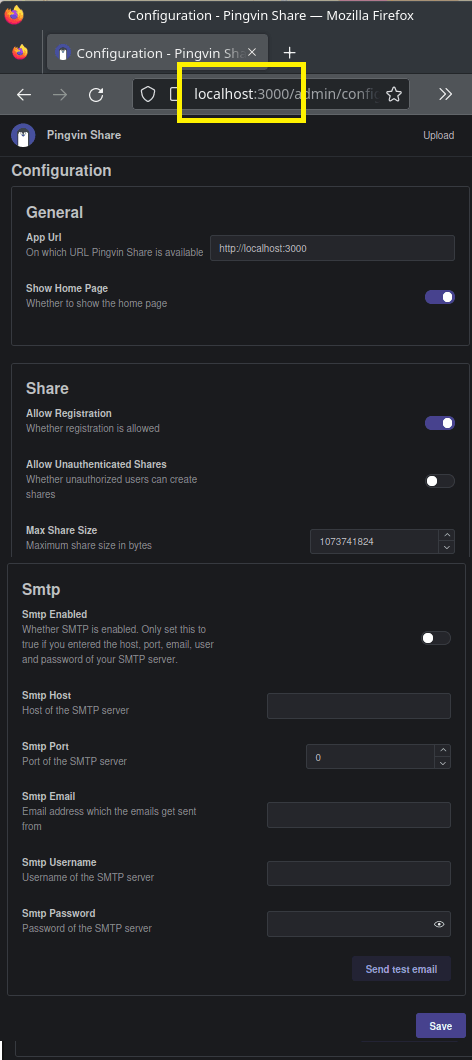
After configuring these setting, you just save the changes, and they will be applied immediately. In addition, if you know how to DevOps operations then you can assign a domain here and map it to the servers’ IP address. Also, you will have to generate HTTPS certificates. There are tools and tutorial out there to do, so, I will now show here how to do that.
Using Pingvin Share for File Sharing:
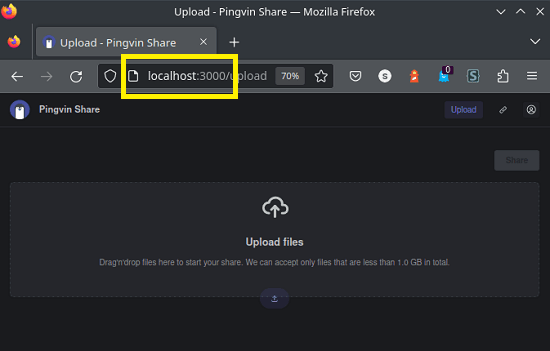
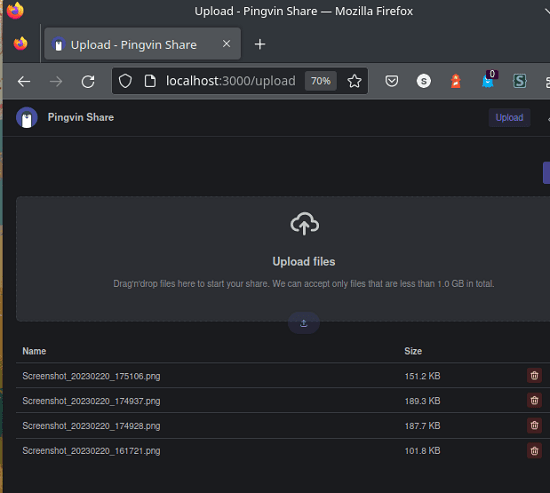
Once everything is set up, it is very simple to use it. Just go to the main homepage and then upload screen will show up. It is very simple, and you just go ahead and upload files. You can upload a single file, or you can also upload multiple files if you want to.
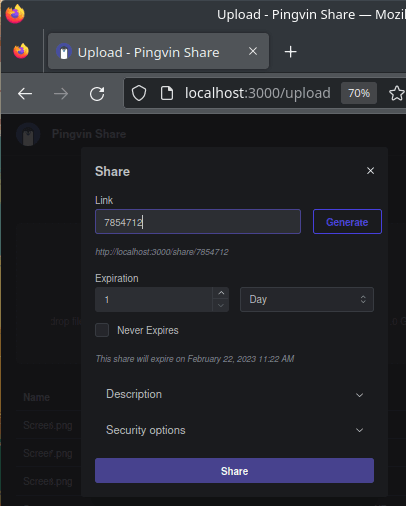
After the files have been uploaded, simply click on the Share button and then it will open a popup. From, here, you just need to set the expiration date, a description, and set a custom URL if you want to. Do note that, the domain will remain same, but you can name your link to anything you want.
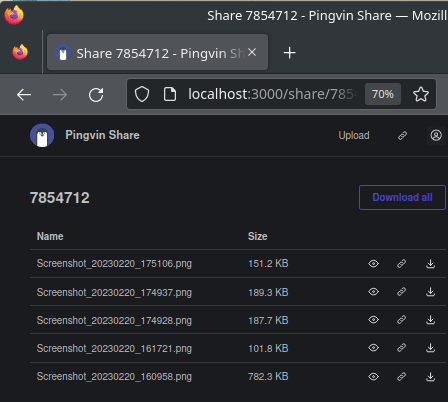
Finally, share the files and it will give you the link. You can share this link with anyone. The shared files will look like this. It even gives preview option, so you or anyone can see what the file is before actually downloading it.
This is how you can use this simple and powerful self-hosted file services. Run it locally in an organization or you can host it on a VPS. Then interface and deployment are very simple, and you can use it for as long as you want.
Closing thoughts:
If you are looking to host your own file sharing service, then Pingvin Share is a very good option. Just go ahead and give it a try. I have already mentioned installation and configuration details here that you can follow. Everything is super easy to set up and you just have to run a few commands and then forget it. I liked that it lets you customize so many aspects of file sharing and the fact that it comes with antivirus support.