In this post, I will talk about how to enable Storage Sense in Windows 11 to delete temporary files and free up disk space. By default, this feature stays disabled but I will walk you through simple steps to enable it. After you enable it, it will analyze the temporary files on your PC and will keep deleting them automatically to
I think Microsoft is trying to extend Disk Clean up in Windows 11 and that’s why they have included Storage Sense in the Storage settings. Storage Sense runs automatically as well, and you just turn it on. The process of using and configuring is very simple. And you just need a Windows 11 PC in order to set this up.
A lot of temporary files on your PC can slow down your PC and the overall performance. It can also clutter your hard disk as well so, it is better to delete them as soon as possible. There are already a lot of free disk cleaners out there which you can use. But if you don’t want to reply on a third-party tool for this then you can use the built-in feature of Windows.
How to Enable Storage Sense in Windows 11 to Free Disk Space, Delete Temporary Files?
If you have a Windows 11 PC then you can just follow these steps to enable Storage Sense.
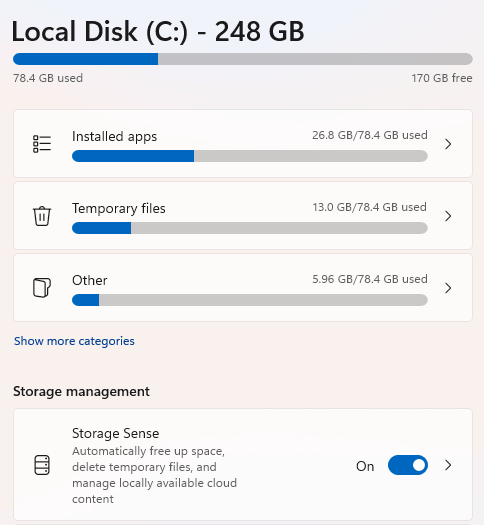
- Open Settings app and navigate to System > Storage and on this page, it will show you the stats of the C drive. You can see this in the screenshot below.

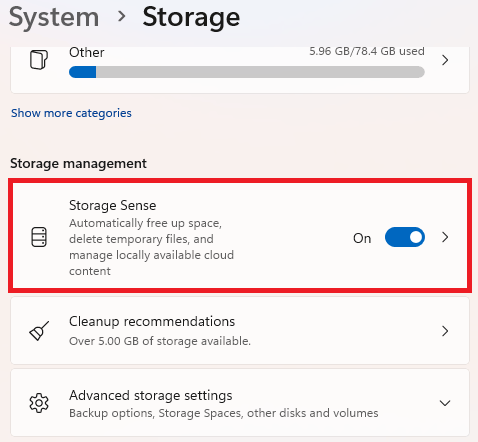
- Now, you will see the Storage Sense option there which is disabled there by default. Just slide the switch to turn it on.

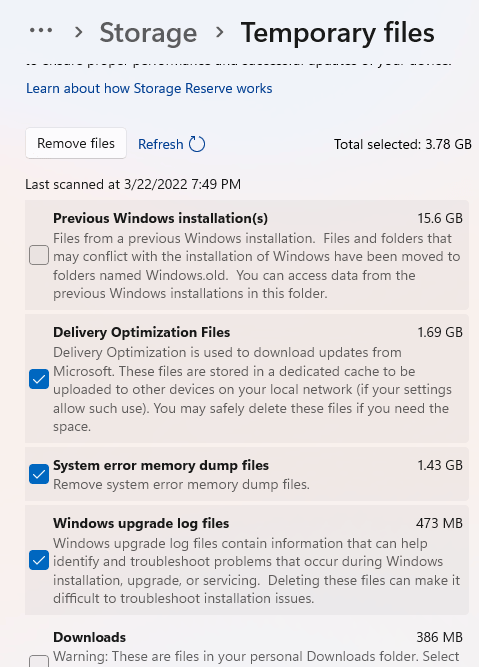
- After a few minutes, here it will show you the stats of the temporary files on your PC. You will be able to see the storage that is being used by the temporary files. Click on the Stats and then it will show you more details about them.

- Now, from this page, you can remove these files and gain space on your hard disk. This is as simple as that.

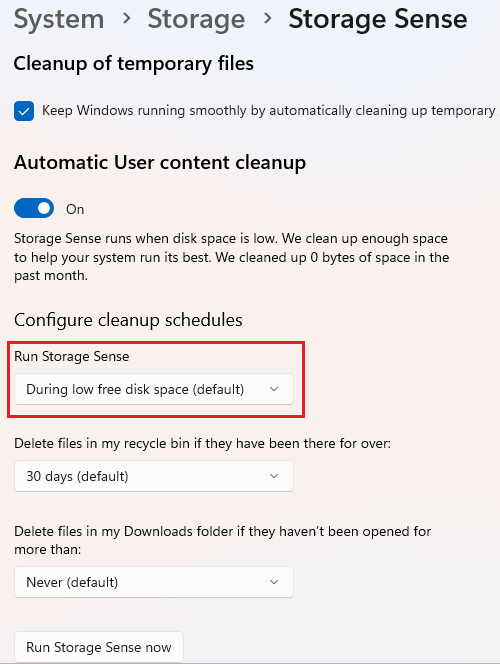
- At last, you configure the Storage Sense Core settings. Just click on it and then you can configure options such as even to run it automatically, delete files from Recycle Bin, Delete files in Downloads folder automatically, etc.


In this way, you can turn on Storage Sense on Windows 11. The process is simple and straightforward for any user. And after you have enabled, just let it run on auto pilot. And if you think, you don’t need it then you can disable it in the same way.
Final thoughts:
If you are unaware of Storage Sense and how to use it, then you can now follow this simple tutorial here and enable it in a few clicks. Especially, if you have SSD installed on your PC, then this feature will be of great help. Too much occupied space can degrade SSD life and if you keep Storage Sense enabled then it will keep your SSD healthy. Another advantage is that you will not have to reply on 3rd party cleaner tools.